• Sydney: Art Gallery of New South Wales

    I’m in Sydney this weekend so went along to the Art Gallery of New South Wales for the Alphonse Mucha exhibition. I knew that Mucha practiced during the Art Nouveau period but I wasn’t aware of the scope of his work. It is a beautiful exhibition filled with an amazing collection of panels, posters, artworks, and objects. My one gripe – the exhibition labels. Tiny white text that is near impossible to read. I was concerned I’d trip an alarm just trying to read the labels. Since this is a re-occurring gripe with galleries, I’m mentioning it here and moving on. Before sharing some highlight works, I’m going to start with an exhibition overview that will explore the layout.

    Overview

    The exhibition is held in the new Naala Badu building in what I presume is a temporary exhibition space. After seeing a couple of exhibitions in the original building, I was concerned it might be crowded and quite cramped. Despite the crowd, the exhibition has plenty of room to not only move around, but to sit! There are chairs and benches in each room which was excellent to see. All seating options are placed near the works without being obstacles.

    On first entering the space, there is a projection of Mucha’s work on a large wall. Directly opposite is the introductory panel and portraits of Alphonse as well as his family. The rest of the exhibition is in chronological order, tracing Mucha’s life and artistic development.

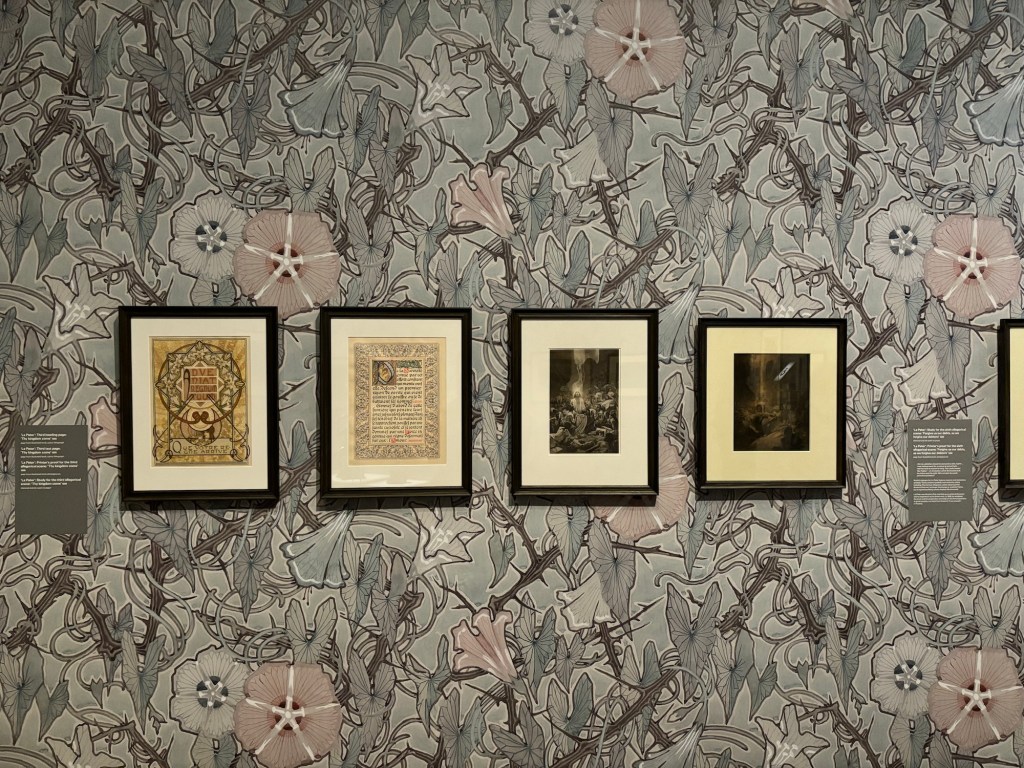
    The majority of what’s on display are posters, panels, and sketches. In a few rooms there are some objects that either inspired Mucha or that he designed. For example, there are some biscuit tins from Nestle that Mucha was asked to illustrate. One of my favourite rooms has the artworks displayed on a wall covered in Art Nouveau wallpaper.

    Art Nouveau Wallpaper

    At the end of the exhibition is a room dedicated to Mucha’s Slavic Epic – a twenty-canvas visual of the history of the Slav people and civilisation. Each wall has one canvas projected and is somewhat animated (snow falling or birds flying). The playlist in this room adds to the grandeur of the works. Before exiting, there is a small display of Mucha-inspired posters and album covers from the 20th and 21st century. There is also a fascinating section on how manga is connected to Mucha.

    There are five artworks I’d like to share to hopefully give you an idea of the exhibition.

    One: The Seasons, 1896

    The Seasons
    The Seasons

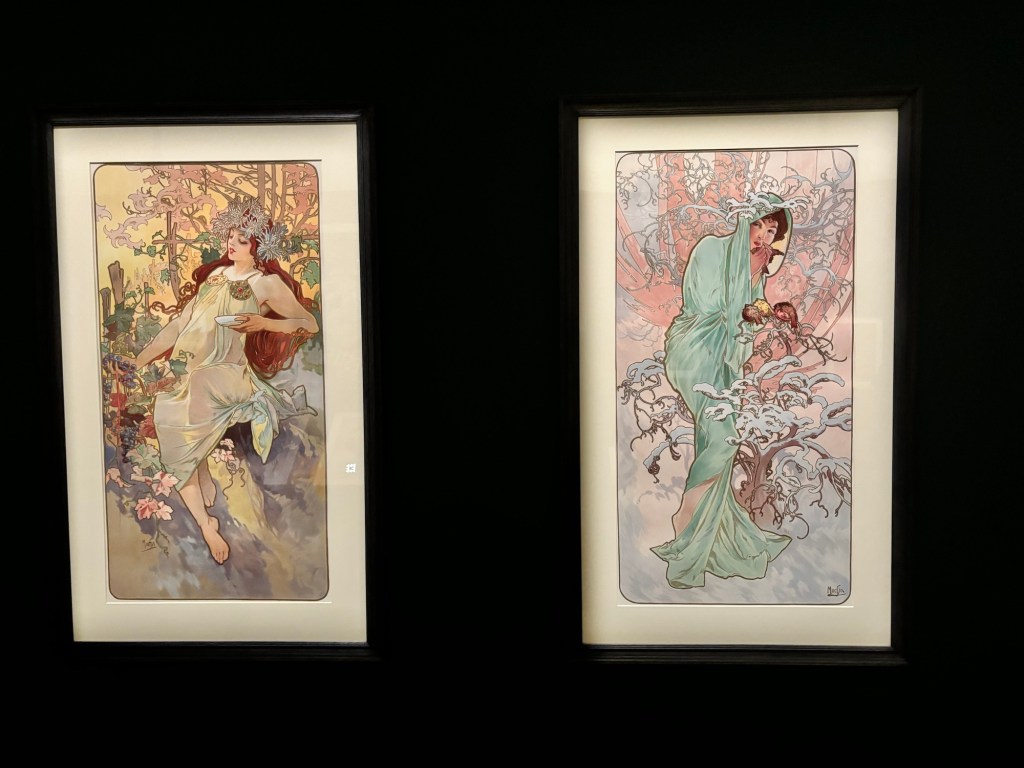
    This group of four panels displays the four seasons. In order – spring, summer, autumn, and winter. The colours and composition are stunning. They were created in 1896 and became so popular, Mucha replicated them in 1897 and 1900. One constant throughout his works is how he captures and evokes emotion. You can stare at the faces for hours reading all the emotions.

    Two: Women in the Wilderness, 1923

    Women in the Wilderness

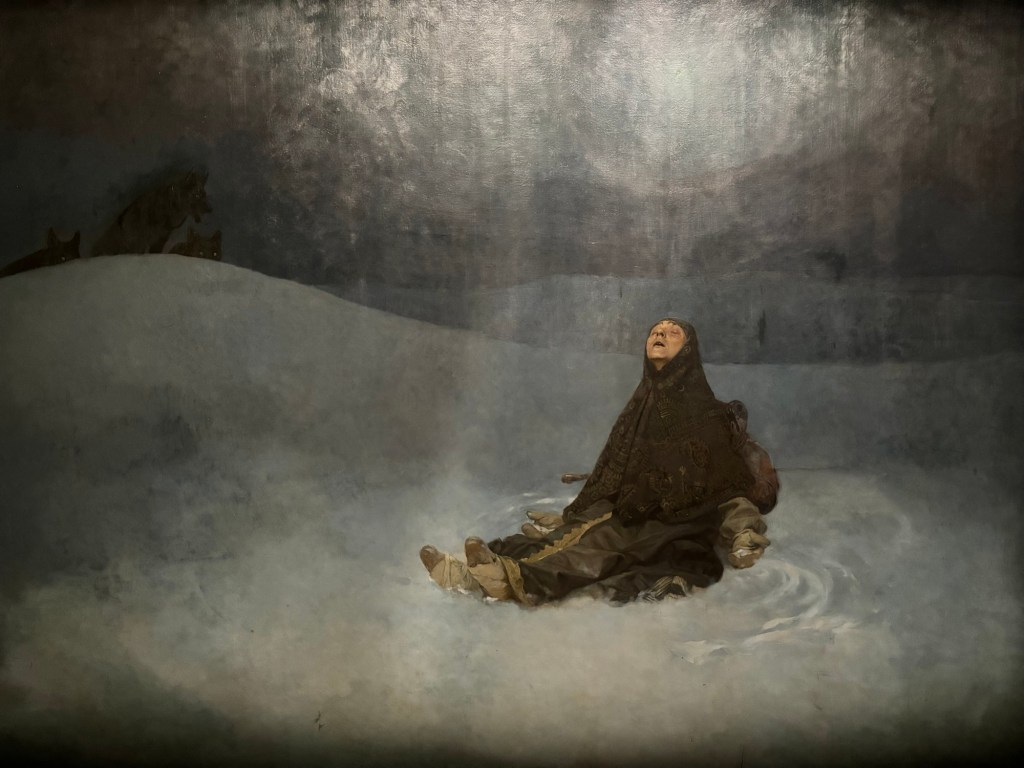
    Speaking of emotion, this painting stood out to me the most in the exhibition. It was painted in response to the sufferings of Russian and Ukrainian citizens after the Bolshevik Revolution. Above the woman is a star, representing the future and hope. Throughout his career Mucha not only created advertising, but also focused on humanitarian issues.

    Three: Austria at the World Fair, 1900

    Austria at the World Fair

    This poster was designed for the Paris World Exposition of 1900. It shows the Austrian buildings and exhibitions in such beautiful detail. I love these world expositions so I’ve included this here.

    Four: Moet and Chandon, 1899

    Moet and Chandon

    I’ve included this work because the colours and panel composition are spectacular. The autumnal leaves in the hair and branches wrapping around the body integrate nature so delicately.

    Five: The Arts, 1898

    The Arts
    The Arts
    The Arts
    The Arts

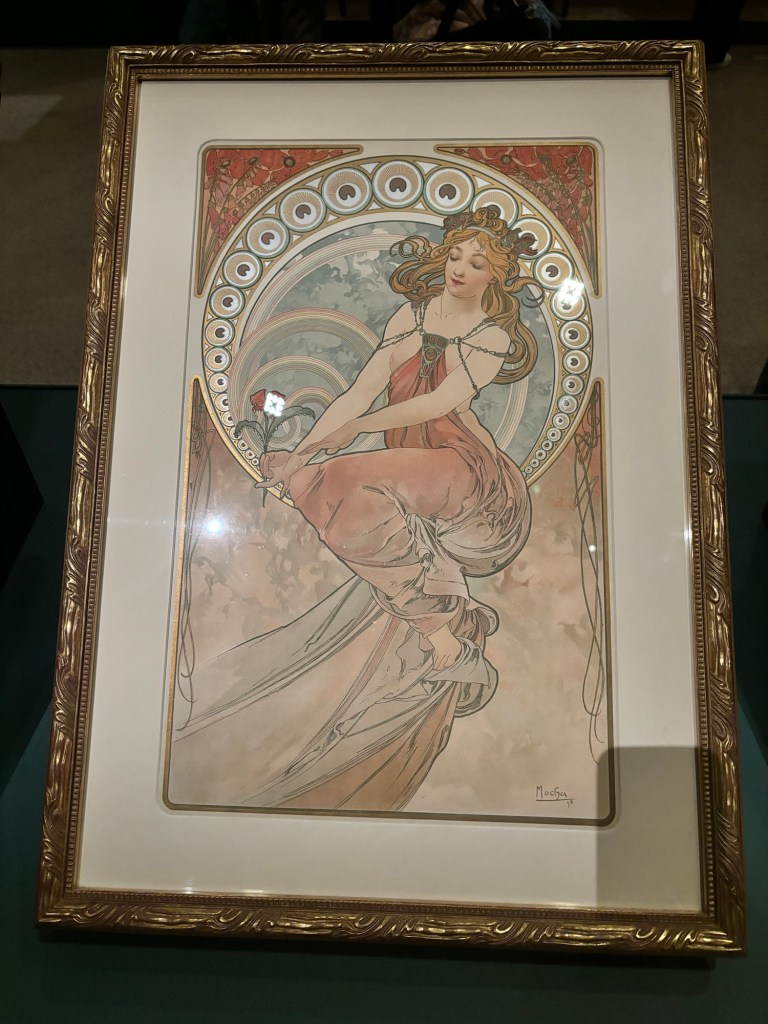
    These posters depict dance, painting, poetry, and music. Rather than include obvious symbols reflecting these areas, Mucha has selected times of the day. For example, dance is painted with falling leaves from a morning breeze. He has captured the arts in a way that attaches them to the everyday.

    Logistical Information

    Alphonse Mucha is on display until 22 September 2024. There is an associated ticket price. More information can be found here: https://www.artgallery.nsw.gov.au/whats-on/exhibitions/mucha/

  • Melbourne: Immigration Museum

    The second museum I visited in Melbourne was the Immigration Museum. I have visited in the past so won’t be focusing on the general museum for this post. Instead, I want to share my experience of their new exhibition, Joy. This exhibition contains seven installations, reflecting on the meaning of joy. There was one installation in particular I was very excited to see – more on that later. I’m going to jump right in to reviewing the installations and will provide visitor information at the end.

    Nadia Hernandez – Que te puedo decir, asi son las cosas

    Que te puedo decir, asi son las cosas

    This is the only installation for Joy on the ground floor of the Museum. It consists of a series of vignettes covering the walls. They tell stories of family connections and cultural traditions. Joy is represented here as ‘everydayness’ or the small moments everyday that can often be taken for granted. The bold colours used in the vignettes help to communicate this feeling of joy and help them to stand out in the space.

    Spencer Harrison – Bring It to the Runway, Runway

    Bring It to the Runway

    The rest of the installations are located on Level 2, starting with Spencer Harrison’s Bring It to the Runway, Runway. As the name suggests, the installation consists of a long runway with dangling coloured jewels hanging from the ceiling. Harrison has created this work to reflect drag, nightclubs and fashion runways. In his words he also wants to ‘queer the architecture of the gallery’. I will say here that the use of colour by all artists was, for me, most powerful and what I best remember. My friend and I took the opportunity to walk the stunning runway before heading in to the next installation.

    Callum Preston – Video Land

    Video Land

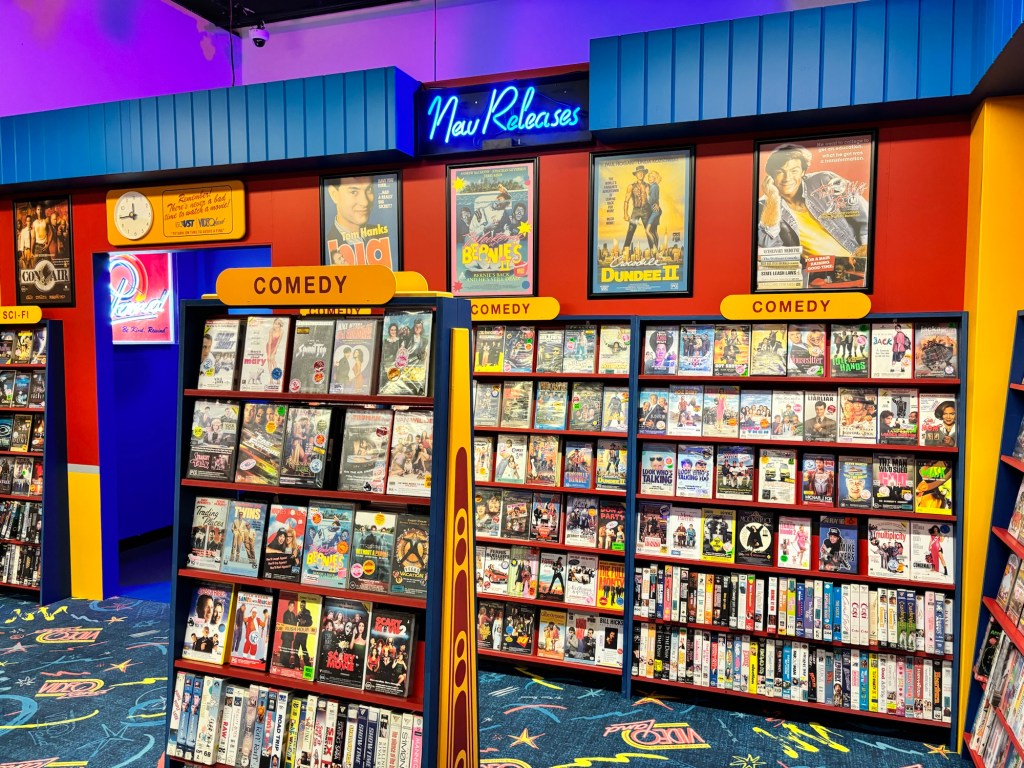
    Out of all the installations, this one was my highlight. I resonated greatly with the aim of the artist and their interpretation of joy. Preston has created a video store to transport visitors back to a time before social media and streaming. A time when visiting a video store was something so normal. Similar to the artist, I too didn’t realise how much I missed this experience and the joy I had when browsing through the aisles. I spent a substantial amount of time in this installation doing my own browsing and sitting with the memories I have of my own childhood. I really enjoyed looking through the VHS tapes as well and seeing all the films on display. I was looking forward to this installation the most and it did not disappoint. The use of colour and the attention to detail is what really sold the trip down nostalgia-lane.

    Video Land

    Jazz Money – Our Laughter Will Become the Waterfall

    Our Laughter Will Become the Waterfall

    Behind the VHS store is this beautiful installation by Jazz Money. Through her work, Money highlights how joy and laughter can be radical acts for oppressed groups. The yellow house in the middle invites visitors to crouch down and see/hear what’s happening inside. There is a looped audio track of people laughing and having fun. Joy can occur anywhere – public or private.

    Beci Orpin – Bunny Dearest

    Bunny Dearest

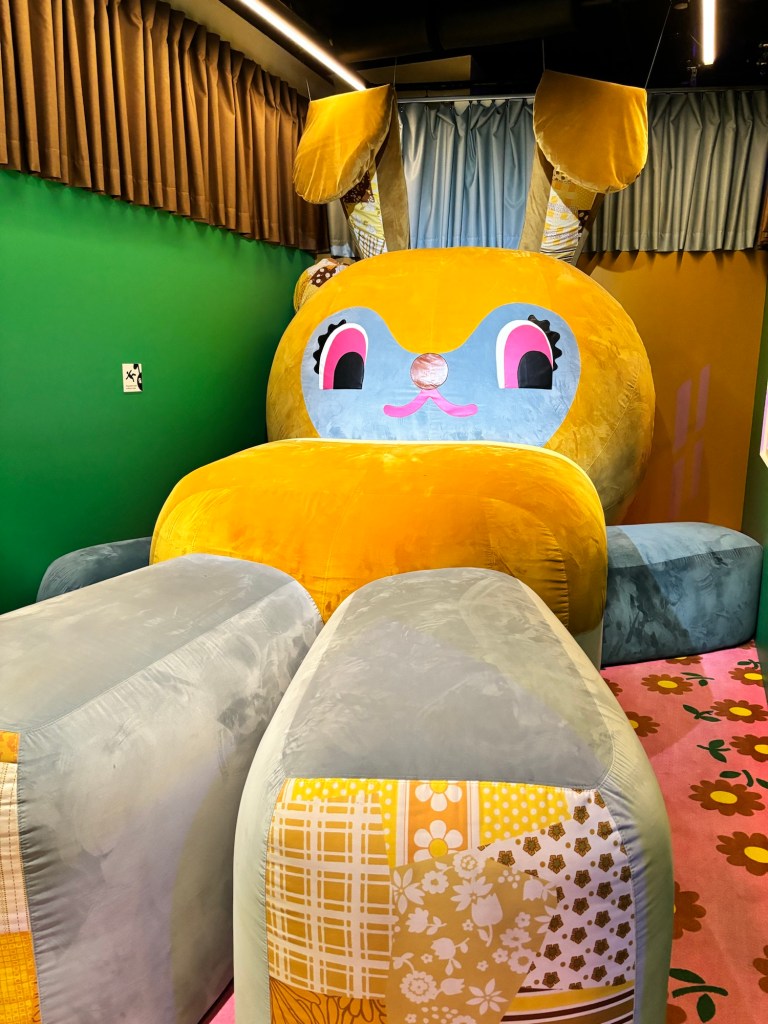
    The first sentence of the label for this installation hits hard – ‘as we become older, joy becomes harder to find’. As you enter the room, you are greeted by some stickers on the wall and a giant, soft rabbit. Orpin invites visitors to climb onto the rabbit and remember what it was like to be a child again. It was another strong nostalgia trip and while I thought the rabbit would be scary, it was actually comforting.

    Elyas Alavi with Sher Ali – In seach of the Simurgh

    In seach of the Simurgh

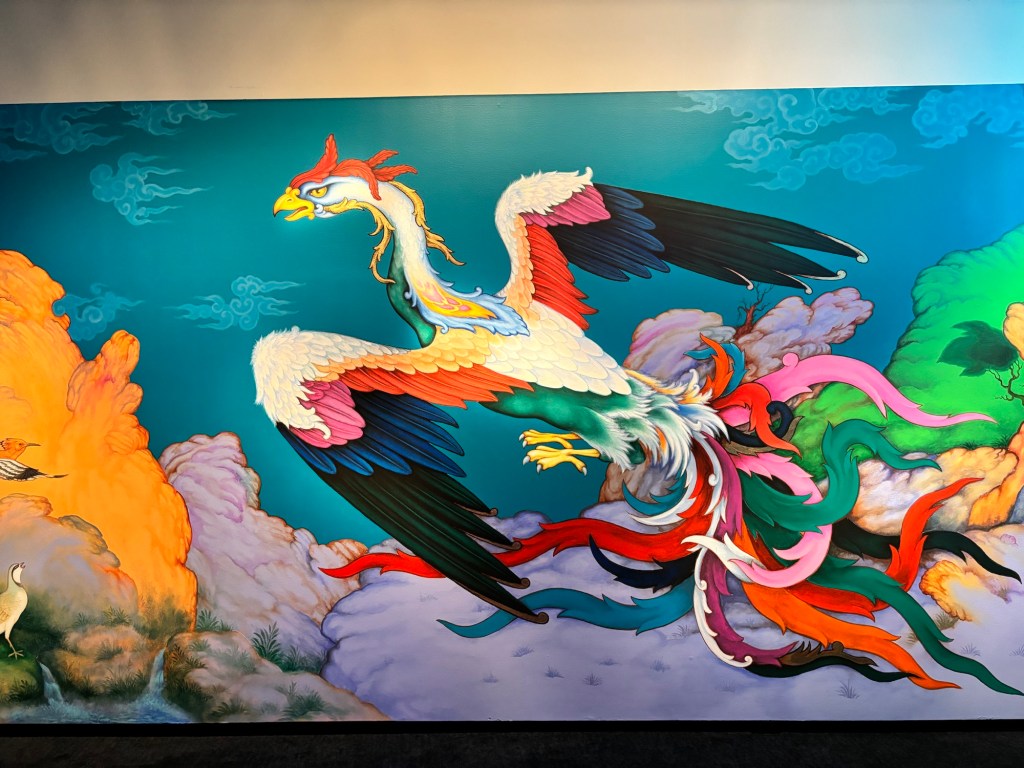
    This is the second last installation we saw. It tells the story of Simurgh – a mystical giant bird from ancient Persian legend. The story includes themes of migration and strength. These speak to the artist’s migration experience. Again, there is a mention of the importance of colour. Bright colours reflecting happiness, togetherness and connection filled the space.

    Nixi Killick – Joy Generator

    Joy Generator

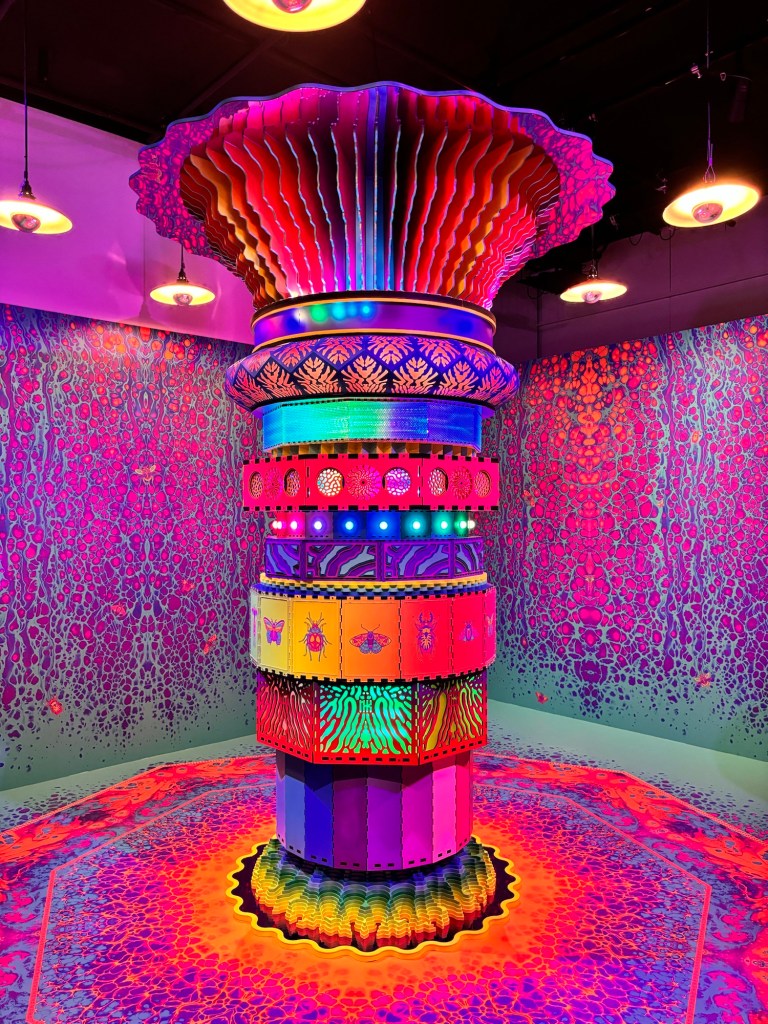
    The final joyous installation is one filled to the brim with colour. In the middle of the room is a joy generator – or a large colourful pillar with lights and interactive elements. You can use your phone for an augmented reality element but I was happy to just sit in the room and take in all the colour. Killick created this work to ‘immerse ourselves in positive storytelling’ and as an opportunity for visitors to spark their own joy.

    Logistical Information

    Joy is currently on display until 25 August 2025. The Museum is open daily (except Good Friday and Christmas Day) between 10am and 5pm. There is an entrance fee if you are an adult or a senior. For accessibility information, follow this link: https://museumsvictoria.com.au/immigrationmuseum/plan-your-visit/accessibility.

    I strongly recommend you also visit the permanent exhibition galleries and interact with those spaces.

  • Melbourne: National Gallery of Victoria (NGV)

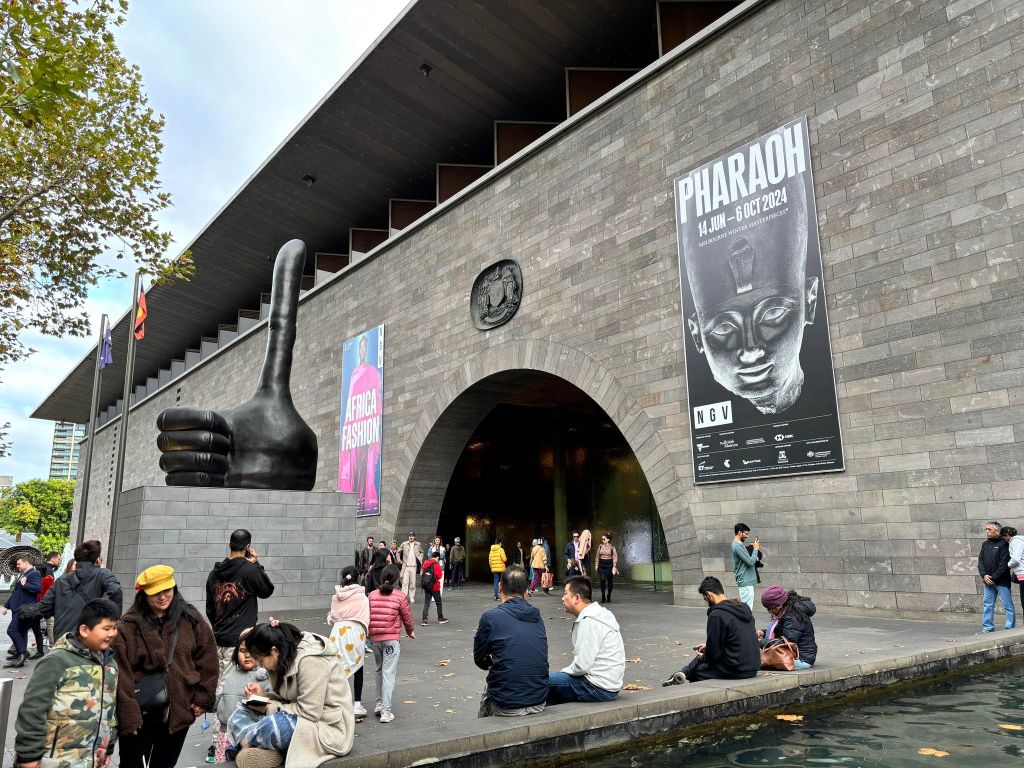
    I am exploring Melbourne this long weekend with a wonderful group of friends. One of our first stops was the NGV. While I have visited the NGV numerous times to see travelling blockbuster exhibitions, I have rarely ventured higher than the ground floor to see what else is on offer. Granted, I am usually exhausted from spending hours in one exhibition. So this was a great opportunity to get a glimpse into the collection and see how the more permanent exhibition spaces have been curated. Fortunately for us, these spaces had works from the Triennial on display (will expand on this later). Due to time restrictions, we only visited the 3rd floor. Here are my personal highlights.

    Entrance Foyer

    Thomas J Price Sculptures

    In the middle of the entrance foyer are two large bronze sculptures by artist Thomas J Price, a British contemporary artist. They are on display for the Triennial, an exhibition showcasing the works of 120 contemporary artists, designers, and collectives. I had seen these sculptures online and was so disappointed to learn that the Triennial was only on until 7 April. Needless to say, it was a surprise when we entered and the statues were there. They are amazing to see in-person.

    Through these sculptures, Price has created something that looks familiar (a Western-style sculpture) with a message of prejudiced representation. While they are not based on one particular individual, they combine stereotypical representations and artist observations. According to the statement on the NGV website, ‘together they [the statues] confront the lack of people of colour represented in public statuary’ (source). Their presence cannot be ignored.

    Level 3 Highlights

    I thought this was the only Triennial work we had seen during our visit but I was glad to see that the next couple are part of the festival too. Just goes to show that my observation skills while reading labels isn’t always the best!

    Colonialism and Abstract Art, 2019, Hank Willis Thomas

    Colonialism and Abstract Art

    This was my favourite artwork we saw during our visit. The base of this artwork is a 1936 Cubism and Abstract Art graphic designed by Alfred H. Barr Jr., original founding director of the Museum of Modern Art. Thomas has taken this poster and overlayed it with socioeconomic, cultural and political events that have informed/existed/intersected with some of these movements. The result is this more complex and thought-provoking work that you could spend hours reading and following. What really stood out to me about this is how it challenges the ‘neatness’ of these types of visuals and reminds viewers that categories and time periods are complex.

    Ouroboros, 2023, Heather B. Swann

    Ouroboros

    Another fantastic Triennial work that stood out to me while walking around was Ouroboros by Heather B. Swann. It is a striking 3m wide statue carved from wood, leaning against the wall. Ouroboros can be linked to Celtic, Egyptian, Greek, and Viking cultures and is usually depicted as a dragon or snake eating its own tail. In the sculpture, its a human. It’s meant to represent the circle of life and death but, according to the label, add an additional meaning of self-destruction and regeneration.

    Propagate, 2023, Jaydan Moore

    Propagate

    The final Triennial work I want to mention is Propagate by Jaydan Moore. Large shiny objects still work to capture my attention. This one is a combination of serving platters dating from the 1920s to 1980s soldered together. As viewers, these platters could stir up memories or feelings of nostalgia. For me, I was more focused on the aesthetics of the work and the patterns created from the different platters joined together.

    To die upon a kiss, 2011, Fred Wilson

    To die upon a kiss

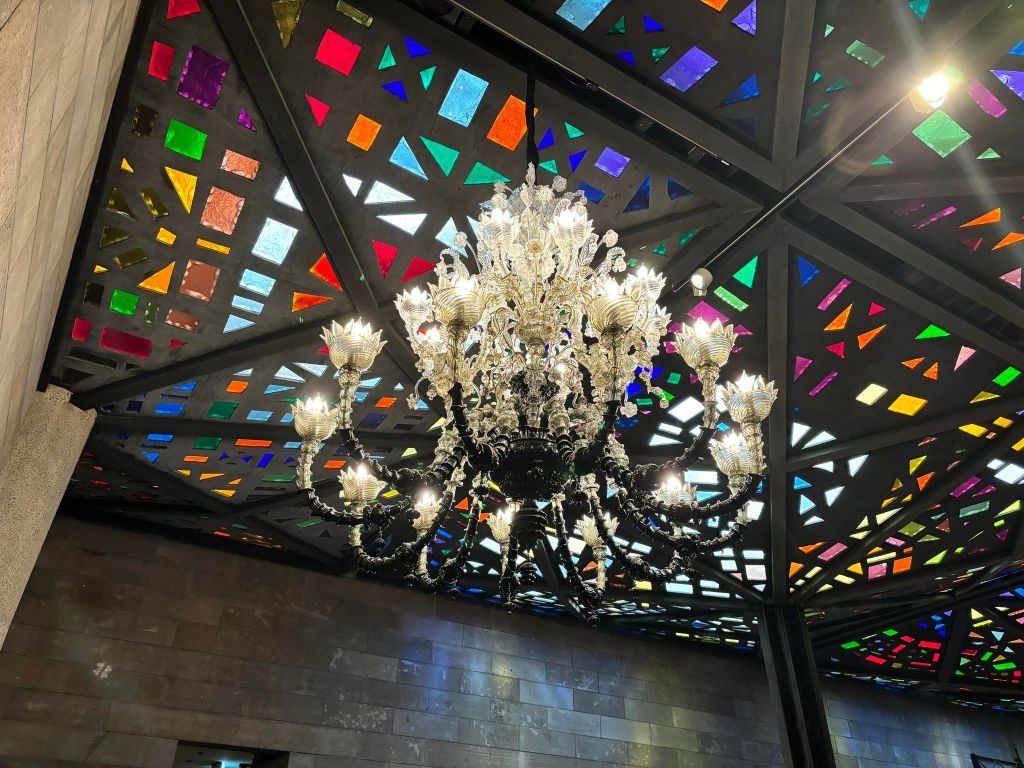
    I have an absolute knack for finding and enjoying works relating to death. This stunning chandelier represents transformation, referencing the history and presence of Africans in Venice. It also references the destruction of the body during death. I really like the juxtaposition of something usually regarded as just an aesthetic item now with a much deeper meaning.

    Portrait of Renee Delmas de Pont-Jest, 1875, Louise Abbema

    Renee Delmas de Pont-Jest

    I want to finish with something completely different. This portrait is of Marie-Louise-Renee nee Delmas de Pont-Jest – a good friend of the artist. Why I selected this painting in particular is because of the emotion. I’ve been trying to look at art more slowly and digest what I’m seeing. This was a great work to practice on as you can focus on her facial expression and what emotion that might convey. Also is she finishing her writing and removing the pen or bringing the pen back in to write more/correct something.

    I hope you enjoyed reading about these works and the Triennial in general!

    Logistical Information

    The NGV is open 10am – 5pm daily and is free entry. There are some great accessibility resources on their website: https://www.ngv.vic.gov.au/triennial/access/.

    I am not sure when the Triennial works will be removed but safe to say, it luckily wasn’t 7 April.

  • Sydney: Australian Museum

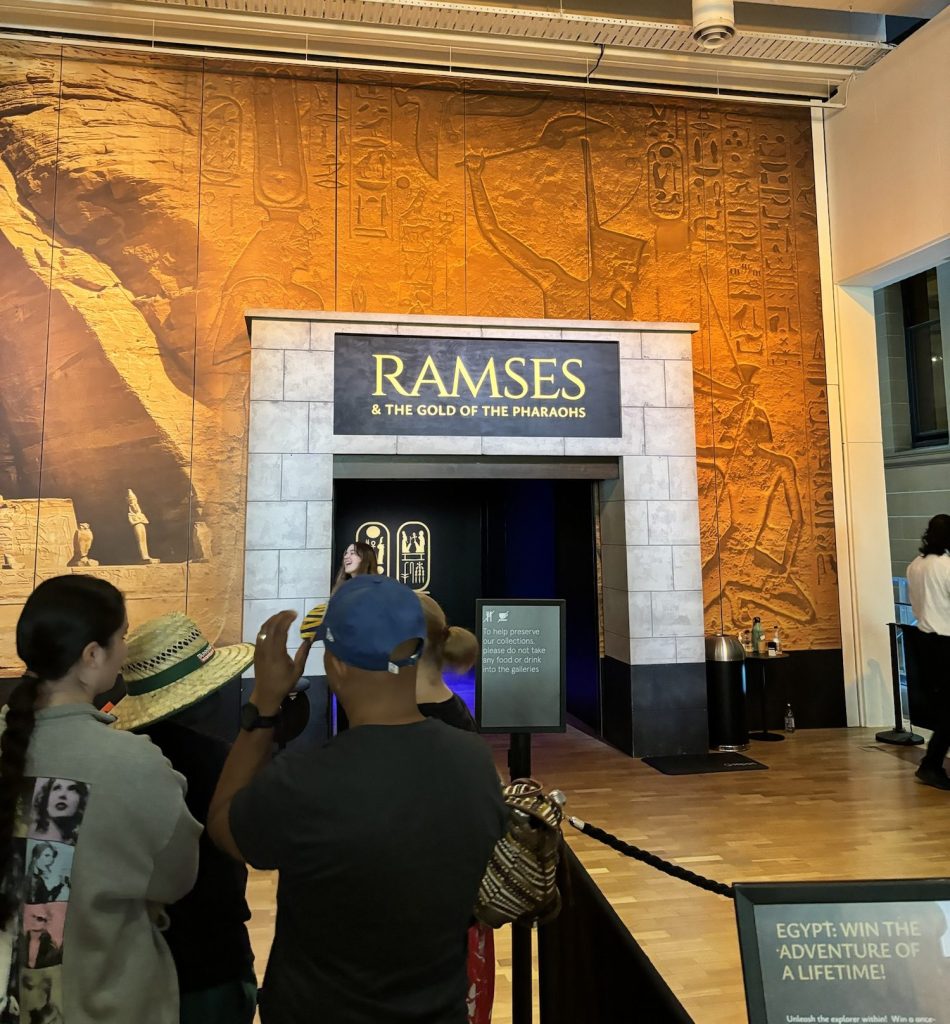
    Last weekend I was in Sydney and wanted to visit the Australian Museum to see the new Ramses exhibition. This is exclusive to the Australian Museum so won’t be touring around. As well as a standard exhibition to explore, there is a virtual reality experience on offer. We decided against the experience and just went with the exhibition. To begin, I want to say that while there are animal remains on display, there are no human remains. I did hear a few visitors asking “where are the mummies?” While I am tempted to delve further into this topic, I want to keep this post about the exhibition. If you are interested in reading more about mummies, I would strongly recommend reading Mummified by Angela Stienne. Definitely worth looking into the ethics of this kind of display.

    This post will start with an overall impression of the exhibition, then focus on a couple of objects. This year, I’m trying to select one highlight element from each exhibition I visit. So, I’ll also be covering that in this post. For more information on the exhibition, I’ve included a link at the end!

    Exhibition Entrance

    Overall Impression

    I visited on a Sunday and it was so intensely busy I don’t think buying a ticket onsite would be possible. My best advice is to pre-purchase a ticket and arrive on time. The wait to get in wasn’t too long and everything had been well organised to manage a crowd.

    Once inside, there is a short holding area with a video to watch before you can head into the exhibition. This tactic works pretty well for streamlining visitors into small groups. I do enjoy how dramatic these short videos are and hope they never disappear. Once inside the exhibition, there are two levels filled with objects, dioramas, videos, and information panels. A generic archaeology soundtrack plays throughout creating an appropriate soundscape.

    Because it was so busy, there were a few bottleneck areas that resulted in queues. One area I thought could have been slightly altered is at the bottom of the escalator. Here there is an object that isn’t set back far enough. People linger around the object making it difficult for those stepping off the escalator to move around. In terms of accessibility, I also noticed a lack of chairs and seats for those who might require them in the space.

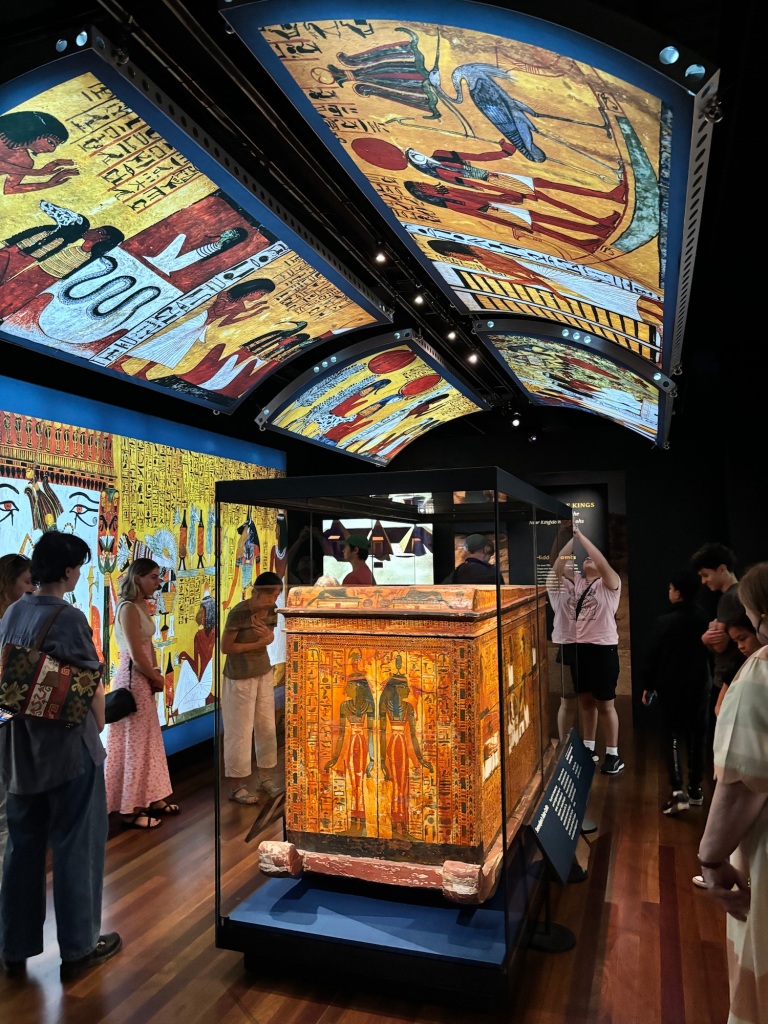
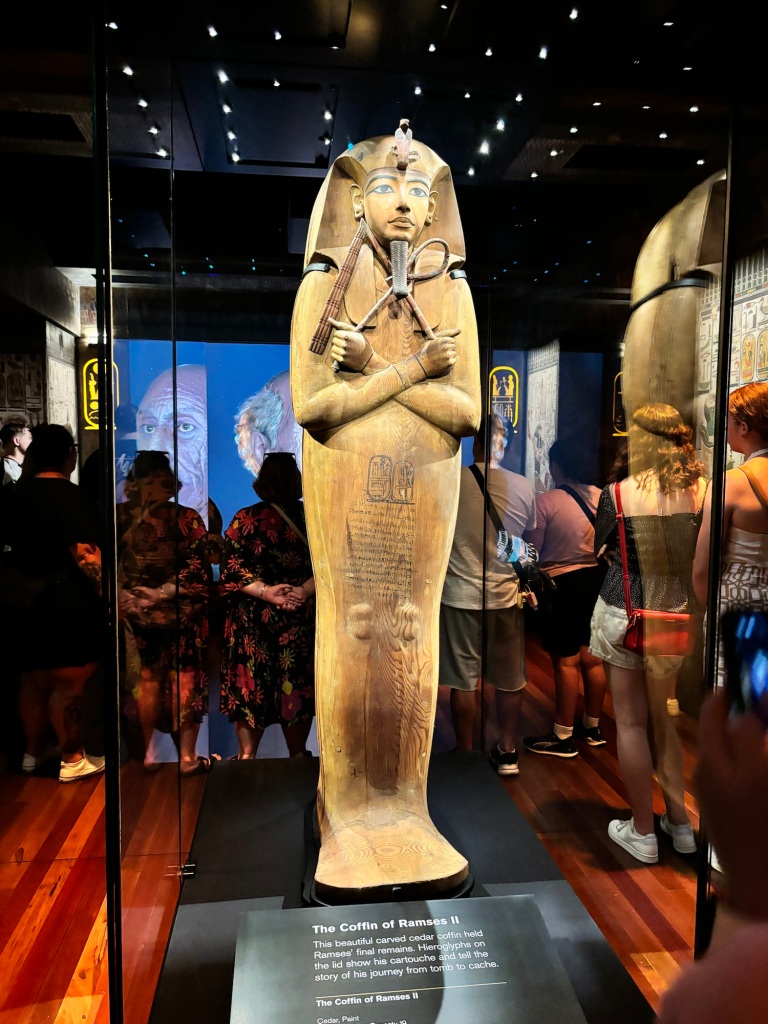
    I managed to see most of the display cases and read the majority of labels which took me just under two hours. I spent a bit of time in the two most immersive areas. One of which had the empty sarcophagus of Sennedjem in the middle and TV screens surrounding it with enlarged images. I’ve included a photograph below so you can see what I mean. The second area had the coffin of Ramses II. Rather than being surrounded by TVs, wallpaper has been used to create the look of his tomb. A nice rest from the digital.

    Overall, I did enjoy seeing the objects and learning more about this period of Egyptian history. It is a pharaoh-heavy exhibition (you can gather that from the title) so expect to see objects relating to this and not really anything else.

    Highlight Objects

    Now that I’ve set the scene, here are my top five objects that I hope give you a sense of what’s on display.

    1. Sennedjem’s Outer Coffin

    Sennedjem’s Outer Coffin

    On the lower level of the exhibition is this colourful outer coffin belonging to Sennedjem. He was an artist who painted the coffins of Ramses and his father. It is such a colourful coffin with hieroglyphs and gods of the underworld painted all over the surface. There is even a mummification scene. It is on display surrounded by digital screens showing other paintings so you feel totally immersed.

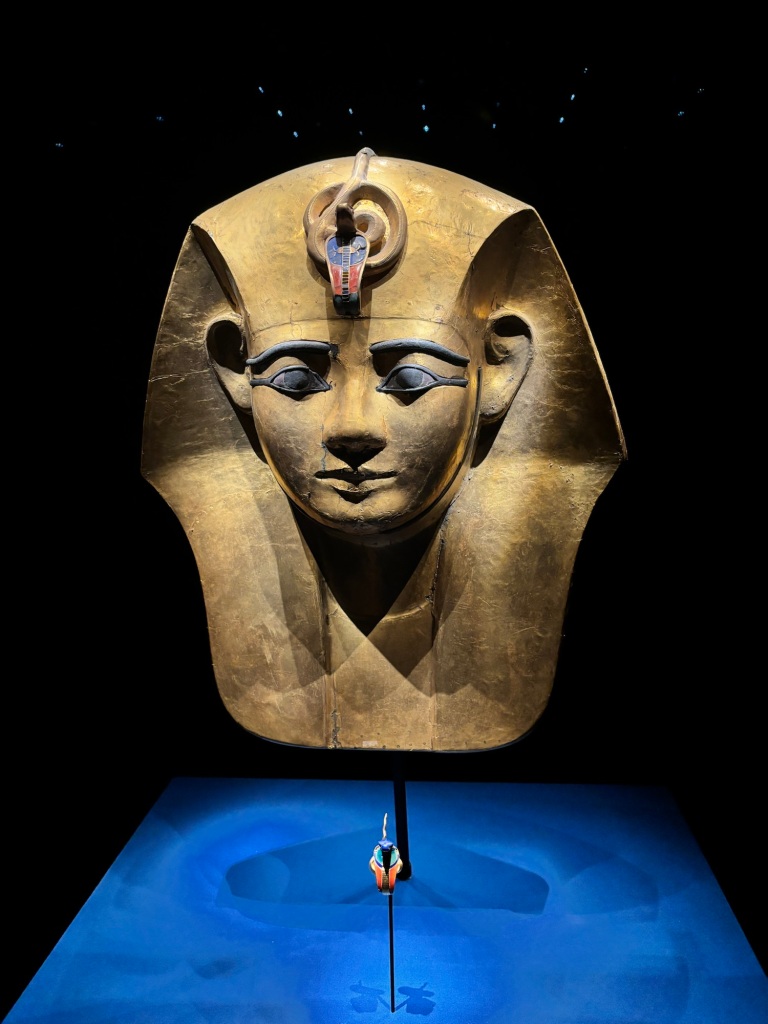
    2. Gilded Wooden Mask from the Coffin of Amenemope

    Coffin of Amenemope

    We queued the longest to see this mask. Amenemope was a Pharaoh who ruled between 1001 and 992BC. This mask was found in his tomb, one of the most intact royal burials ever discovered.

    3. Ramses II Coffin

    Ramses II Coffin

    At the end of the exhibition, you will find the coffin of Ramses II. It is presented in a room covered in wallpaper that aims to transport you to the real tomb in Egypt.

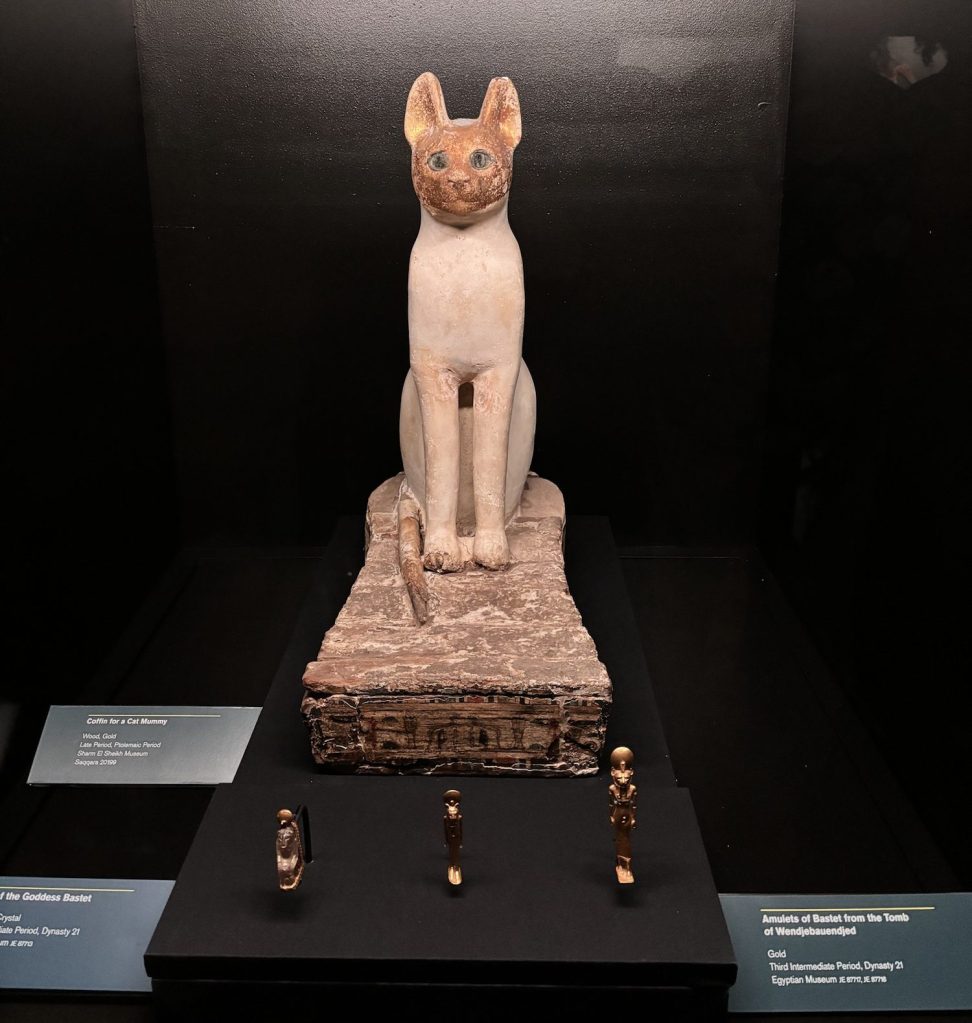
    4. Coffin for Cat Mummy

    Mummified Cat

    This object really stands out in the exhibition and is displayed alongside mummified cats. There is something about the expression on the cat’s face that has made it into my top 5.

    5. Colours

    Colours from Egypt

    Last, but not least, one of my favourite elements of the exhibition is this display case. It shows you what colours would have been used in Egypt to decorate statues, paintings, etc. I’ve never seen the colours before so it was a great contextualising element.

    My Highlight

    Canopic Coffinettes

    Canopic Coffinettes

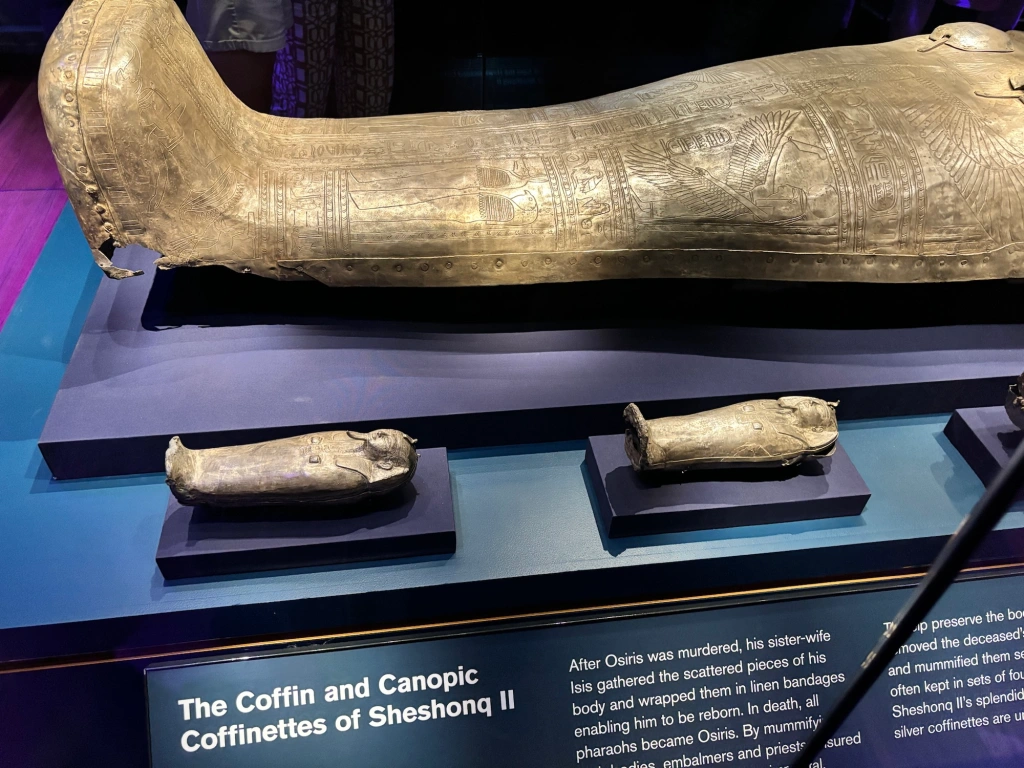
    My highlight element for this exhibition is the coffinettes displayed alongside the coffin of Sheshong II. These miniature coffins were used as canopic jars to store the deceased’s lungs, liver, intestines, and stomach. They are displayed beautifully alongside the coffin and really emphasise the power this individual had in life. Not only could they afford mummification, but specialised canopic jars.

    Conclusion

    It was an interesting exhibition that had some excellent elements and objects. I highly recommend booking tickets before going to the exhibition! It’s currently on display until 19 May 2024. For more accessibility information, head to their website: https://australian.museum/exhibition/ramses/.

  • Sydney: Sydney Jewish Museum and Hyde Park Barracks

    I had a wonderful opportunity to return to Sydney this week for a Knowledgeable Object Symposium at the University of Sydney. It was such an enriching professional development day. Before returning home, I visited Hyde Park Barracks to experience their new audio tour. I want to combine this with my visit to the Sydney Jewish Museum a couple of months ago and explore/evaluate how these museums have utilised immersive experiences through audio guides and artificial intelligence. I’ll also note here that both museums manage some pretty traumatic material. It is so great to see museums try something a little different and experiment with their engagement.

    Sydney Jewish Museum

    Sydney Jewish Museum

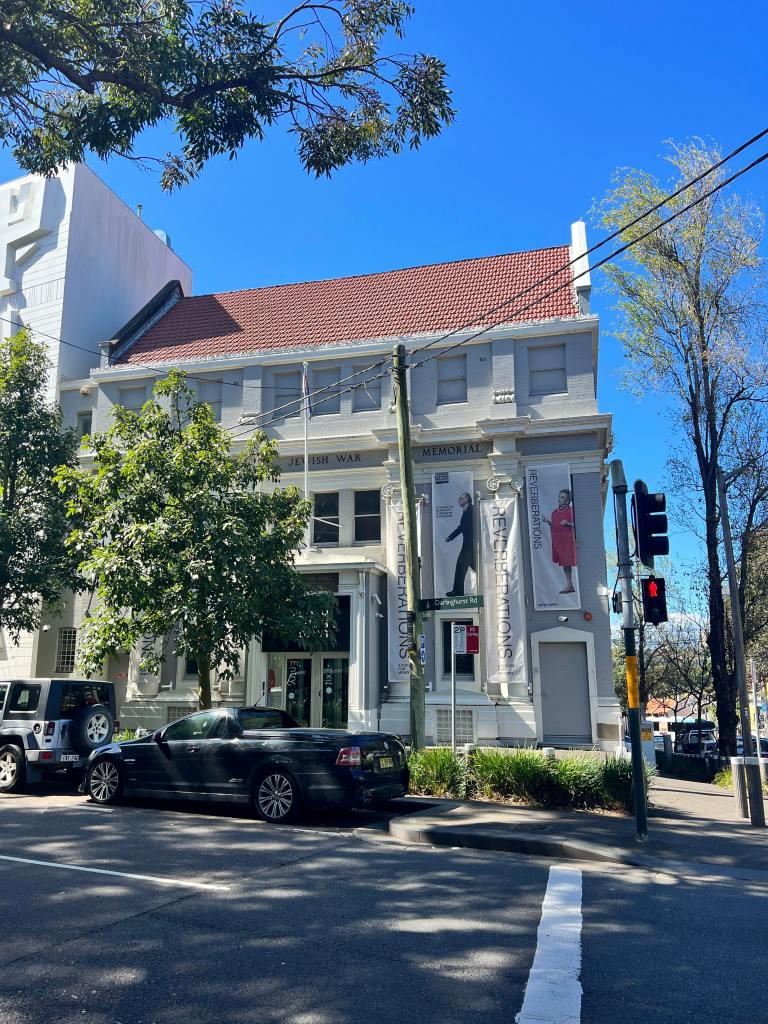
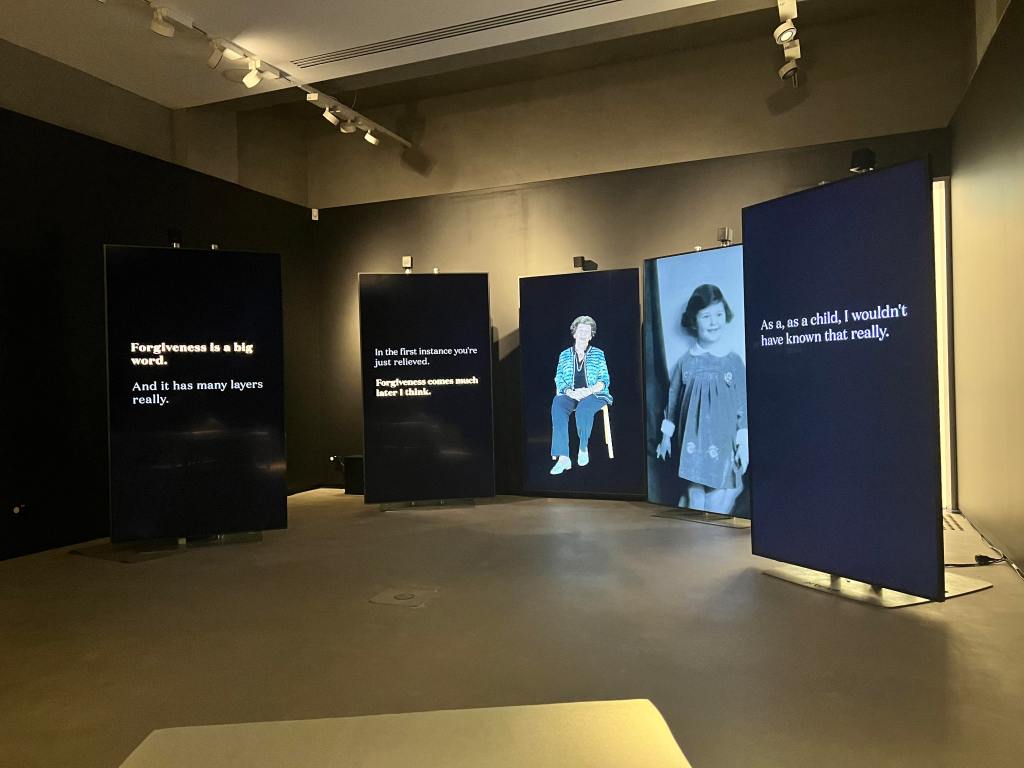
    I have visited and written blog posts about the Sydney Jewish Museum a few times so I won’t provide an overview – you can read one of my posts here. I will say that this time I went on a guided tour and found it to be a fantastic experience. Highly recommend it if you are visiting. Instead, I am going to focus on the exhibition Reverberations: A Future for Memory. This exhibition opened in late 2022 and consists of two main areas. One contains a series of large screens showing Holocaust survivors sharing their stories and memories. The other area is where you can actively engage with three survivors.

    Reverberations

    I started in the room with the large screens. In total, there are forty-three survivors telling their stories in response to some posed questions. I sat in this room for close to an hour – it was so engaging. The other four people in the room also stayed for around that long. Questions asked are not only about the past but also their thoughts on issues such as revenge – a topic not often covered but one, I’m sure, people think about. Some of the stories are difficult to hear, no surprises here. But, there is also a lot shared about hope and love so you leave the room feeling inspired.

    Oral History

    It was then time to move to the artificial intelligence (AI) area and experience something truly unique. In the opposite room there are three designated areas for visitors to step into and come face-to-face with one of three Holocaust survivors (Olga Horak, Yvonne Engelman, and Eddie Jaku). They are on huge television screens so you really do feel they are there. Then, you can ask them questions – any question you like. After a small pause, they answer your question which is still something that seems so surreal to me. The technology behind this installation is quite remarkable. These three survivors were asked hundreds of questions over a period of time and their responses were recorded. Using AI, keywords in your question are used to scan the database of responses and find one that’s the closest to what you asked.

    Reverberations

    Of course, every single question you can think of might not have an answer. In saying that, I asked all three survivors about six/seven questions each and the answers made sense. The reason behind this technology is to try and capture a way for future generations to engage with Holocaust survivors when there are no longer survivors able to tell their stories.

    It was such a moving experience. I do wish there were signs or more information available on how to take care of yourself when visiting. I asked a question that included in its response something I wasn’t expecting – caught me off guard and I had to take a moment outside. If there were some kind of resources in the space for people who experience something similar, that would be amazing.

    The exhibition is only on until the end of this year, but no doubt the installation will move into a more permanent home once it has closed.

    Hyde Park Barracks

    Hyde Park Barracks

    The next experience I want to share is Hyde Park Barracks. Here, they have moved completely to an audio-guided tour. There are no labels and only minimal wayfinding signs – everything is presented through the audio guide. The result has been the creation of this soundscape that follows you throughout the entire museum and heritage building. Even when no one is talking to you, there are sounds that do make things feel immersive.

    I love an audio-guided tour – especially if I’m travelling on my own. The quality of the audio and the noise-cancelling headphones are fantastic. Not only did I feel totally immersed, but it even set the pace so I wasn’t rushing through anything. In saying that, you do have the option to skip rooms or areas if you wish. The audio is controlled by these little monitors on the ceiling that pick up where you are and feed you the correct audio. They are so precise that you just have to approach a display case and they start describing what’s inside.

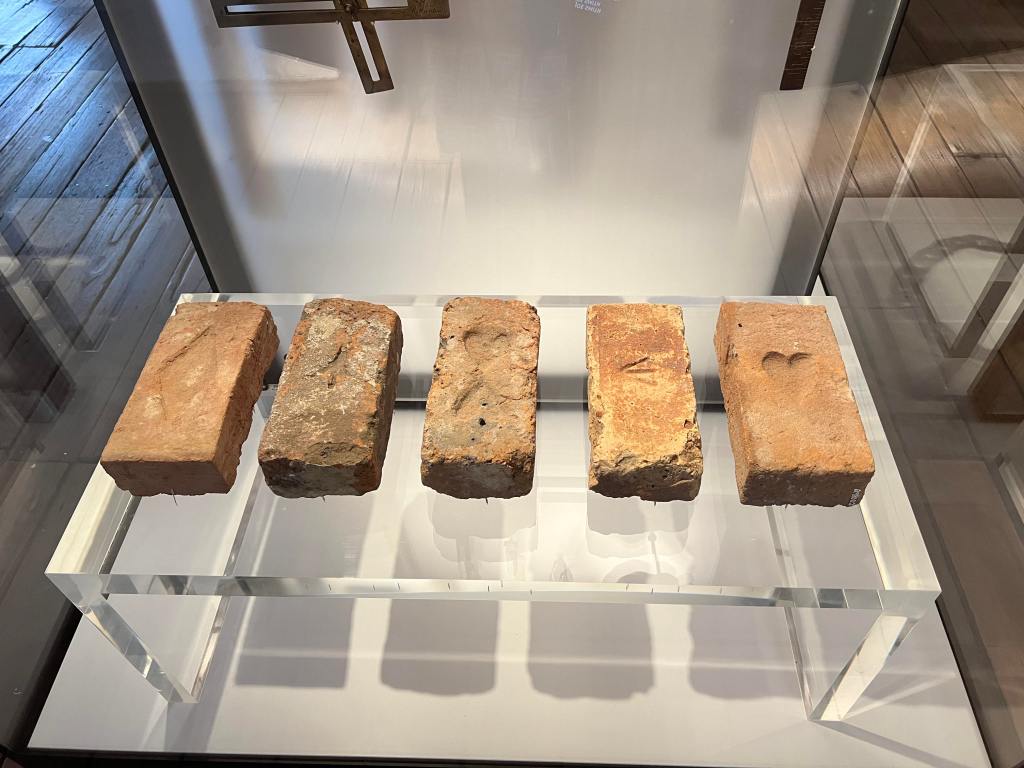
    You start with a bit of general history about convicts and why they were sent to Australia. Then, you start on the third floor of the original barracks where you visit the original sleeping quarters and a mummified rat or two. The top floor is all about life in the barracks. There are times when the original source material is read by voice actors to really give you a sense of context.

    The second floor is split into some dioramas and Indigenous history. Such an important inclusion in the space and it was beautiful to hear the inclusion of Indigenous language in the audio tour. Again, this is a difficult traumatic history to engage with, but important to hear and learn from.

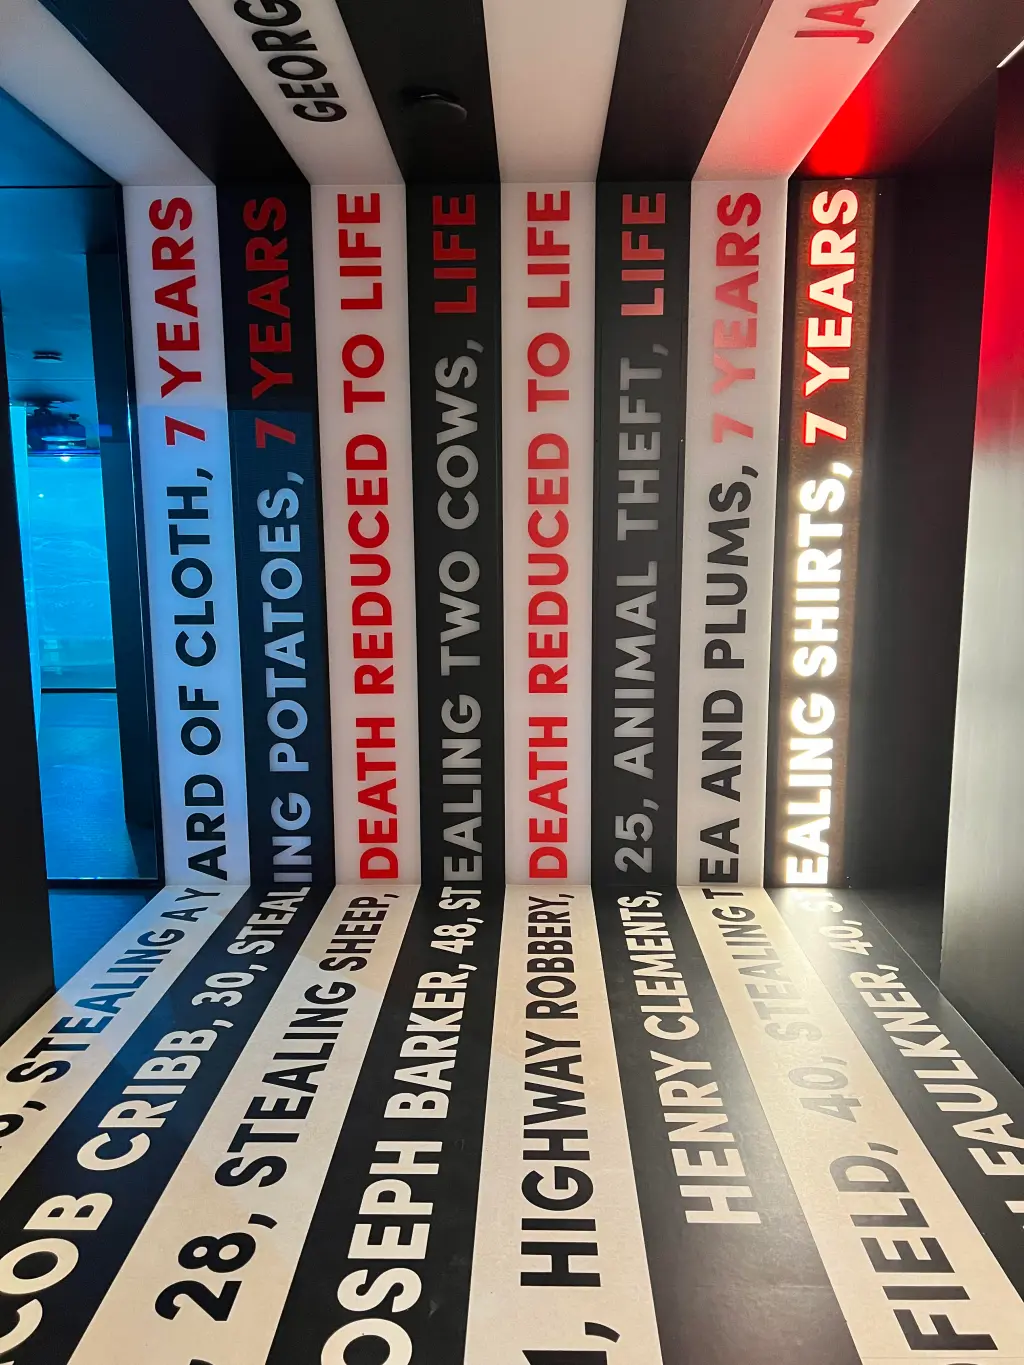
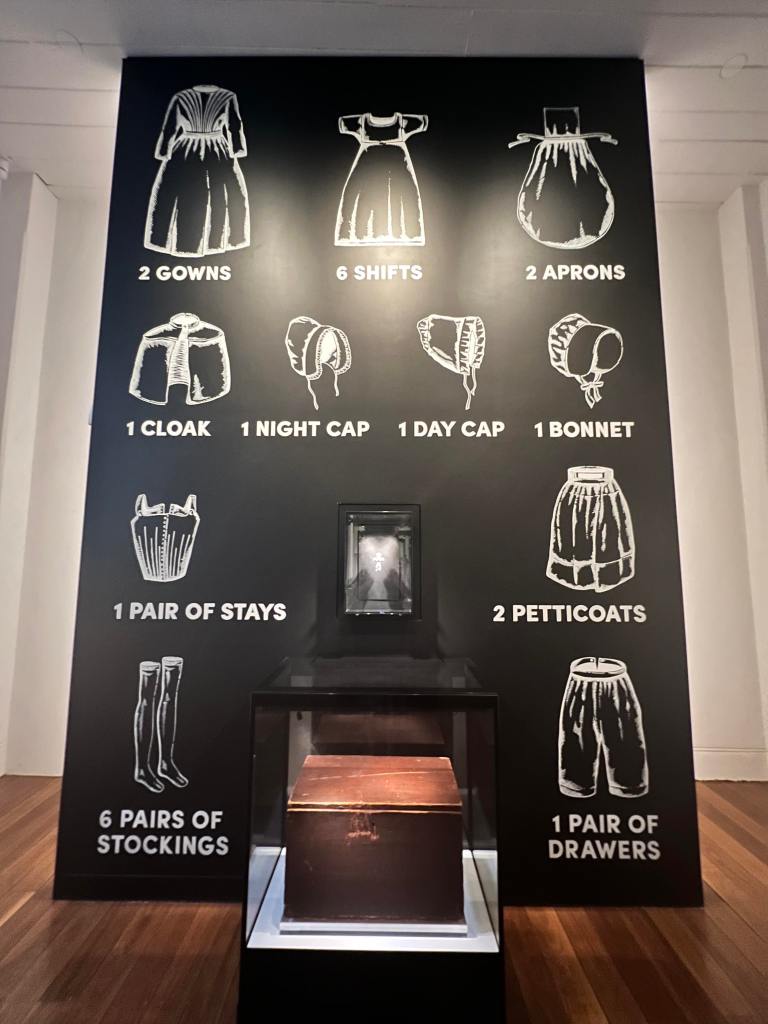
    Finally, the ground floor is all about when the barracks housed female immigrants when they arrived in Australia. My favourite display was in this space. A chest that was carried over from Ireland containing some essentials. Surrounding the chest is a beautiful artwork showing everything that would have been inside. Before you leave, you can pause and listen to Indigenous and non-Indigenous descendants share their stories about the impact of this building and the history it represents.

    Even if you don’t enjoy audio tours I would recommend giving this one a try. There were times when the audio didn’t quite work for me but it was a matter of moving around and finding the right spot. I started the tour with about five other people and although it was crowded, we could all find our own space to listen to the audio. If there were any more than this, it could be a lot to navigate.

    Entry to the site is free and there are lifts even in the heritage building. Hyde Park Barracks is open daily from 10am – 6pm with the last entry at 4.30pm. It does take around 90 minutes for the whole experience.

    Tying it Together

    When tying these two together, it is clear that digital immersive experiences have been used to highlight and better present stories. The digital here is not replacing the entire experience, but adding to it. In other words, it’s not digital for the sake of digital – it is digital to preserve and digital to create a sensory experience. I thoroughly enjoyed both the Sydney Jewish Museum and Hyde Park Barracks and am grateful that they are trying something a bit new while still providing their audiences powerful storytelling. This is a great way to manage these kinds of traumatic histories. It is amazing how they’ve made something so digital feel so personal.

  • Hobart: Cascades Female Factory

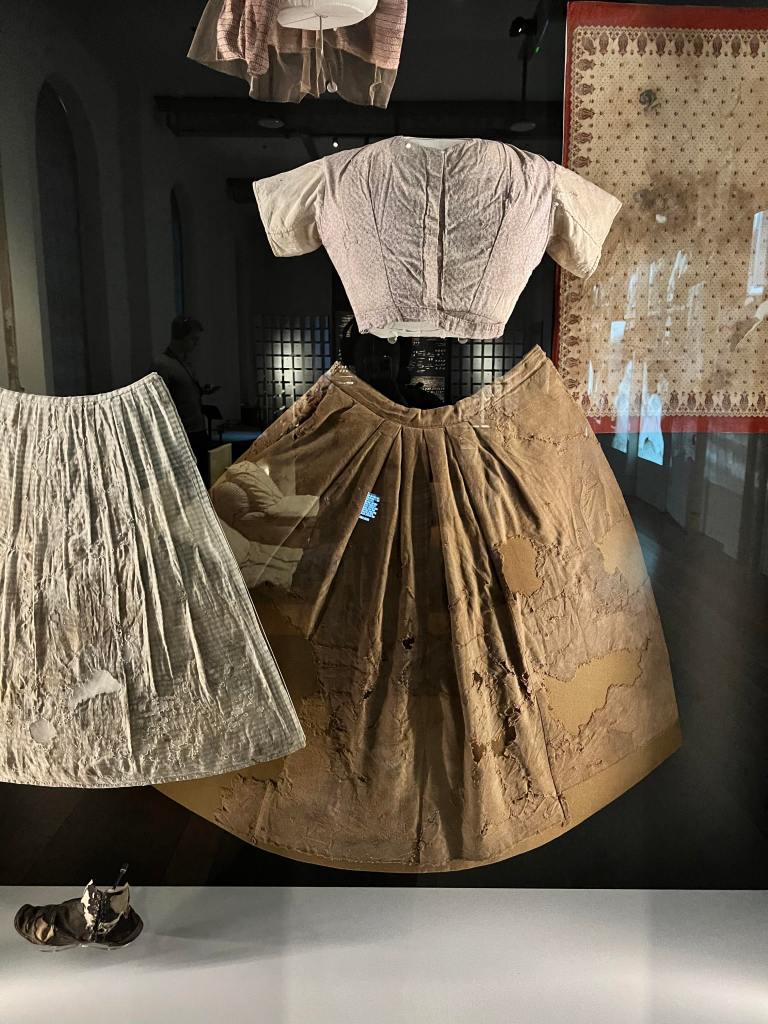
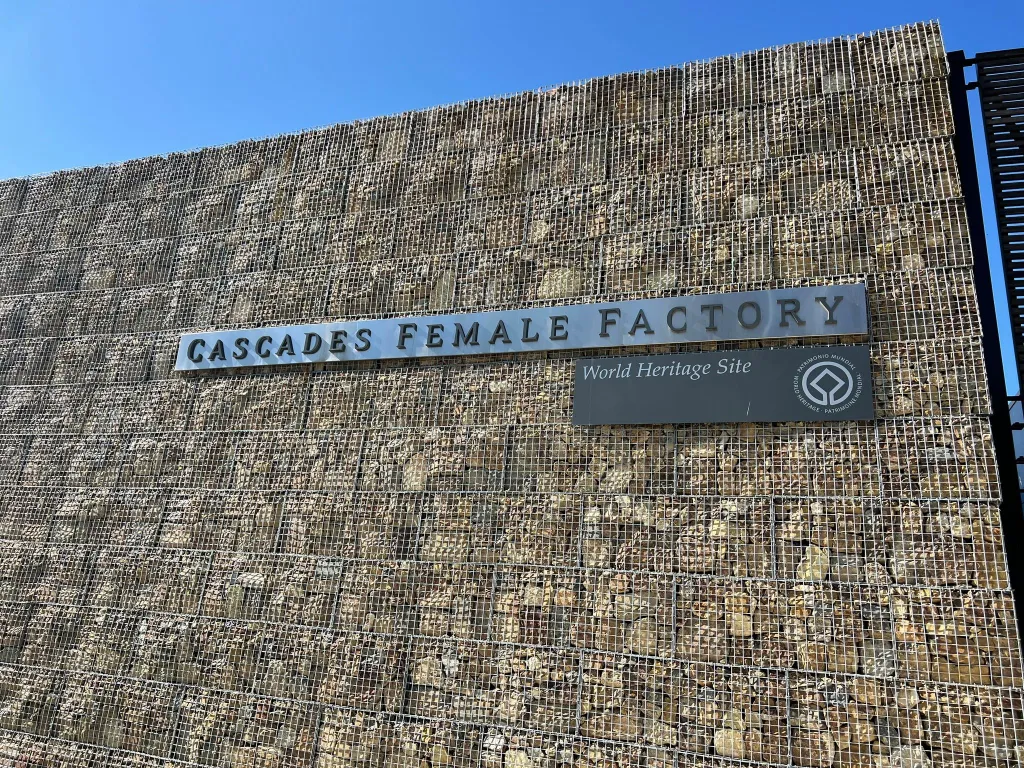
    Our final museum/heritage visit for this holiday was the Cascades Female Factory in Hobart. How this site has been managed is both a fitting memorial to those who were incarcerated and an informative insight into the past. This is despite only one original building still standing. We arrived around 10am and decided to do the guided tour of Yard 1 (shout out to Hugh for being an incredible guide). For those who prefer, there is an audio guide option. If you have the opportunity to take a tour, take it – you won’t be disappointed. After sharing some history and world heritage information, I want to delve into the site layout and how they’ve told the history.

    Museum Entrance

    History

    The Cascades Female Factory opened in 1828 to house female and children convicts who were now segregated from the male. Convicts who were sent to the Factory were divided into three distinct classes and were unable to communicate with each other. In order to reach first class, women could either exhibit good behaviour on the journey to Australia or serve their probation in second class. The benefits of being first class included being sent outside the prison for employment. However, it was not unusual for the conditions outside to be just as tough or even tougher.

    Women in the second class were convicted of minor offenses or had risen from the third class. During the day, their main task was making clothes and mending linen. The third class consisted of female convicts who re-offended either inside or outside of the Factory. The toughest jobs were reserved for these women including all the laundering and working in the orphan school.

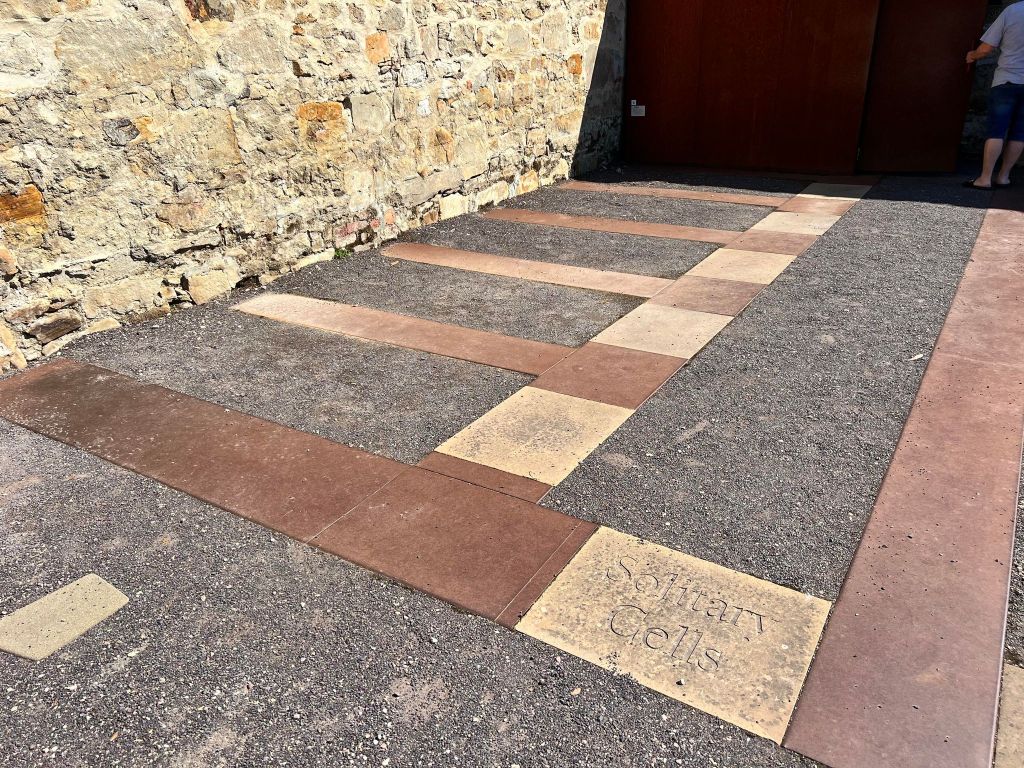
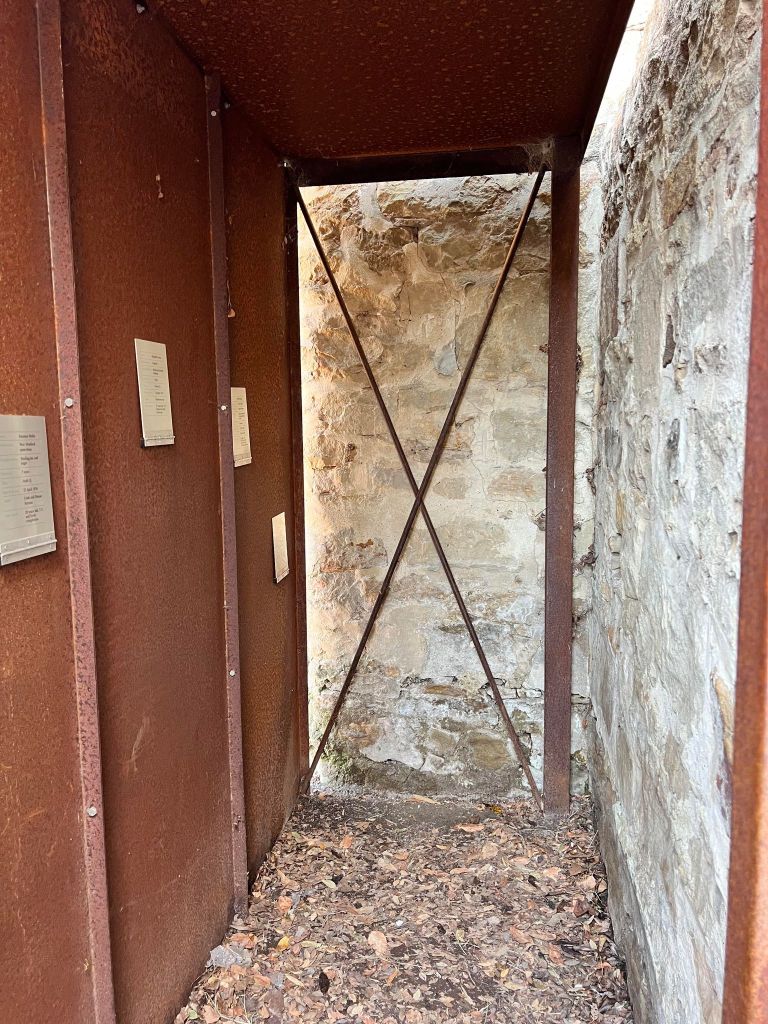
    For those who misbehaved, not only could they lose their class status, but there were harsher punishments. At the back of Yard 1, you can see the solitary confinement cells marked on the ground. Women were locked inside for 23 hours a day with only an hour outside for exercise.

    Female convicts could be released and re-interned for further crimes. Many children were born in the Factory, however, infant mortality was approximately 65% and those who survived were often described as ‘mute’.

    The Factory operated until 1856 when it became a general gaol. During the late 1860s, the Factory served as a Contagious Diseases Hospital and Hospital for the Insane. Gradually, the various institutions moved out and by 1904 the site lay vacant. It was sectioned and sold to private buyers who demolished nearly all the buildings.

    Thankfully, the Women’s Electoral Lobby in Victoria raised enough money to purchase Yard 1 (out of an original 5 yards). With the aim of preservation, they handed it over to the Parks and Wildlife Service. Due to their efforts, this is one of the only surviving sites in Australia telling the female convict story. Over time, the Matron’s Quarters, Yard 3, and Yard 4 have been acquired. Since 2011, management of the site has been handed over to the Port Arthur Historic Site Management Authority (PAHSMA).

    Heritage Listing

    In 2010, Cascades Female Factory joined other convict sites in Australia to be inscribed on the World Heritage List. I have written about some of the other sites (Port Arthur, Fremantle Prison, and Cockatoo Island) on this blog. The Factory was inscribed for its representation of the female convict experience and life in Australia.

    World Heritage Properties

    Site Layout

    I mentioned in the history section that basically all buildings have been demolished in the years following the Factory’s closure. What remains are the original sandstone walls and building plans. Very few photographs have survived. I’m going to use the photographs I took on our tour to explore how the site has been interpreted for visitors.

    Female Factory Grounds

    Buildings

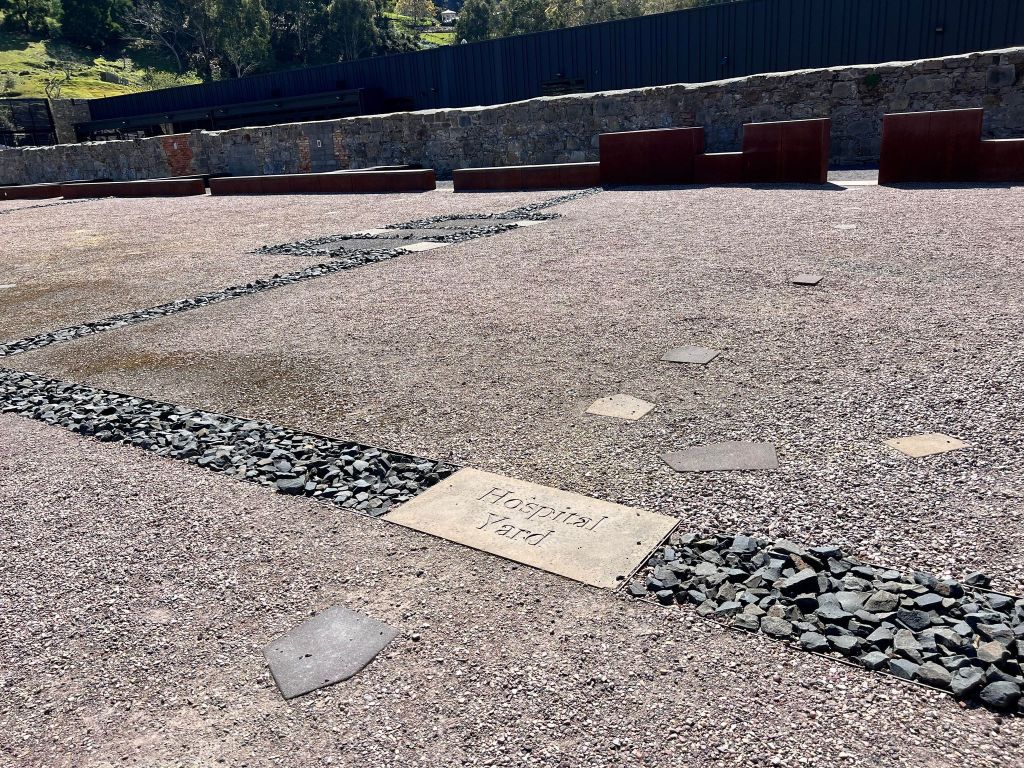
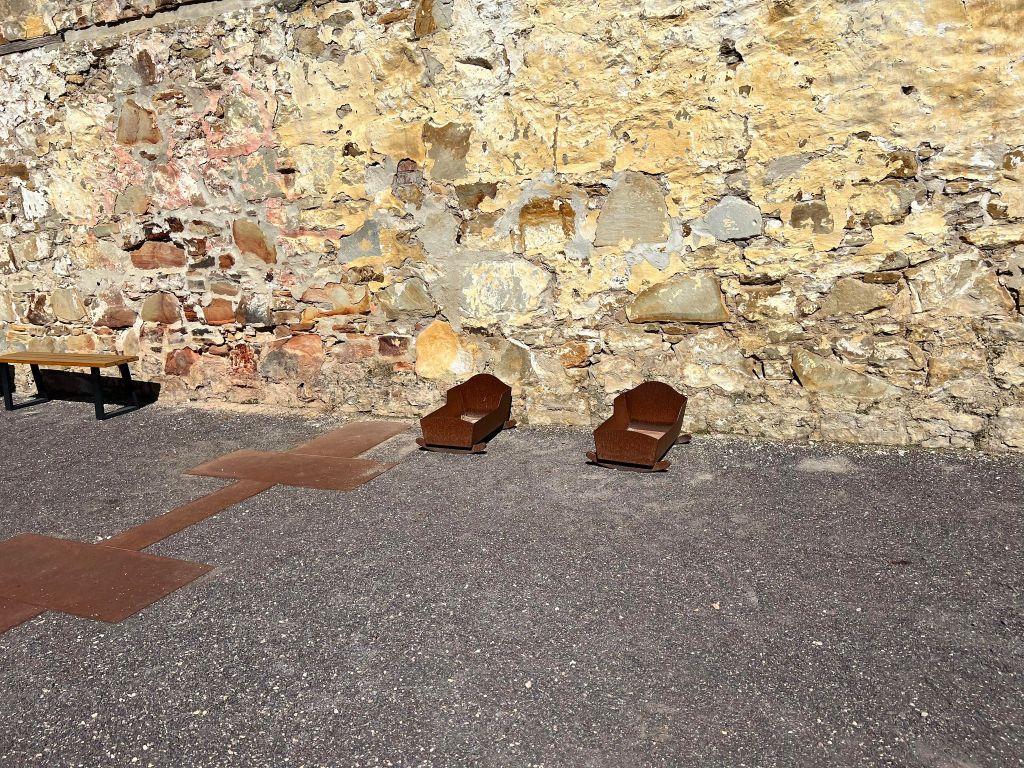
    Where the buildings once stood are now markings on the ground orientating visitors and marking out the geographical locations of each building in the Factory. In areas such as the solitary cells, the markings also show the size of cells. This was a very effective way to take a practically empty site and provide some context through a floor plan.

    Building Markers
    Building Markers

    Minimal Sculptures

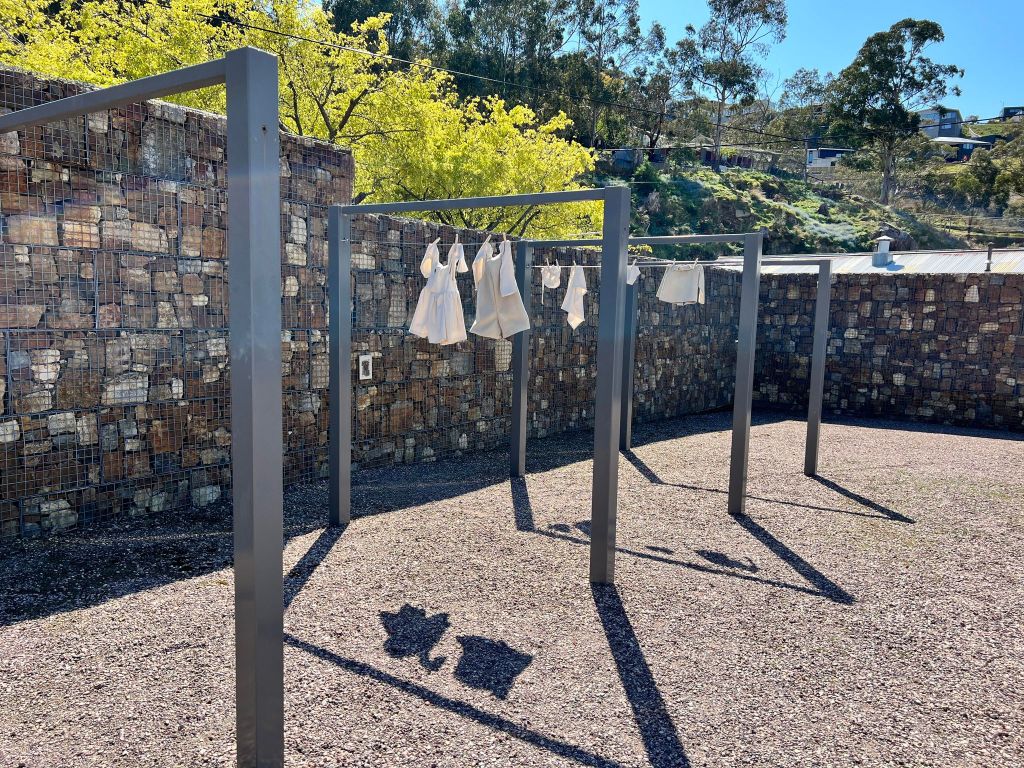
    In my opinion, the minimal sculptures were the most effective elements. Each marked-out area had a simple minimal sculpture inside to represent the purpose of the building. For example, in the nursery there are small cradles. In the laundry, a washing trough. Some of the sculptures are interactive and will be covered later. The one with the most impact was a laundry line containing the clothes of children in Yard 4.

    Sculptures
    Sculptures

    Clear Boxes with Interpretation

    Around the site are a few clear boxes with some interpretation inside. You can read about how the site served as tennis courts during the 1920s and 1930s or the history of the site as a winery. These are a great addition that don’t interfere with the overall message but add some further interpretation.

    Interpretation

    Interactive Elements

    There are a couple of sculptures that are interactive. For example, in the solitary confinement area, there is a cell you can walk into for an idea of how horrible conditions were for those inside.

    Solitary Confinement

    Stories

    Around the site are information plaques containing the stories of female convicts. They are just a snapshot consisting of the individual’s name, date of birth, description on arrival, and crime committed. Despite limited information, it is great to see what we know of their stories shared around the site.

    Modern Elements

    There are two modern elements, or additions, I’d like to mention. The first is at the original entry to the Factory. On either side of the walkway are metal walls with descriptions of select female convicts inscribed. These have been taken from the entry register that was completed by those in charge with each new arrival. The descriptions include phrases such as ‘beautiful, abused, missing front teeth, and scar on the right cheek’.

    Quotes

    The other element is the memorial statue at the end. This is a really meaningful addition and allows visitors a moment to reflect before leaving.

    Memorial

    Final Thoughts and Logistical Information

    The final thing I want to mention is that the gift shop is amazing. Not only does it sell convict-related items, but also books on consent and feminism. There was also a great exhibition inside sharing some modern stories from Tasmanian women. It really is serving an important role in the community as well as sharing hard stories from the past.

    Cascade Female Factory is open from 10am to 4pm daily (except Christmas). There is an entry fee and the site is somewhat accessible. Check their website for more information: https://femalefactory.org.au/visit/.

  • Launceston: Queen Victoria Museum and Gallery (QVMAG)

    We had such an amazing time in Launceston visiting Cataract Gorge, eating at some outstanding restaurants, and enjoying the weekly farmer’s market. A couple of days ago, I visited the Queen Victoria Museum and Gallery (QVMAG). According to their website, this is Australia’s largest regional museum. Can confirm that it is huge. I spent around two hours here which wasn’t enough but visitor fatigue got the better of me. I will provide an overview of the Museum then touch on a few highlight elements.

    History of QVMAG

    Museum Entrance

    QVMAG started from the collections of the Royal Society of Tasmania and the Launceston Mechanics Institute. When it opened in 1891, it was intended to just be an exhibition located in Royal Park. State Government funding allowed the exhibition to grow into a whole museum. If only museum funding was like this today. Its original collection focus was mineral specimens and natural sciences. This grew in the early 1900s to accommodate a zoological gallery.

    The Museum and its collection continued to grow throughout the 20th century with large acquisitions of convict-related objects and scientific specimens. In 2001, the Museum relocated to the railway yards in Inveresk. This is where the natural sciences and history collections are on display today. The Art Gallery remains at the original Royal Park site. I only visited the Inveresk site so will not be commenting on the Gallery.

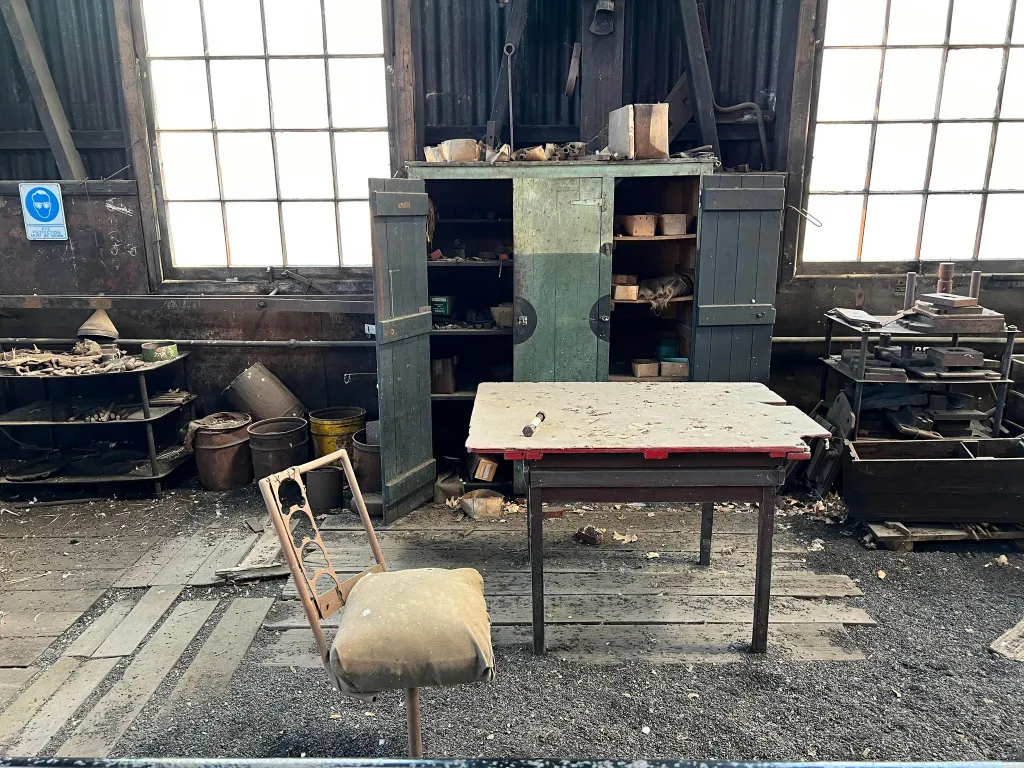
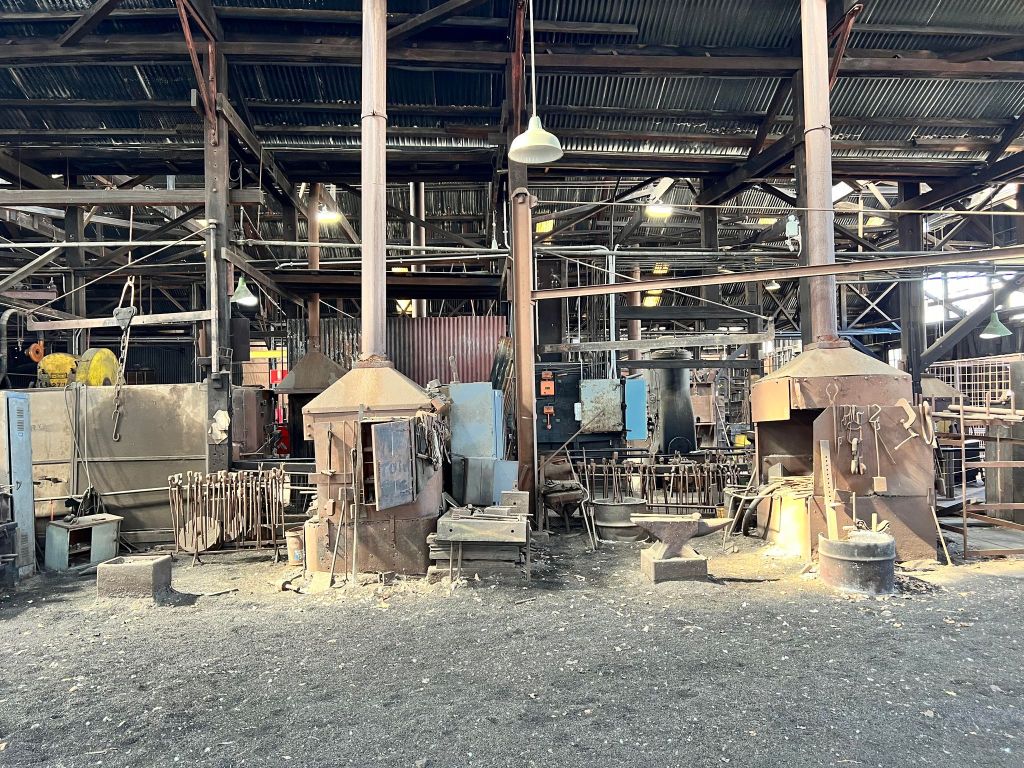
    Part of the Museum also includes other buildings such as The Blacksmith Shop. This was built between 1909 and 1937 and operated until 1994. I will write a section about this building later, but I will say it gives Cockatoo Island, abandoned industrial vibes.

    Main Exhibition Room

    Highlights of the Museum

    There are a few highlights I want to mention that range from inclusions in exhibitions to signage and interpretation. I’ll be jumping all over the place so I am going to include the map here and make sure I mention the section underneath each highlight.

    Museum Map

    Highlight 1: Touch Signs
    Section: Tasmanian Connections

    Broadly speaking, there has been this fantastic move to multi-sensory and more accessible museum experiences. Including touch objects is a great way to increase engagement and cater to those who may have low or no vision. QVMAG has quite a number of touch objects including replica dinosaur fossils, megafauna, and a Tasmanian Tiger pelt. There are large green signs next to the objects you can touch and large red signs next to the ones you cannot. It would be good to have some audio to accompany for those who may have no vision. I enjoyed interacting with a few of the touch objects – they always enhance an experience.

    Touch Signs

    Highlight 2: Transport Section Shoes
    Section: Tasmanian Connections

    Behind the dinosaurs are some transport objects including a 1923 Alfa Romeo RLS (one of only five in the world) and a cute 1950s caravan. Amongst all these large objects is a case filled with shoes. Why? Because walking, technically, is a form of transport, so why not include shoes in this section. I really like this idea and how the interpretative panel linked it all together. It poses the question: with the rising environmental costs, will walking once become a primary form of transport? My eyes immediately rested on the 1900 ladies’ button boots. They are stunning and look quite comfortable.

    Transport Shoes

    Highlight 3: Tasmanian Tiger (Thylacine) Display
    Section: Tasmanian Connections

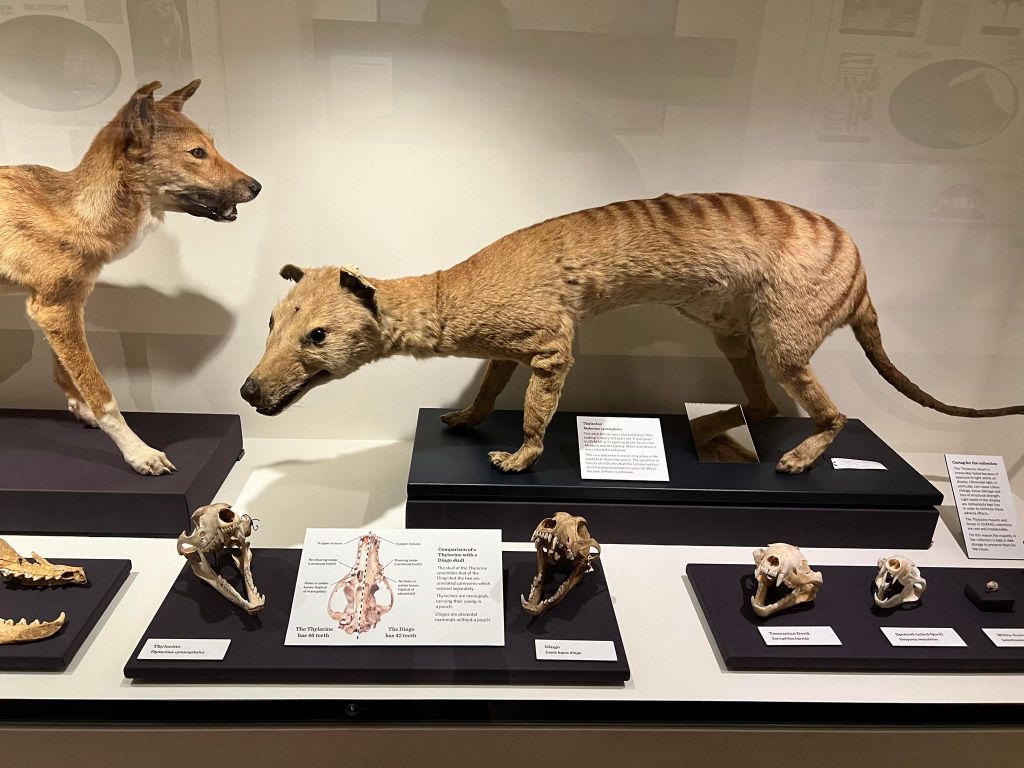
    I did not want to leave Tasmania without seeing something about the Tasmanian Tiger (Thylacine). Luckily, QVMAG delivers. In an exhibition titled Precious Little Remains, you can learn all about the Tiger and see some remains. There are a couple of display cases containing bones such as the skull, limbs, and vertebrae. There is also a polyester pelt you can touch on the wall. My favourite part is the taxidermied Tigers including an adult female collected prior to 1897. This is one of the only specimens where you can see the pouch. Next to the Tiger is a Dingo to provide a size comparison. The other part of the display I liked was the section on whether or not they are extinct. It is interesting to see that the Museum has been collecting material culture relating to claimed sightings since the 1940s.

    Highlight 4: Beer
    Section: Tasmanian Connections

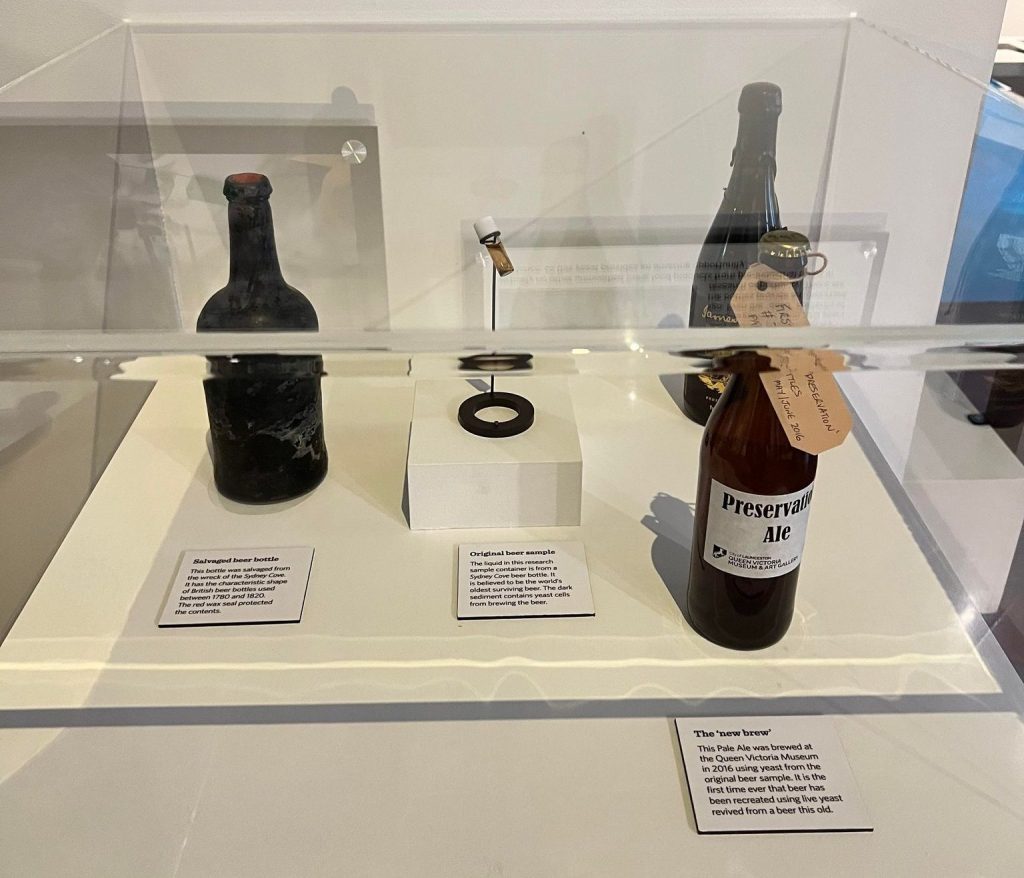
    This section captured my attention while walking through. In this case are a few bottles of beer and some yeast. According to the panel, bottles of beer were found in the wreck of the Sydney Cove (a merchant ship sent from India to Sydney in 1796). Scientists were able to isolate some live yeast that was used to brew beer in 2016.

    Beer

    Highlight 5: Display of Porcelain
    Section: Tasmanian Connections

    I’ve included this because it’s an interesting and engaging way to display porcelain fragments. These fragments were retrieved from the Sydney Cove wreck. You can see both the whole of the porcelain piece and also where the fragment would have been positioned.

    Porcelain Display

    Highlight 6: The Blacksmith Shop
    Section: The Blacksmith Shop

    When you step outside the Museum to the Courtyard, you can see the Blacksmith Shop on the other side. Inside, you walk around a guided platform while listening to a soundscape of factory noises. I recommend finding the entrance with the introductory panel and maps so you can orientate yourself in the space. This reminded me so much of Cockatoo Island in Sydney.

    Blacksmith Shop

    Extra Highlight: Surprise Dog
    Section: Transforming the Island

    In the area on Transforming the Island, there are a few large train carriages to explore. In one, there is a dog box, where passengers would leave their dogs. Inside is a taxidermied dog so I’m including it as a surprise dog.

    Train Dog

    Logistical Information

    QVMAG is a fully accessible site open seven days a week from 10am – 4pm. It is closed Christmas Day. Entry is free! If you want to see any observatory shows, there is a small cost. Highly recommend visiting if you are in Launceston.

  • Hobart: Port Arthur

    Before driving from Hobart to Launceston, we booked the rental car for an extra day so we could visit Port Arthur. I am fascinated by convict history so somewhere like Port Arthur will always be high on my ‘must-visit’ list. I am so glad we dedicated an entire day to exploring the site and I’m sure we could have filled a second day if needed. Entry tickets cover two days for this very reason. It is a huge site to explore with a free harbour cruise included and multiple tour options. If that’s not enough, a select number of buildings have short talks throughout the day. There is so much to do and so much to write about. I’ll start with a brief history of the site followed by some highlights and what could be altered for a better experience.

    Port Arthur

    Port Arthur’s History

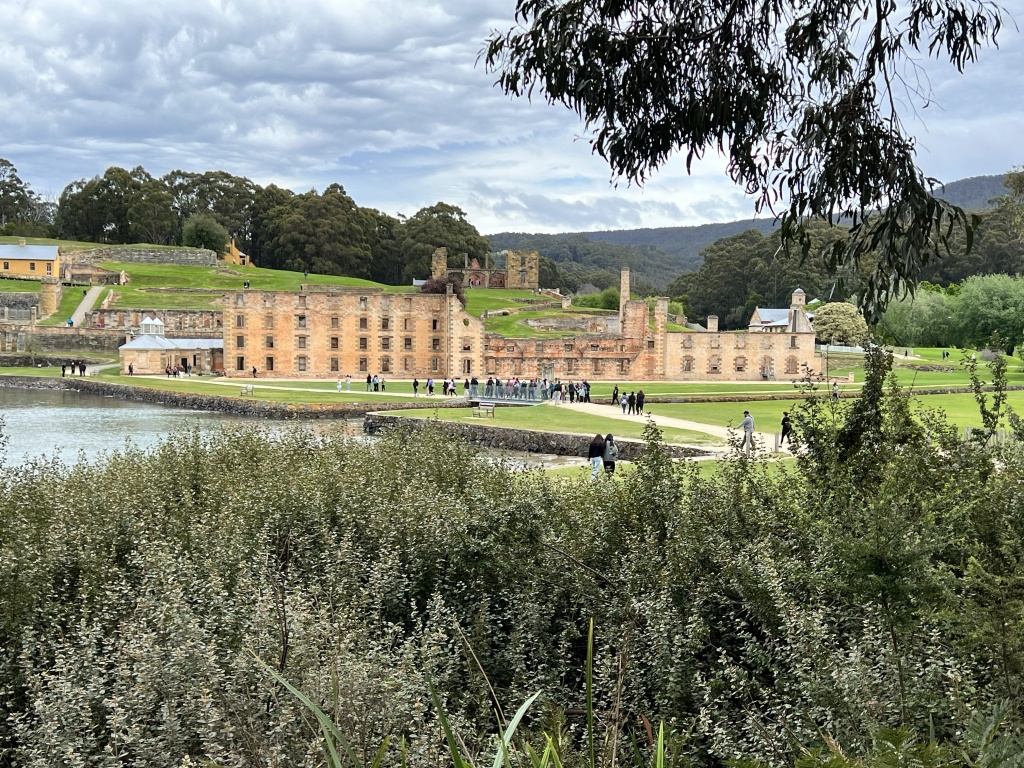
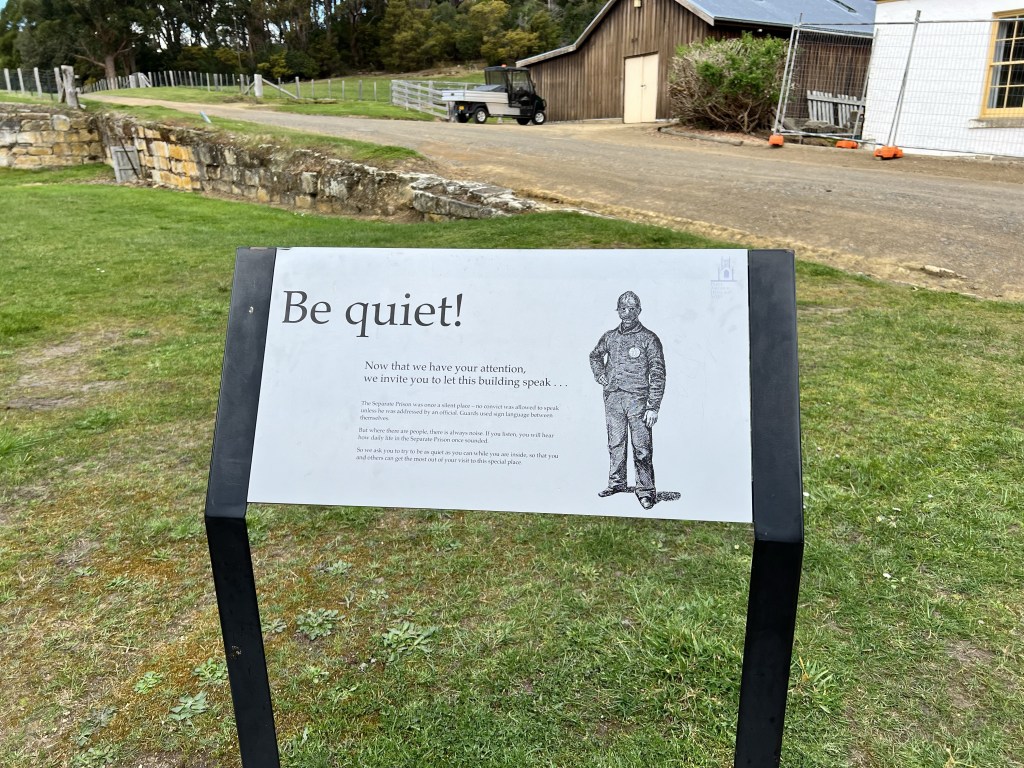
    The following information has been sourced from the Port Arthur website. Here, the history section begins with the creation of a timber station to house convicts in 1830. Throughout the 1830s and 1840s, the settlement focused on more industrial pursuits and equipping convicts with useful ‘real-world’ skills such as carpentry and metalwork. The population of Port Arthur grew in the 1840s to around 1100 convicts. They built a flour mill/granary and a hospital to accommodate the growing population. At the end of the 1840s, they also built the Separate Prison, which was used for mental subjugation and punishment.

    Overview of Convict Barracks

    Transportation of convicts to Port Arthur stopped in 1853 and the final convict left the island in 1877. After its convict period, Port Arthur became the town of Carnarvon. Residents moved into some of the original houses maintaining them for years to come. The name, Port Arthur, was reinstated in 1927 and tours of the site commenced shortly after. The Port Arthur Historic Site Management Authority took over in 1987 increasing the interpretation and focusing on the preservation of the site. It is still run by the Authority today.

    In 2010, it was declared a UNESCO World Heritage Site, inscribed as an exceptional example of how the 19th-century British penal system was adjusted to Australian conditions. In particular, how punishment and reform worked together. Its entry also mentions its role in tourism, its local significance as the town of Carnarvon, and how an absolute tragedy that occurred at the site in 1996 led to changes in Australia’s gun laws. The following have been included in its inscription:

    1. Scientific Value: the site has great research potential and has developed Australian archaeological methods and theory.
    2. Aesthetic Value: Port Arthur is a prominent visual landmark and a large, well-maintained site.
    3. Technical Value: The site speaks to adapting industrial practices to local materials and conditions.
    4. Social Value: Supports and fosters a community to tell important social stories.
    5. Special Association Value: Included due to its association with notable reformers, administrators, convicts, artists, and writers.
    6. Indigenous Value: This is the first time I saw the site’s Indigenous history mentioned. It’s World Heritage listing includes that the site was and is significant to the Indigenous population.
    7. Rarity: Port Arthur is one of a handful of examples of a penal settlement used for recidivists.
    8. Representativeness: The site has a wide range of buildings, construction techniques, materials, and designs all representing the era and the type of convict settlement.

    This is only a very brief introduction to the history of Port Arthur. If you are interested, there is so much out there to delve into. I suggest starting with the official Port Arthur website and going from there.

    Highlights of Port Arthur

    There were quite a few highlights I want to mention and one thing you can skip if you don’t have the time. It is a huge site with so many buildings to explore. I’ll include a picture of the map below so you can see just how many heritage places there are and gauge how long it might take to visit them all.

    Visitor Map

    Highlight 1: Isle of the Dead

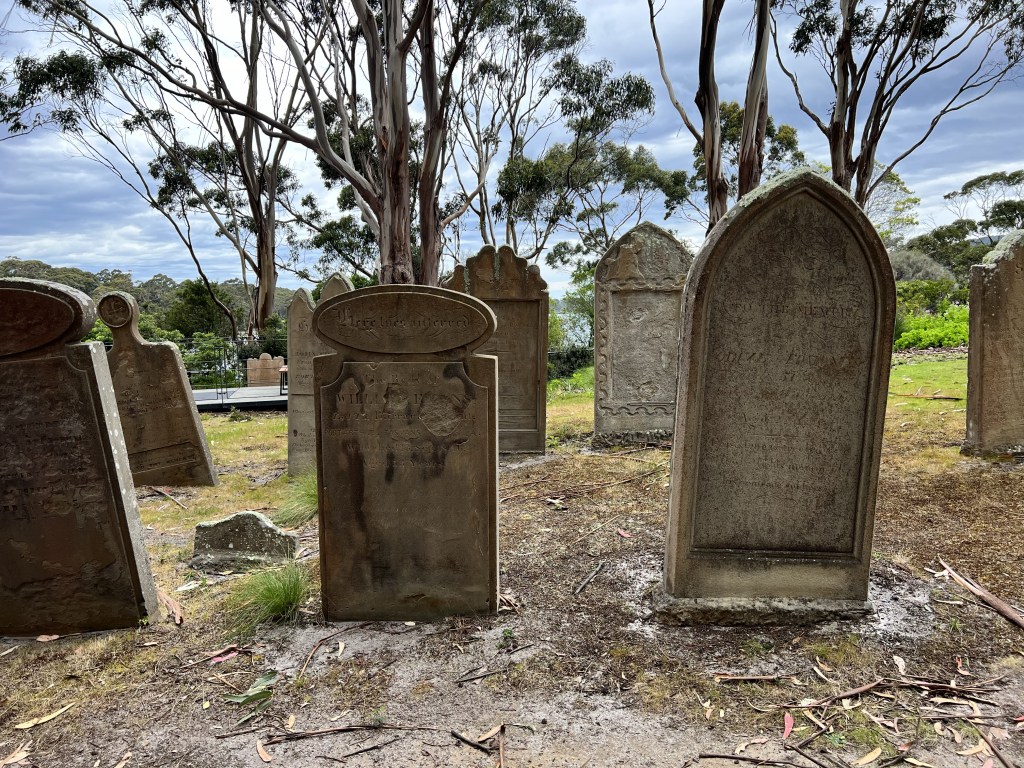
    I strongly encourage any visitor to Port Arthur to add an Isle of the Dead ticket to their order. You depart on the harbour cruise and spend about 40-45 minutes being guided around the island. No surprises here, it is where the dead were buried. There are a few surviving headstones but it is worth going for the stories. I felt a bit detached from the stories just walking around the site so this was an incredible tour for shining a light on some of the individuals who called Port Arthur home. The best part of our day was this tour!

    Isle of the Dead
    Isle of the Dead

    Highlight 2: Heritage Interpretation Panels

    Port Arthur has great wayfinding signs, a comprehensive guidebook and map, and plenty of heritage interpretation. This works especially well in areas where the original building no longer stands. For example, next to the penitentiary were the old workshops. While there is nothing there today, the interpretation sign provides context for the workshops and a map of the building. There are also some stories and photographs shared via the panels.

    Interpretation Panel

    Highlight 3: Open Buildings

    So many of the buildings at Port Arthur are open to visitors. Unfortunately, when we visited there were more closed than open. Still, the ones we could go into were fascinating and helped to piece together the entire story of the settlement. The Junior Doctor’s House was one of my favourites and shared the story of medical care at Port Arthur. Due to their nature, not many of the buildings are fully accessible.

    Commandant’s House
    Commandant’s House
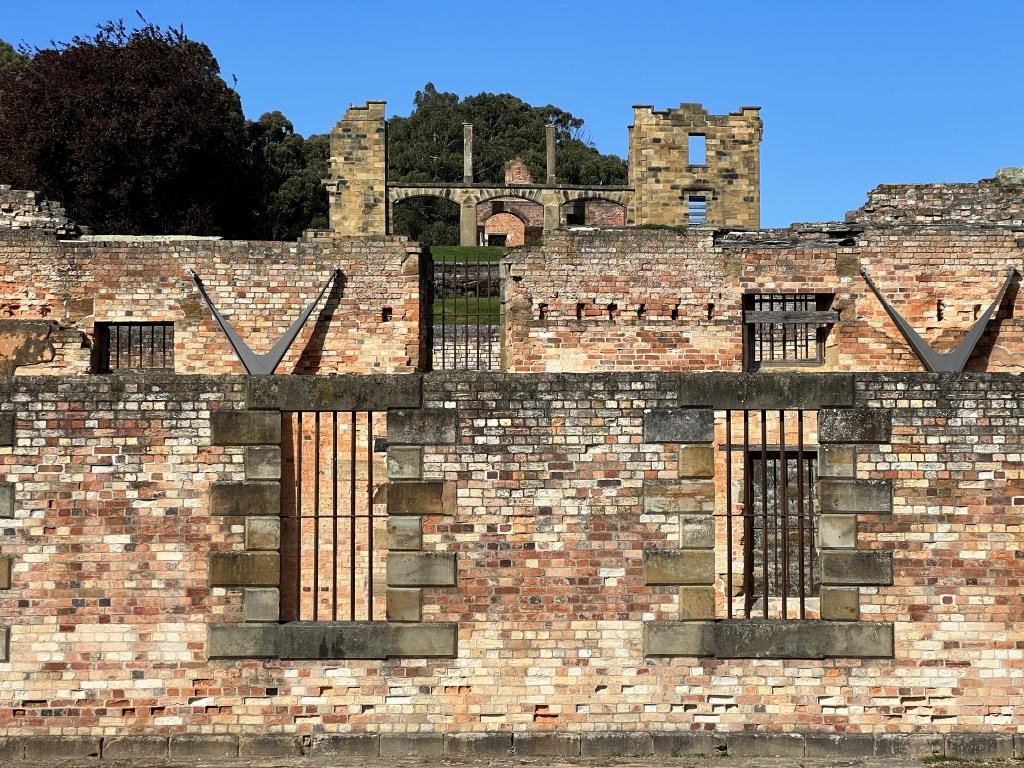
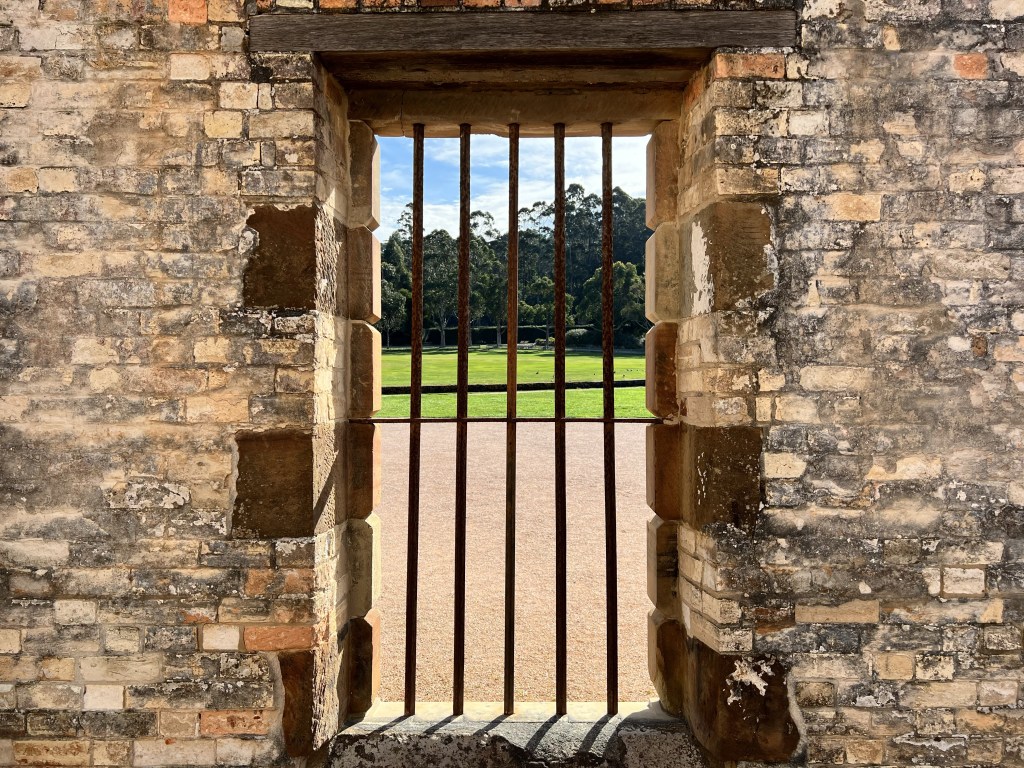
    Building Ruins
    Building Ruins

    Highlight 4: Government Gardens

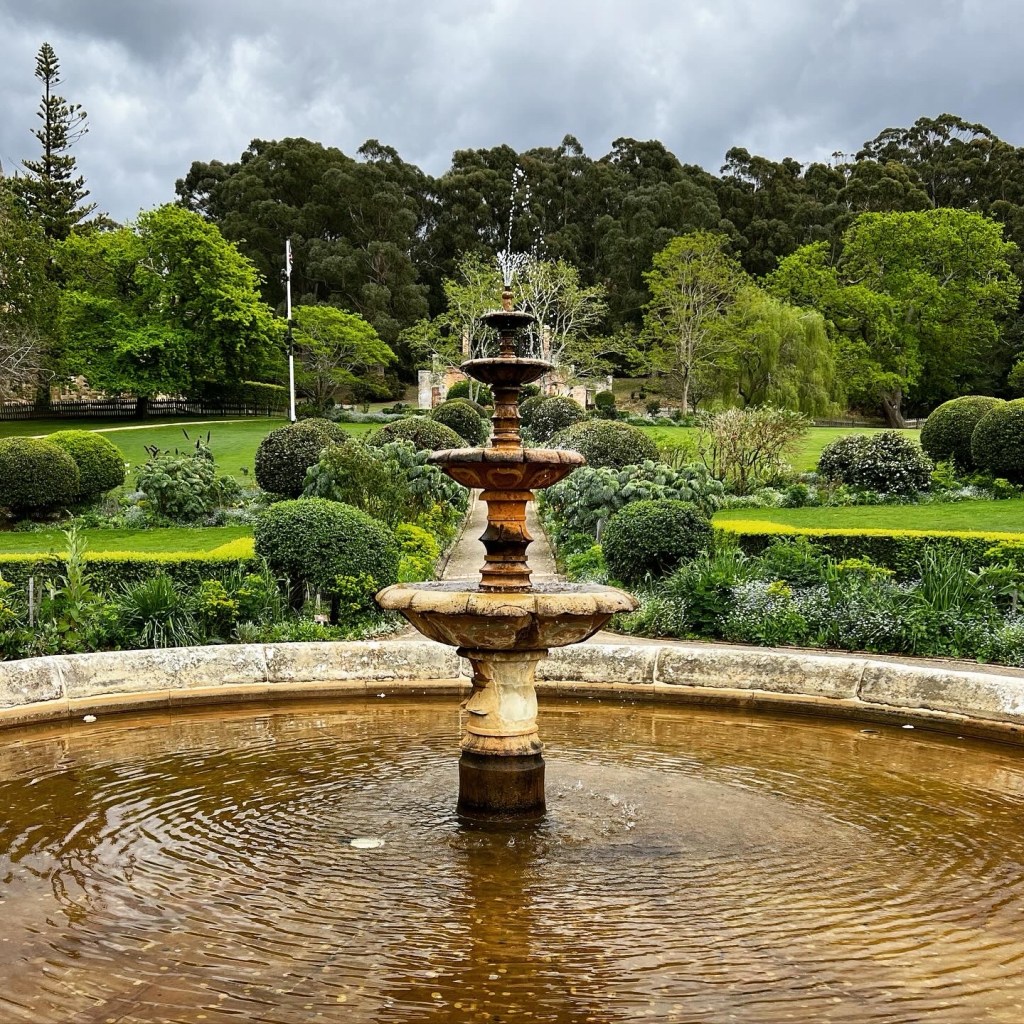
    The Government Gardens are stunning and one of the first places you see after exiting the Visitor Centre. It is so well maintained and a beautiful space to walk around for a bit of a break. I do think a garden tour of the site would be excellent to offer! There is so much to cover and so much history in the gardens to explore.

    Government Gardens

    Highlight 5: Separate Prison

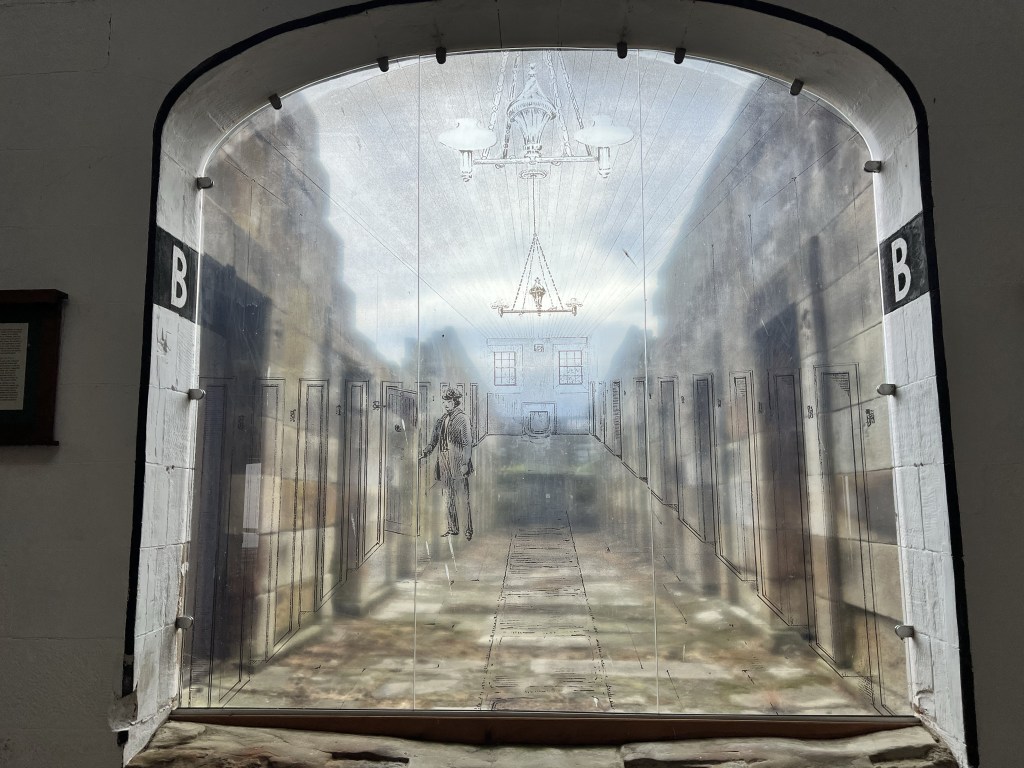
    One of my favourite buildings at the site is the Separate Prison. Convicts were sent here for solitary confinement. As you can see below, they’ve used old historical images to add context to the heritage buildings. They also have a memorial to those who were sent to solitary. All the lit-up photographs below are of men who were sent to the Separate Prison. The memorial has a great impact in the space.

    Separate Prison
    Separate Prison
    Separate Prison

    Alteration 1: Convict Tour

    Before our Isle of the Dead tour, we joined a Convict Tour to gain an overview. We didn’t really enjoy this tour and would recommend the self-guided audio tour instead. If you want a very basic introduction that is more about the site and not about any of the heritage, this would probably work for you.

    Logistical Information

    Port Arthur is open daily (except for Christmas Day) between 9am and 5pm. I really appreciate that a ticket covers visitors for two days! Also included in the ticket price is the free harbour cruise, some side-talks at a few locations, and the audio guide. It is great value for money! I’d strongly recommend purchasing your tickets online prior to your visit.

  • Hobart: Museum of Old and New Art (MONA)

    The last time I visited MONA was back in (approximately) 2011/2012. It was during a German summer school and I was in a group tasked with guiding others in the program through the Museum. It was a much more relaxing visit yesterday and I was able to admire more of the architecture than I had the first time. There were, however, elements that I found problematic – I will discuss these later. I will say that from beginning to end, visiting is quite an experience. This post will follow that experience and highlight things along the way. To start, we are going to catch the ferry to MONA.

    Ferry Ride

    You can drive or get an Uber/taxi to MONA but you can also arrive in style via the MONA ferry. Either join the ‘posh pit’ or the plebs in the back for your journey. The ‘posh pit’ is a more expensive ticket that includes some food and drinks. Considering the ferry ride is only 25 minutes, you might want to save some money here.

    Ferry to MONA

    Overall, we found the ferry ride relaxing. This is despite there being a delay that almost cut into our museum visit time. I would have liked some narration on the ferry since we were travelling past some interesting-looking sites. Not a necessity, just a nice addition. It was a smooth ride and when we arrived, easy to navigate to the Museum. There are 99 steps from the ferry to the Museum but there is a tunnel you can walk through, straight into a gallery space, if you have accessibility requirements.

    Entrance to MONA

    The ‘O’ App

    I remembered the app from last time and the frustration it caused. I am all for an app supplementing and/or augmenting the experience, but I am not a fan of an app replacing almost everything. In terms of a positive, the map function is useful. On the other hand, the app replaces on-the-wall object labels. This means you spend most of your visit looking at your phone. I definitely think increasing labels and interpretation within the space would work a lot better.

    Linking in with this is the lack of wayfinding signage. There are times when you need to go to another level in order to find a different set of stairs to go back to your original level. It is very hard to find where to go and more signage would have been appreciated.

    Basement 3

    We entered the Museum on level Basement 3. This was my favourite level of the Museum with a couple of highlight installations. The first, bit.fall, is a work by German-artist Julius Popp. You can hear this work before you see it. Water droplets drop from a platform to the ground spelling out words on the way down. These words have been sourced from live news feeds and are constantly being updated. It is a fascinating work and one that you can really spend time watching.

    bit.fall

    We then made our way to a new work by Jónsi titled Hrafntinna (obsidian). This was my favourite work in the entire Museum. Basically, you sit in a dark room and experience a volcanic eruption. It is a beautiful work that utilises both light and sound in order to create an experience. We spent around 15 minutes just listening to the music and taking a moment to sit down.

    Last but not least, we have 20:50 by Richard Wilson. With this work, you individually walk down a little runway surrounded by water. This water reflects the square pattern creating the illusion that the squares go on forever.

    20:50

    Architecture

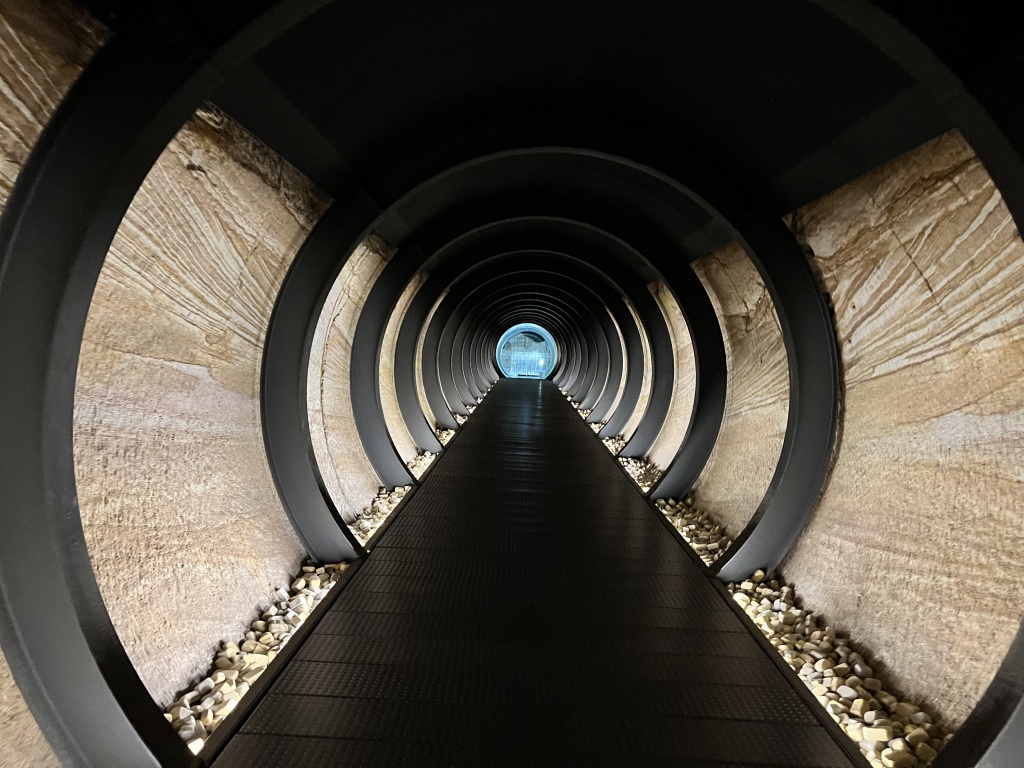
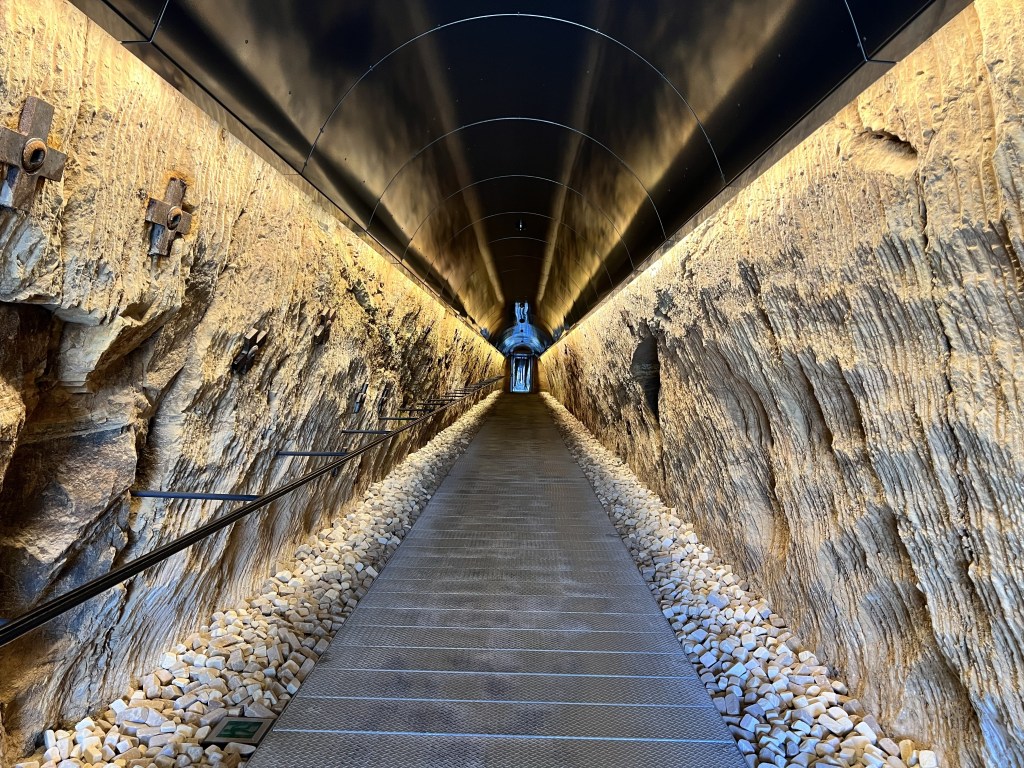
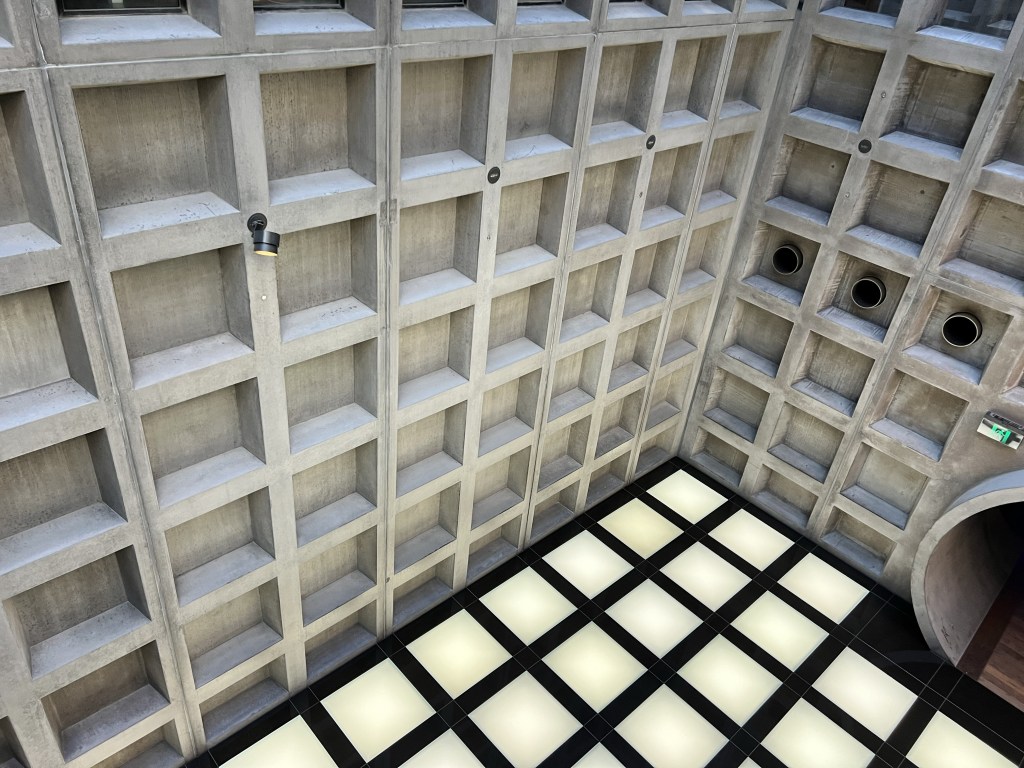
    Between Basement 3 and Basement 2, we really started to appreciate the architecture. Large sandstone blocks and long atmospheric tunnels truly make this museum an architectural marvel. This alone is a good reason to visit.

    MONA Tunnel

    Basement 2

    We didn’t spend long in Basement 2. It was initially difficult for us to find an accessible way to get there but we finally did and just had a quick walk around.

    Basement 1

    The second last level of the Museum is Basement 1. The first thing we did was join the queue to see Museum and Coffin of Pausiris. While we were waiting for our turn, we walked through the other exhibitions on this level.

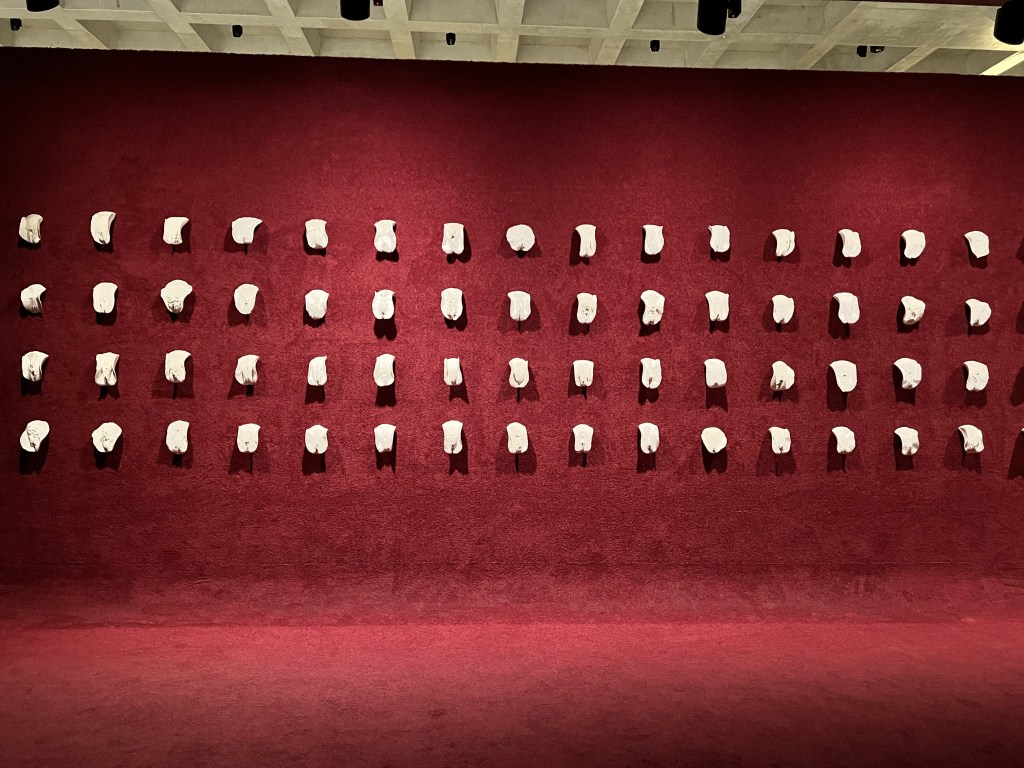
    An artwork on everyone’s ‘must-see at MONA’ list is titled Cunts….and other conversations by Greg Taylor. Displayed on the wall are around seventy seven ceramic sculpture vulvas that were created from sketches of real models. The work aims to celebrate the diversity of women through de-stigmatising this organ. Each sculpture is fixed to a red wall. In front of the wall is a pink plush carpet and lounge chairs. It forms part of the Ladies Lounge that can be accessed by male visitors. The other part of the Lounge is strictly women only (I did like this section!).

    Cunts….and other conversations

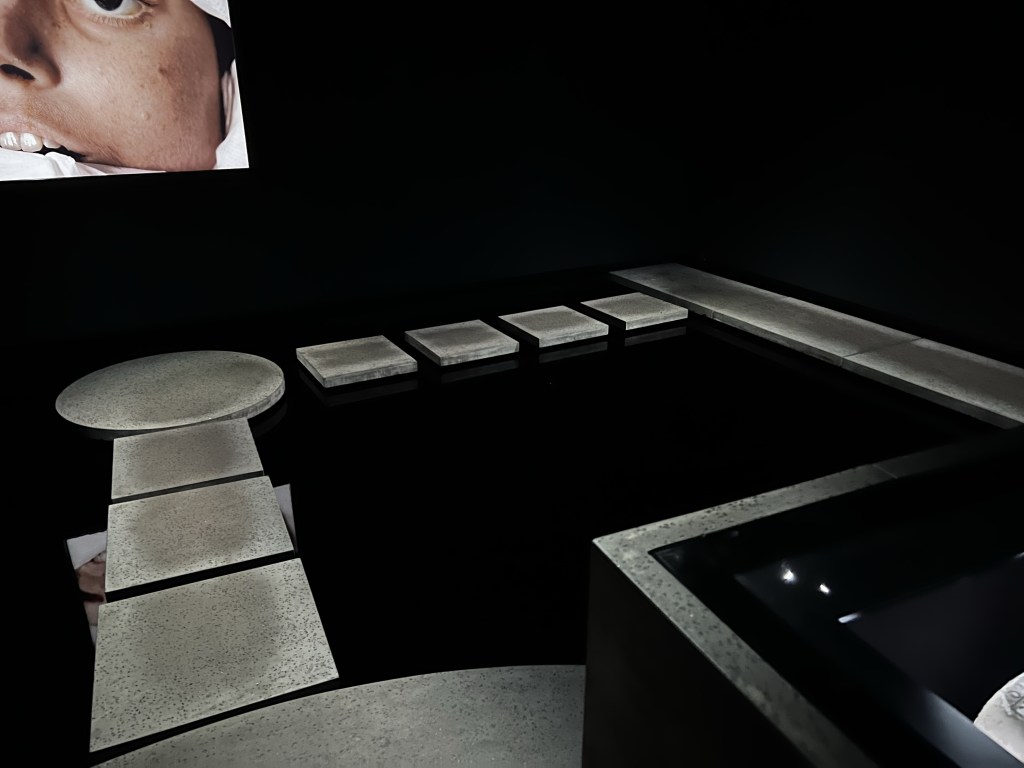
    It was then time to go back and see the mummy. A maximum of two people per session are allowed as the display contains a lot of water. I spent most of my time inside worried I would fall into the deep water. You must navigate across step stones in order to see the mummy on a central platform. Here there is a stone sarcophagus containing the mummy. I felt very uneasy seeing these human remains so I didn’t spend long looking at the other works on the wall.

    Sarcophagus

    Ground Level

    Before boarding the ferry back to Hobart, we visited the gift shop on the ground floor. There are a few interesting things to buy including some pretty epic tote bags. I do love a tote bag so purchased a couple as souvenirs.

    And that was the end of our day!

    View to MONA Ferry

    Overall Thoughts and Logistical Information

    Overall, there were some amazing works on display and we did enjoy our experience. While there are a few frustrating elements, it is definitely worth visiting for the works and architecture. When you add up the cost, a trip to MONA is quite an expensive endeavour. If you are a Tasmanian resident, you can visit for free (excluding ferry). It did make me question how truly accessible this museum is and consider who is excluded because of the cost.

    For all your logistical information, including booking links and price information, follow the link: https://mona.net.au/visit.
  • Hobart: Mary Mary

    This is going to be a very brief post about a re-purposed heritage building in Hobart City Centre. Owned by The Tasman Hotel, Mary Mary is a cute little bar housed in the former St Mary’s Hospital, Tasmania’s first private hospital. How this bar has managed to combine both modern and heritage is amazing and worth a short little blog post.
    History of the Hospital

    Mary Mary

    There is some information about St Mary’s Hospital online, but I found Mary Mary’s page to have the most comprehensive overview. It is great to see a bar with its building’s chronological history on the homepage! The following has been sourced from there.

    St Mary’s Hospital was constructed between 1847 and 1848. It was intended to be a facility for those who could not afford medical care elsewhere in Tasmania. Unfortunately, the hospital was closed in 1862 due to a lack of patients. After closing, the building became offices for the Lands and Survey Department. Over the next few decades, additions were added and renovation work completed in order to expand and stabilise.

    Until 2012, the building was used as a government administration office. It also lay empty for some time. When a redevelopment program was announced for Parliament Square, where the building is located, it included heritage restoration of the old sandstone buildings. This is when old St Mary’s became designated as a bar/dining option for The Tasman Hotel. In 2021, Mary Mary opened keeping the name of the hospital front and centre.

    Objects

    Hospital Objects

    If you enter the bar from the Hotel, one of the first things you see is a cabinet of objects. All of these archaeological objects were discovered during excavation work in 2012. There are a few bottles, decorative plates, and even a child’s shoe! Labels are inside the cabinet providing a description of the objects but no contextual information. A small context label would really add to the display.

    Bar

    The architecture of the bar combines modern and heritage features. The sandstone walls are juxtaposed with a formal bar and leather seats. The original cast iron doors are still in place and used by staff. It is a very nice space to enjoy a drink and some really delicious bar food. I highly recommend the tiramisu.

    Bar Entrance
    Old Hospital Doors
    Bar

    Overall + Logistics

    In my opinion, this is a great re-purposing of heritage. While the old is still featured and celebrated, the contemporary has breathed new life into the building. Mary Mary is open Thursday to Saturday from 4pm to 12am and Sunday to Wednesday from 5pm to 10.30pm.