
Yesterday I visited both the WA Museum Boola Bardip and Art Gallery of Western Australia. They definitely deserve their own blog posts so I’m going to start with the Museum. The WA Museum Boola Bardip is one of six museums owned by the overarching Western Australia Museum network. The new building only opened in November 2020. I still remember watching the news during one of our lockdowns and seeing the grand opening. I didn’t really know what to expect from the Museum before visiting. All I knew was that I would be seeing dinosaurs and megafauna – and I was sold. The Museum houses that and so much more. It is massive – five levels of exhibitions! I spent a solid three hours walking around and could probably go back for another three hours before I leave. I managed to walk through all the exhibition spaces but only stopped to look at the objects/stories that caught my attention. The diversity of available, and inventive, interactives and exhibition display techniques is truly incredible. I can’t cover everything in this post, but I can hopefully cover enough to persuade you to visit. Here are my Top 15 (yes, I couldn’t narrow it down further) objects/interactives/other elements that I found, personally, particularly noteworthy. I will start the list at Level 3 then move down to the final highlight on the ground floor.
1. Level 3 – Wild Life – Caution Sign
Going to start with something a bit random here but it was the first thing I saw that made me really appreciate this museum. On entering the Wild Life permanent exhibition space, there is a little caution sign that states “visitors are advised that this gallery contains preserved animal specimens”. I’ve visited quite a few natural history museums in my life and I’ve never noticed a sign like this. I am used to seeing this when it comes to human remains, but it is really considerate to have something similar for animal specimens too. There are a couple of animal specimen photographs in this blog post so this is your FYI.

2. Level 3 – Wild Life – Layout & Display
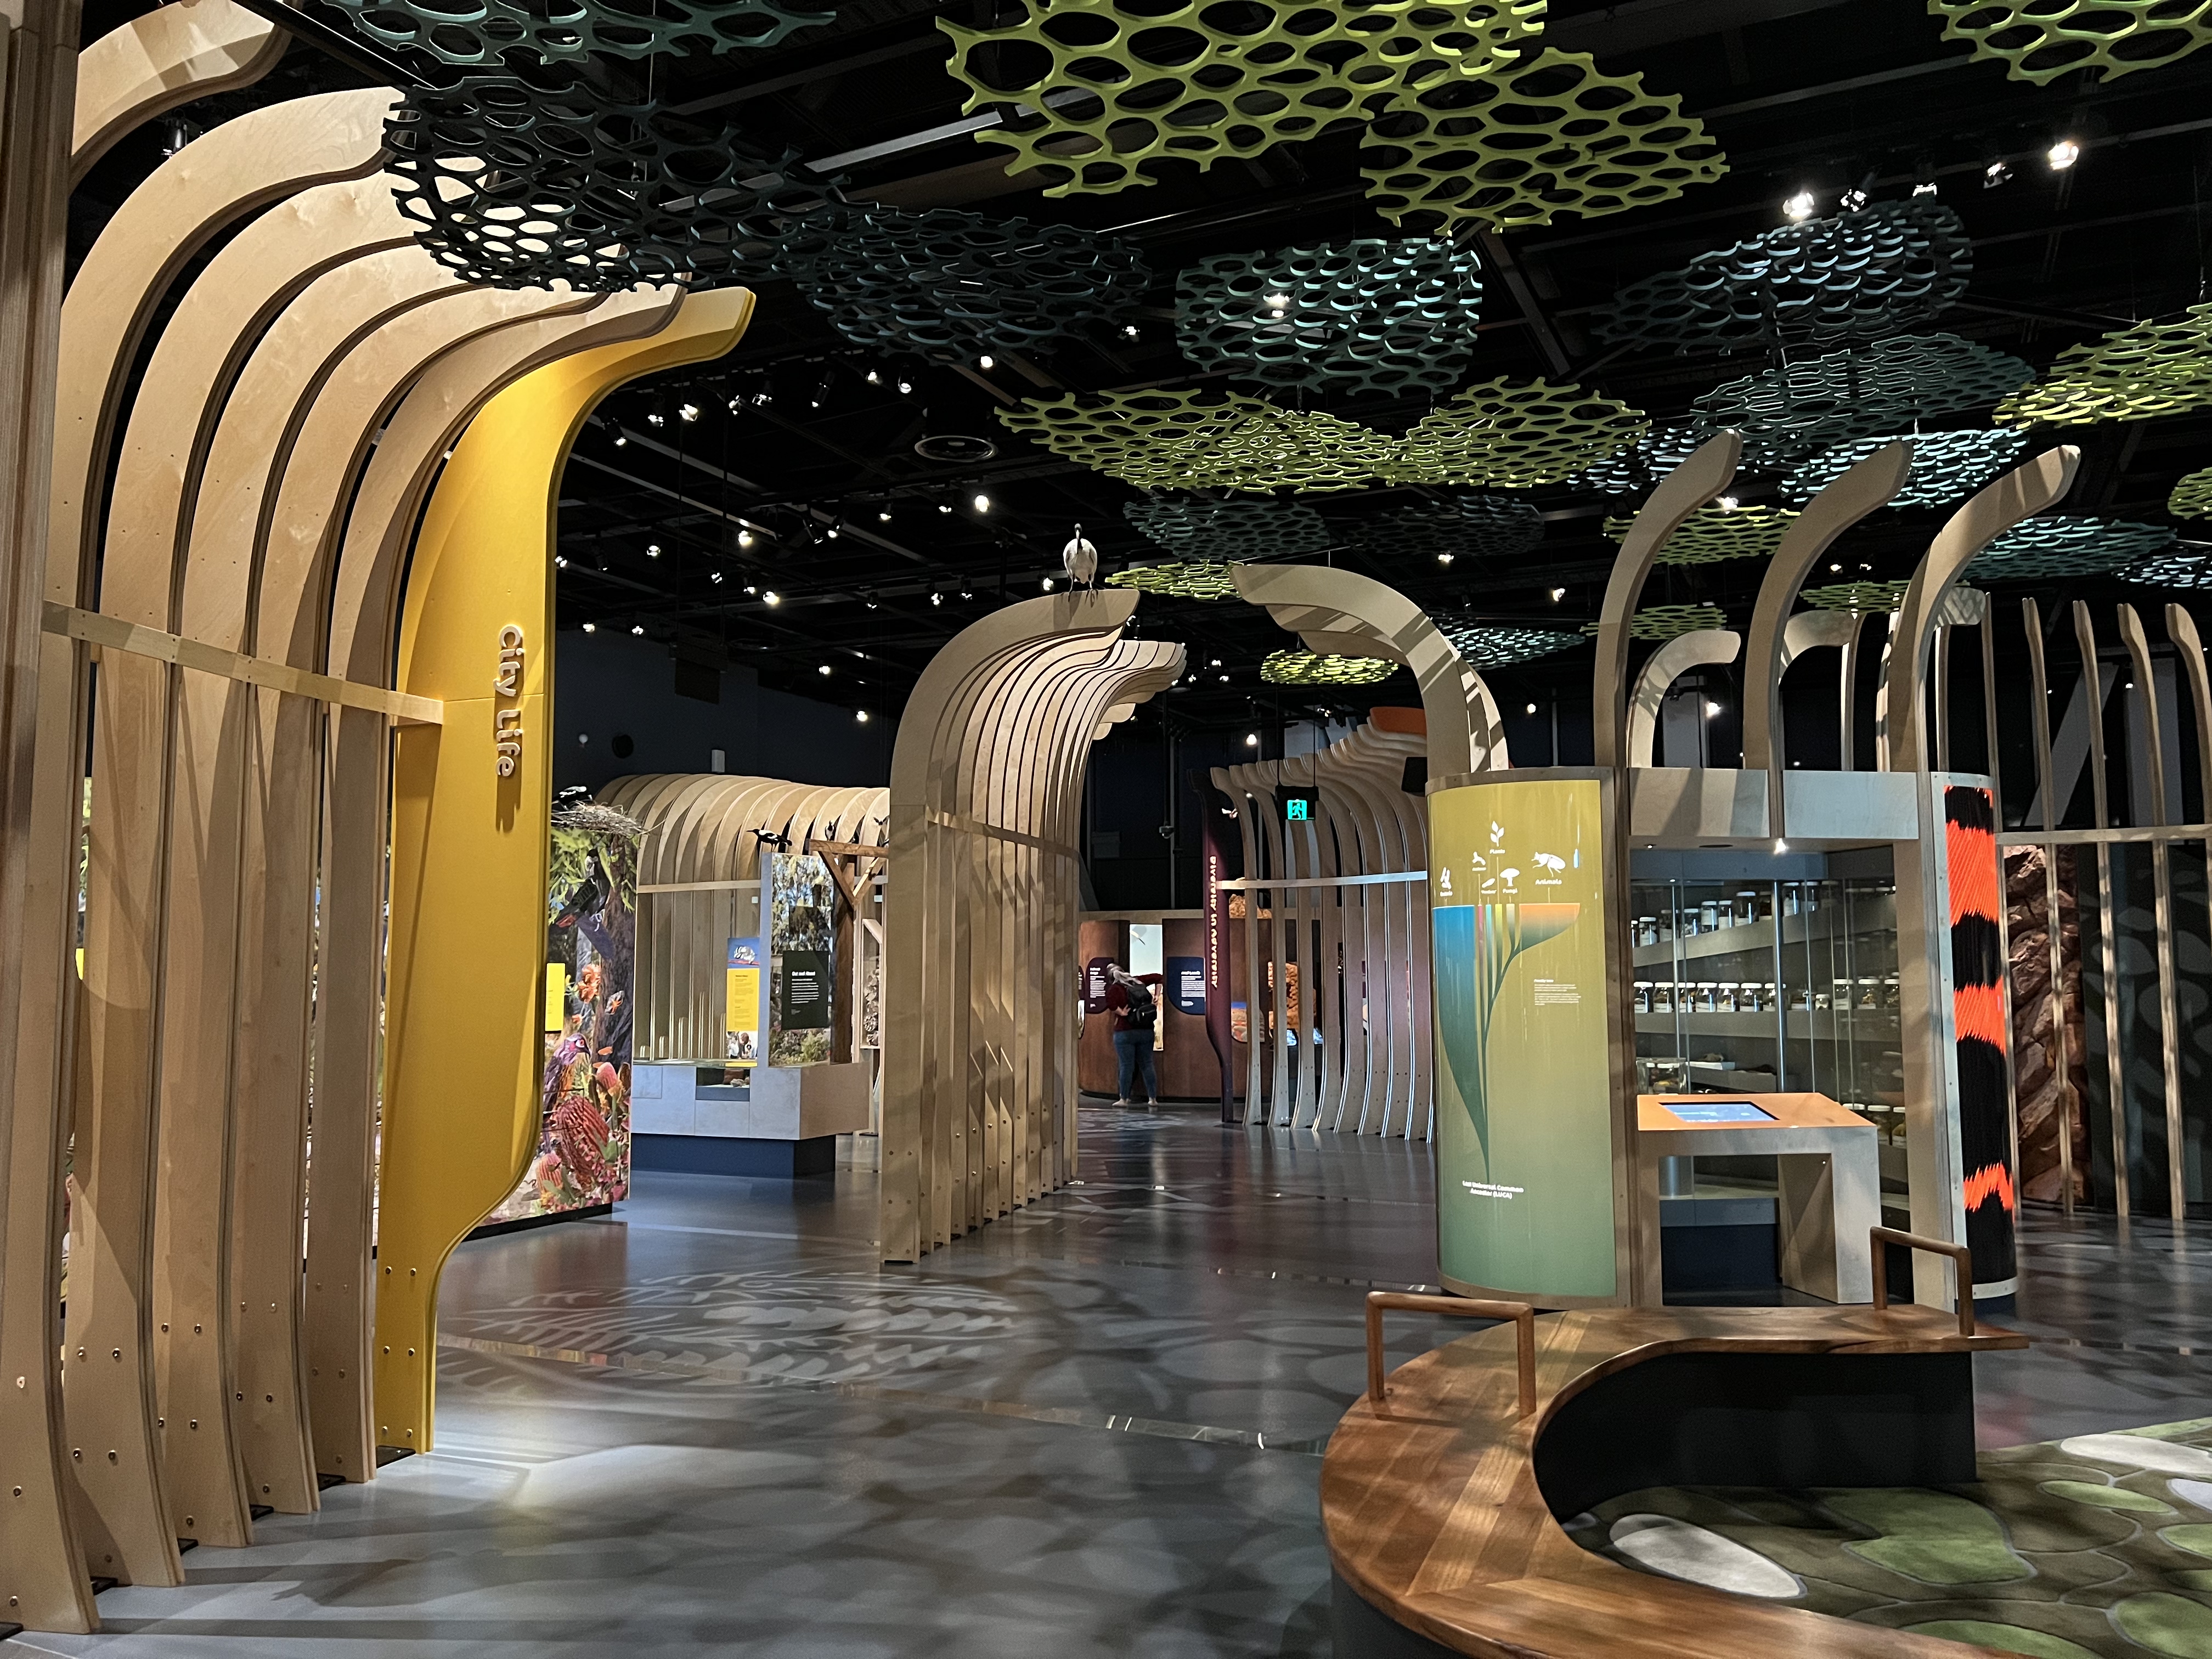
A few of my ‘Top 15’ dot points will be from this particular exhibition because there was very little, if anything, I didn’t like about the Wild Life exhibition space. You can tell that a lot of thought and care has gone into its design. The space truly feels as though you are walking through nature while setting the tone of exploration and discovery. I love how each group of wildlife has its own little space that feels nice and contained. This is achieved through the pillars of wood you can see in the photographs that corner off separate areas and guide you through. There is a clear meaning behind everything and that just makes the space so easy to engage with and navigate. In terms of display, below is a photograph of a group of mushrooms. Integrating these clear glass display boxes into the woodwork of the exhibition really elevates the display and makes the mushrooms quite interesting to view.

3. Level 3 – Wild Life – Touch the Numbat
I am going to include a lot of interactives in this list so here is the first. Right next to a taxidermied numbat there is a ‘touch the numbat model’ interactive. COVID-19 does still exist (as well as all the fun winter germs we’re getting) so please remember to wash your hands or sanitise after touching a shared item. Other than that, touch models are a fantastic addition for those wanting a multi-sensory experience. They can also add so much in terms of accessibility so they’re great to see.

4. Level 3 – Wild Life – Bat Portraits
I honestly could have stayed on Level 3 all day – and I haven’t even mentioned the dinosaurs yet. But up next we have some bat portraits displayed next to bat skulls. What I love about this display is how the Museum has tried to glamorize the bats by having their images in these beautiful frames (photograph below). In total there are six bats. Next to each one is a short bio and the skull of the relevant bat. I just thought it was a really interesting way to display an animal that might not have a lot of fans.

5. Level 3 – Wild Life – Megalodan Tooth
I don’t want to geek out too much but I have watched every shark week special on the Megalodon. Seeing a tooth from this giant shark was amazing and the Jaws-like replica also filled me with joy.


6. Level 3 – Wild Life – Titanosauriform
Dominating the space of Wild Life is the Titanosauriform model that is true to size. This, accompanied by a wall of dinosaur footprints, ticked all the boxes I had for a cool dinosaur exhibition. Who doesn’t love seeing dinosaurs in a museum? If you said me, I don’t love seeing dinosaurs in a museum, then just go to your nearest museum with dinosaurs and think about what you said.

7. Level 3 – Wild Life – Taxonomists at Work
Nothing makes me feel more at home than seeing a wet specimen collection. Great interactive here teaching visitors all about how wet specimen collections are used and preserved. Then, behind the glass, are containers filled with all types of creatures and shells. The Museum has combined some open storage with educating visitors about this niche area.

8. Level 2 – Origins – Microplastics
We are finally moving away from Level 3 down to the exhibition Origins on Level 2. Again, there is a lot to love about the layout and how seamlessly it feels to be guided around. The first highlight object for me in this exhibition is a tube filled with microplastics. Museums are not neutral and I appreciated seeing the Museum displaying the environmental impact of humans in a small but powerful way. It is next to all these incredibly ancient asteroids so really stands out as something to wander over and see.

9. Level 2 – Origins – Born of the Stars
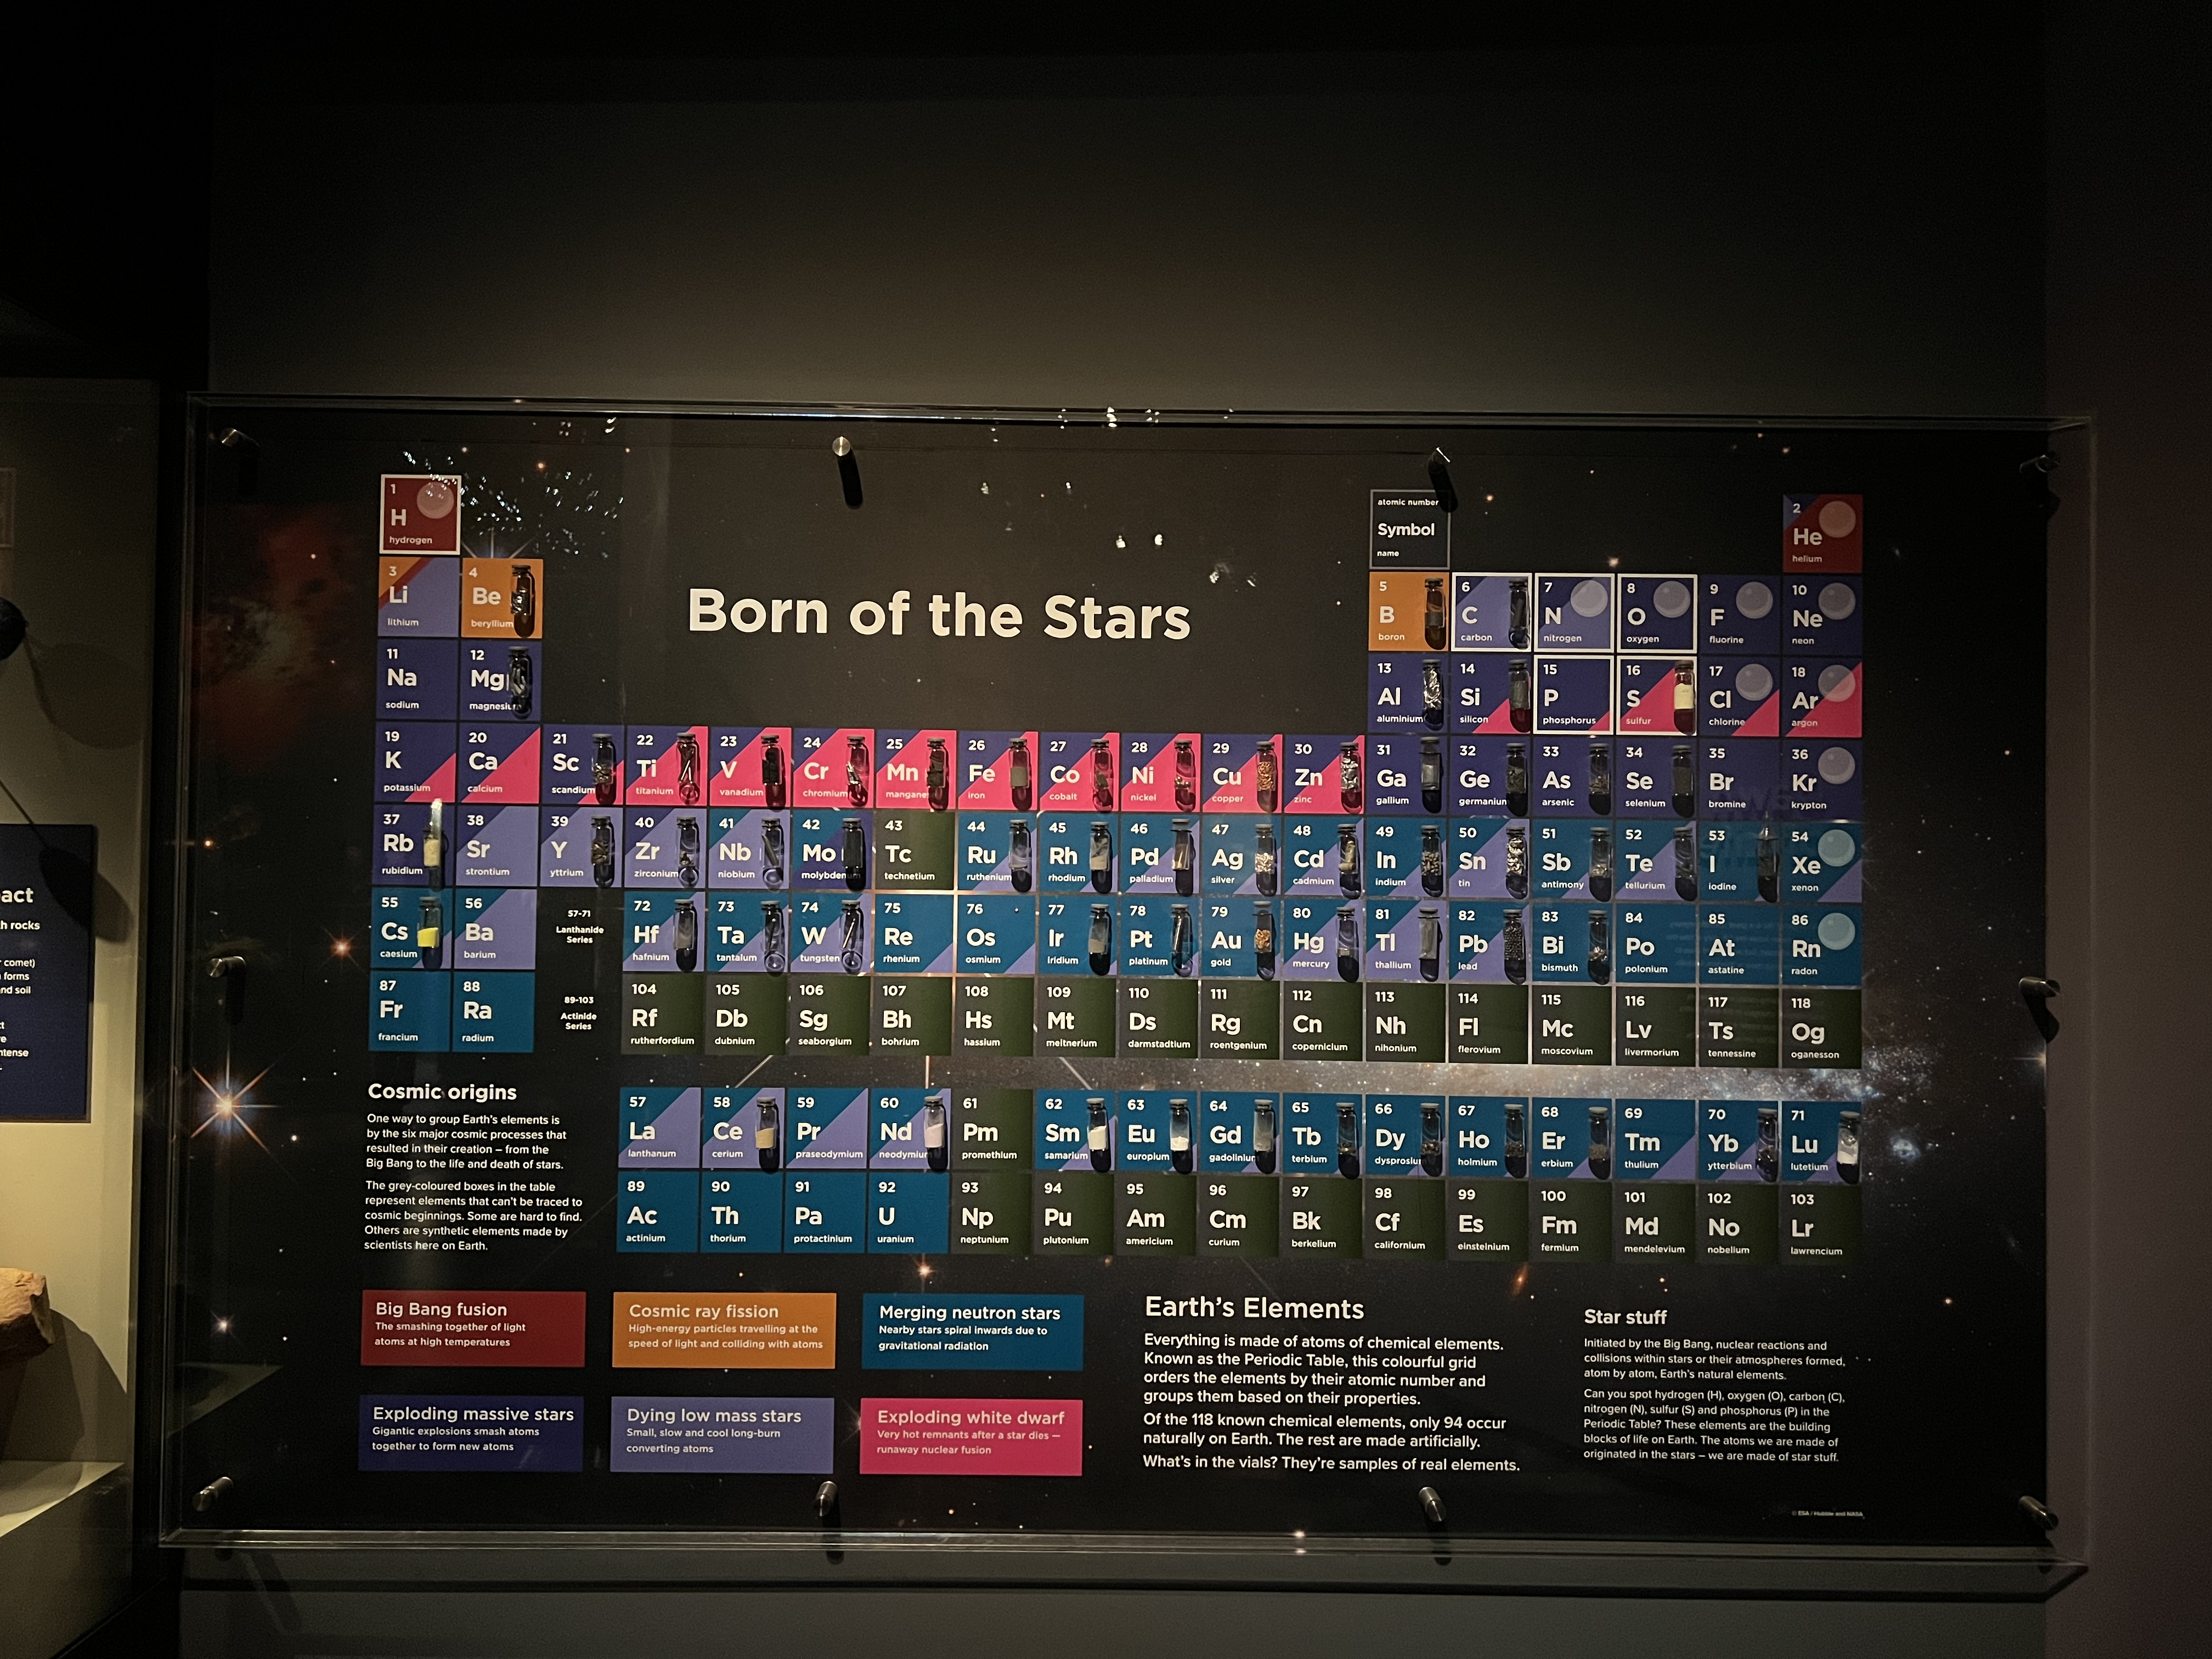
Around the corner from the microplastics is a periodic table of elements. Not only does the table explain how the different elements are made, e.g. dying low mass stars and merging neutron stars, but it also has tiny bits of available elements on display. Really elevated the periodic table from didactic to exploratory.
10. Level 2 – Origins – Minerals Room
We are halfway through the list and I wanted to include this because it is aesthetically beautiful. The entrance to the minerals area has this gem-shaped walkway with close-up colourful images of minerals on the walls. Another design decision that really elevates the exhibition space!

11. Level 1 – Reflections – Recipe Books
Down now to Level 1 which has the exhibition Reflections. This exhibition is all about how different groups and identities have shaped Western Australia. Part of this story includes the sharing of food and traditions surrounding food. I thought it was a brilliant idea to have some cookbooks on display for people to actually borrow while they’re in the space and read. A mix of cuisines and a mix of old and new.

12. Level 1 – Reflections – Barcode Scanner Interactive
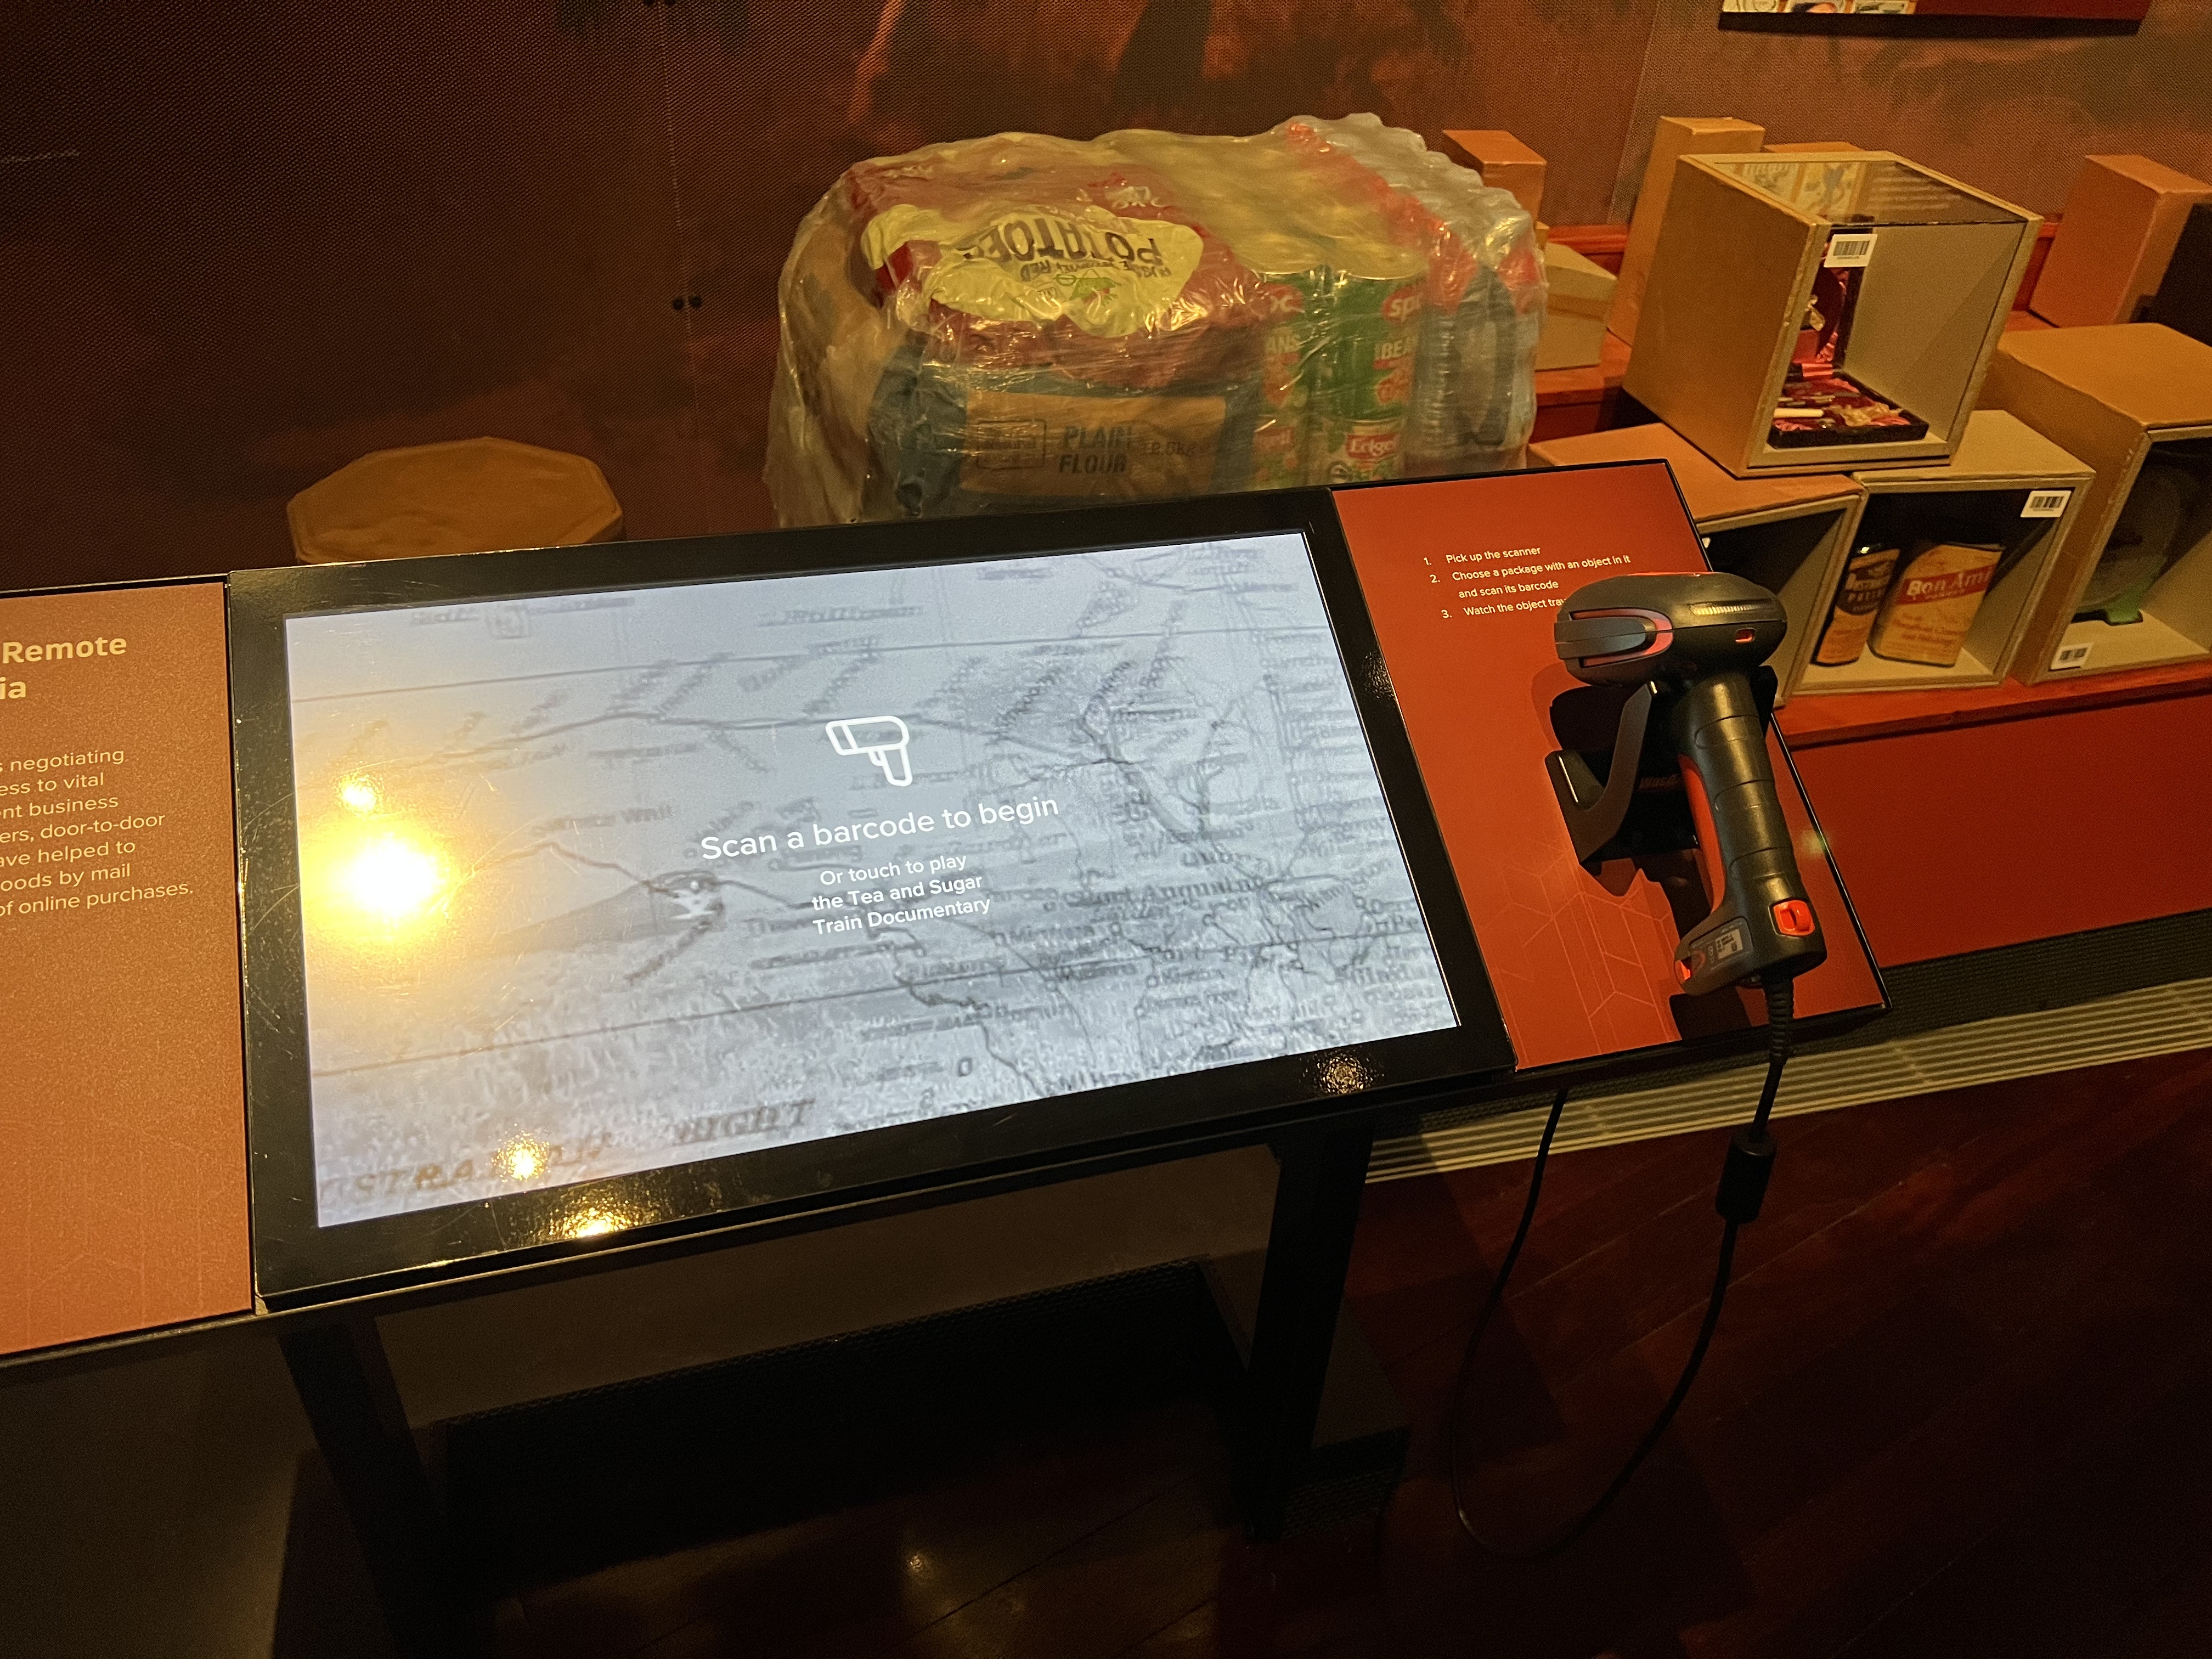
I think this will be the last interactive I discuss but I really enjoyed playing with this one. On display are a few different food items that each have a barcode. By scanning the barcode, you are bringing the story of that particular food or ingredient to life on the interactive screen. Something so simple yet much more interactive than just touching a screen for more information.
13. Level 1 – Reflections – Health & Medicine
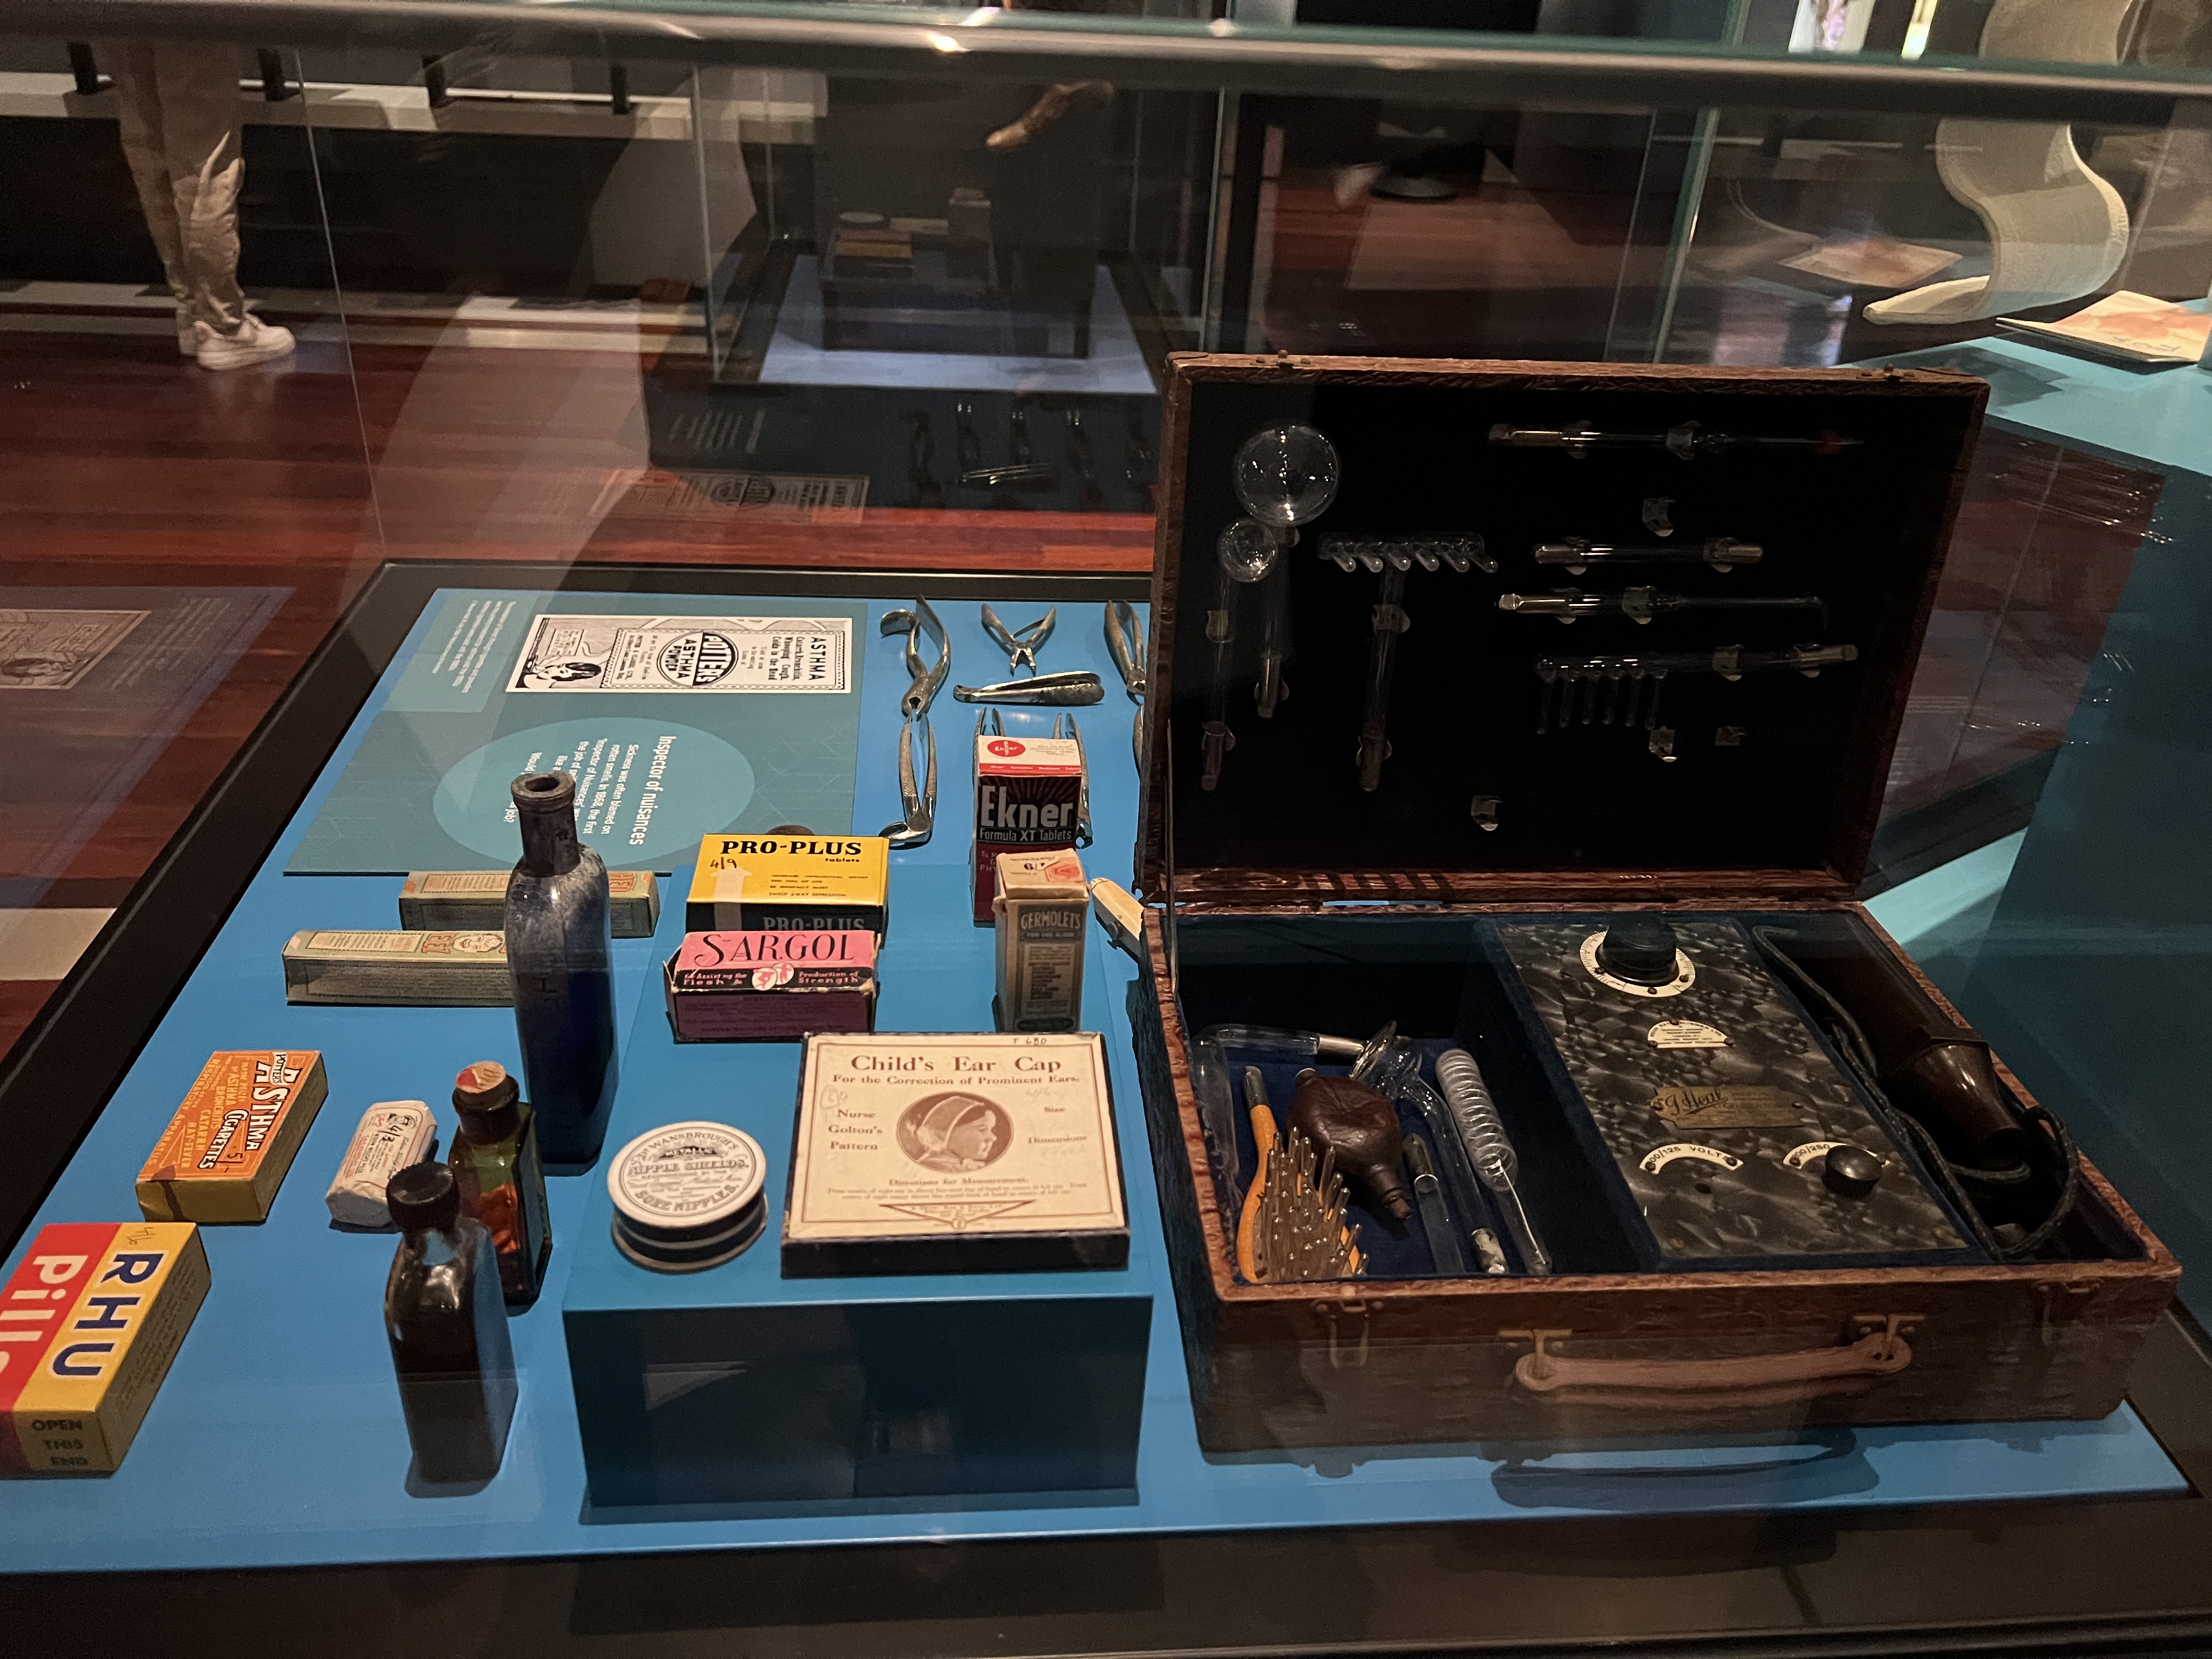
Something truly terrifying to see – a neon slimmer kit that promised to do everything from increase hair growth to remove hemorrhoids. After a few lawsuits in America, the machine was discontinued. Absolutely for the best.
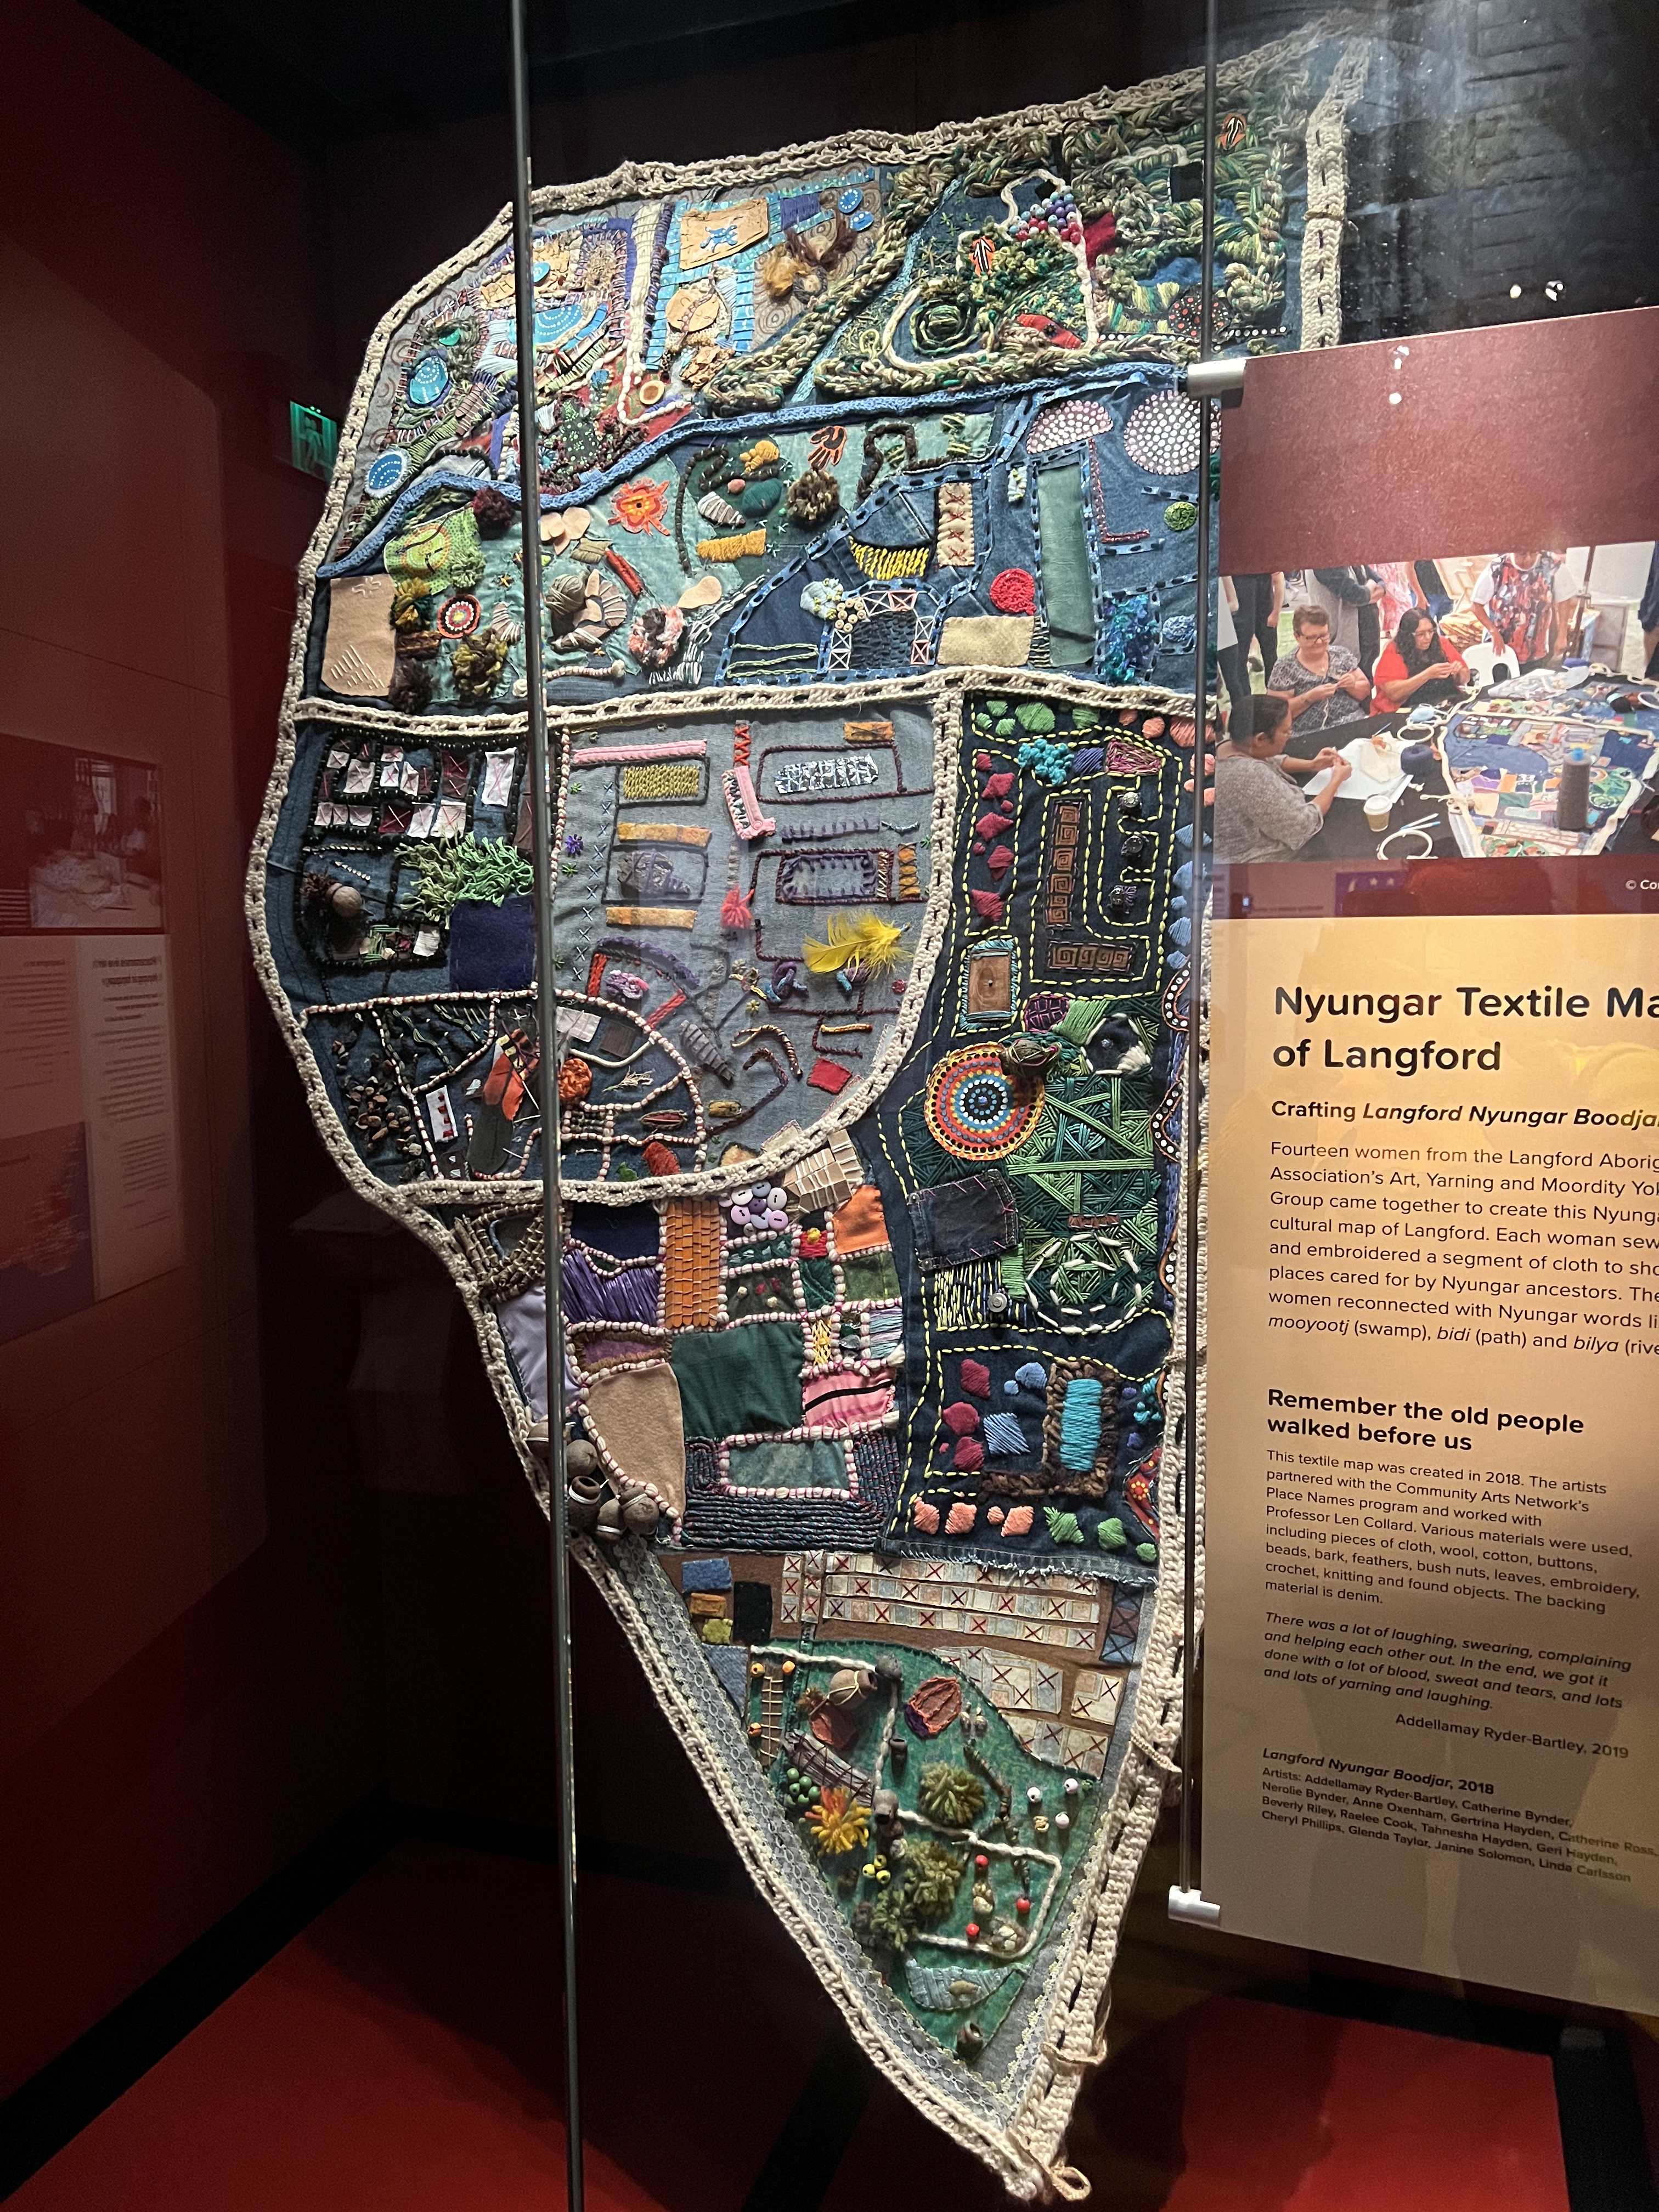
14. Ground Level – Ngalang Koort Boodja Wirn (Our Heart, Country, Spirit) – Textile Map
I am skipping the Mezzanine Level and heading straight to the Ground Level. Before discussing this specific object, I will say that the integration of Indigenous knowledge is evident in almost every exhibition space I visited. Yes, there is a separate exhibition displaying the stories and objects of Aboriginal and Torres Strait Islander peoples of Western Australia. However, this is not confined to this space and actually runs throughout the whole museum. This textile map was created by fourteen women from the Langford Aboriginal Association’s Art, Yarning and Moordity Yoka Group in 2018. It is a Nyungar cultural map of Langford with each segment of cloth there to represent places cared for by their ancestors. It is such a wonderful object on display and you can truly feel the amount of care and love that went into its creation.
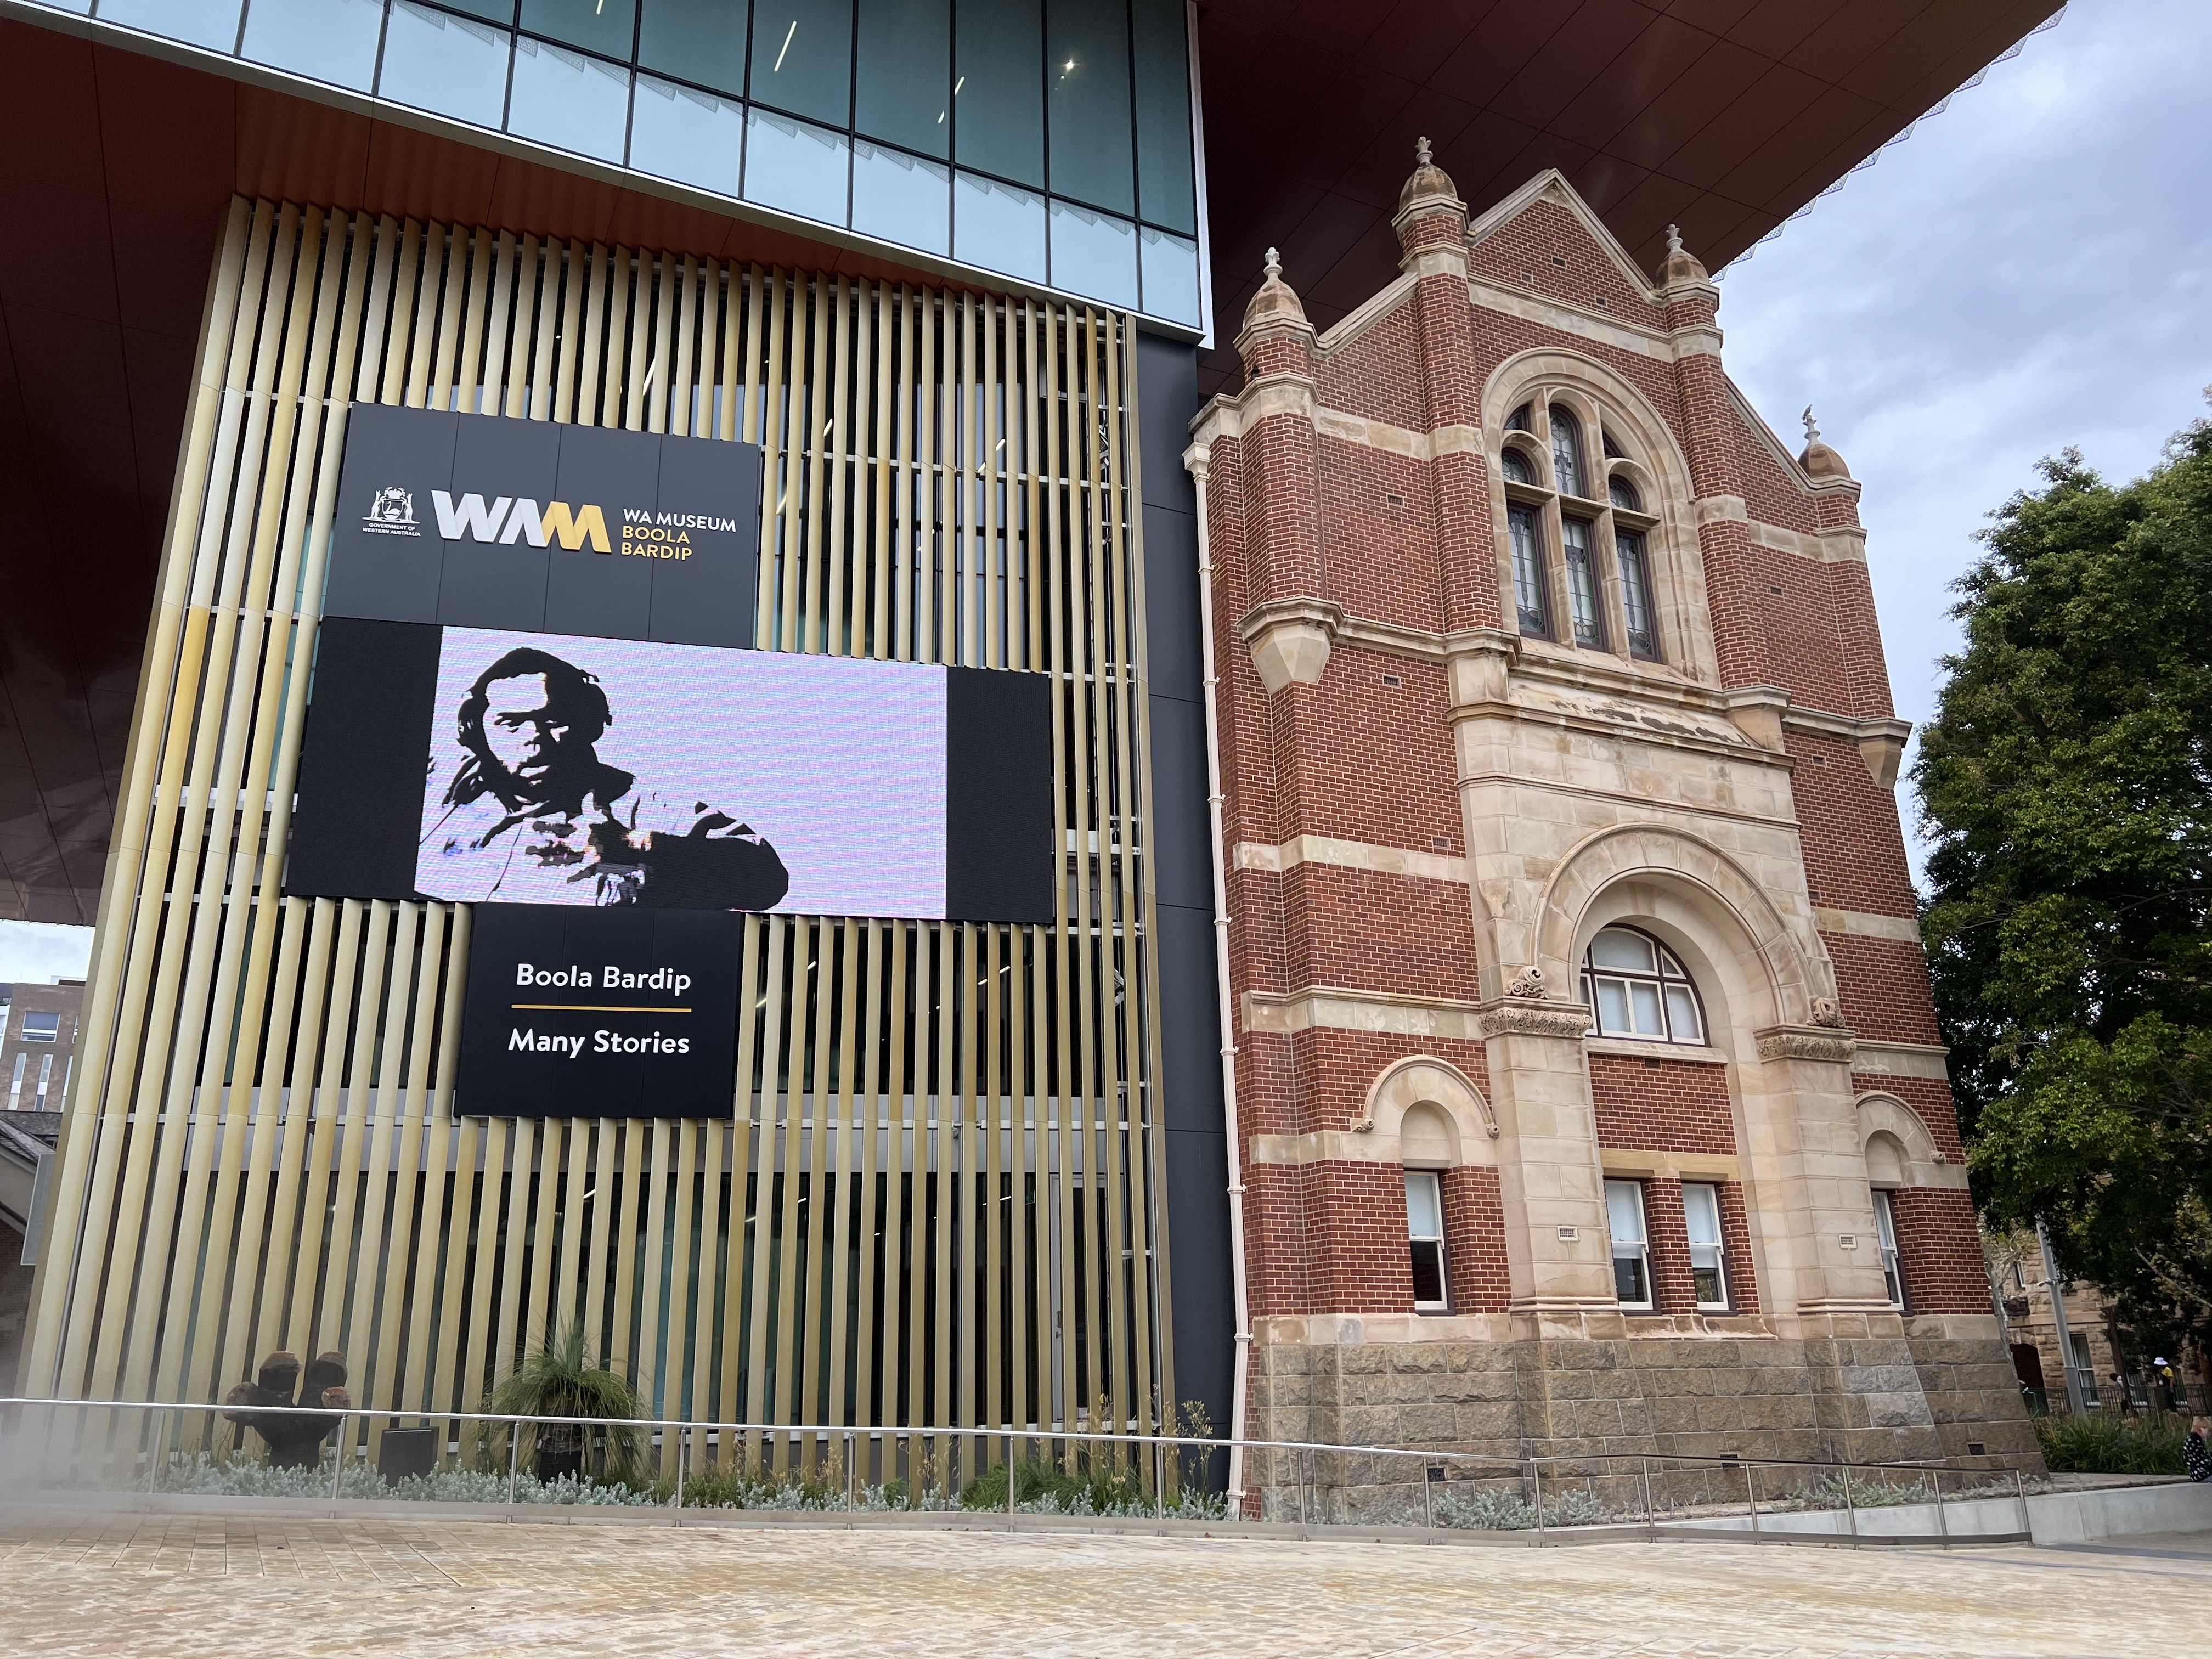
15. Blending Old and New and the Gift Shop
I didn’t want the gift shop to have its own number even though it is a really solid gift shop. I picked up a few things that I can’t wait to unwrap when I get home. So, included in this point is also the blending of old and new buildings. An amazing four heritage buildings have been restored and are included in the grounds of the Museum. These are the Old Gaol, Jubilee Building, original Art Gallery, and Hackett Hall. All except the last were built in the 19th century. How they are integrated with the new museum building is so wonderful to see and I’m glad this heritage has been saved!

Visitor Information
I hope I have inspired you to visit the WA Museum Boola Bardip one day! It is within walking distance of the CBD and right next to Perth Central Train Station. Entrance is free and it is open daily between 9.30am and 5pm. The entire Museum is accessible.

Leave a comment